- Squirrel away more cash for BOBs and vehicle kits.
- Buy a couple of cases of toilet paper. I estimate we need about 8 cases or so to have a year's supply, so this will get us a little closer to my goal.
- Add some more matches to my supply.
- Buy some air-tight containers for my pantry to hold what I take from my bulk food storage (ie. flour, sugar, dry beans).
- Continue to build our three month and long-term supplies of food.
- Exercise at least three times per week.
Thursday, September 30, 2010
Month Five Preps
This is what I've lined up for October:
Wednesday, September 29, 2010
A Generation of Nincompoops Meets the GPS
 |
| The Harried Homemaker et al. hit the road! |
As I have noted before, Hubby Dear is more or less anti-prepping, though he has come to tolerate it as time goes by. He may be against preparedness, but he is firmly for technology. He's into gadgets like I'm into bulk supplies of hard winter wheat. It's remarkable we're as happily married as we are.
On this vacation, Hubby Dear decided to utilize the GPS on his Droid which, for the technophobes in the audience, is a "smartphone". He used the voice search function, selected our destination with a simple touch of the screen, and loaded the instructions. I should mention that we're well-acquainted with the particular metropolis we were visiting. But Hubby Dear loves his gadgets and enjoys watching the GPS work its magic. He practically rubbed his hands with glee.
 |
| Hubby Dear's true love, the GPS on his Droid |
"Honey, you know we should really look up the directions before we go," I said before we left the Harried Homemaker Acres. After all, we were visiting a couple of attractions that were new to us.
"Why bother? We have the GPS," he answered blithely.
To cut a long story short, the GPS would have led us astray twice if we didn't already have first hand knowledge of the area. One of those miscues would have been very unfortunate and we would have likely never found our destination.
The irony in this is that I had just finished reading an article from the AP entitled "Are we raising a generation of nincompoops?". You can read the article here, but the main idea is that kids today are so used to technology that they can't do simple tasks like use a manual can opener. Back in my public school teacher days, I was always surprised at how difficult my high school students found reading maps. What do they teach kids these days? Apparently not map skills. Why bother? You have the GPS!
Technology is great. I may not be as into gadgets and gizmos as Hubby Dear, but I do enjoy sitting in my air-conditioned house, sipping an ice-cold Coke Zero and munching a cookie baked in one of my dual electric ovens. I also like writing this blog on my computer while listening to music on my iPod. The problem is that we have chosen to cripple ourselves by an over-dependence on technology. If that technology is all of a sudden gone, we could very likely find ourselves as lost as that GPS would have led us.
I don't know that TEOTWAWKI will ever happen in my lifetime. What I do know is that my family is very vulnerable should something of a SHTF nature occur. Do I have the knowledge, skills and means to keep us warm in the winter? How about feeding my children without easy access to a fully-stocked grocery store? Could we grow all we needed to eat and then preserve the surplus? What about medicine? Clothing? Everything else that is essential to life?
Heavy questions indeed.
Month Four in Review
- More $ for BOBs. Add $ to our vehicle kits. Status: Didn't do it. I spent my entire budget on numbers 2 and 3. I'll do this in Month Five.
- The items I postponed buying from Month Three: butane refills for my Zippo lighter, the remainder of the items for my van's vehicle kit. Status: Complete.
- Buckets, mylar bags, oxygen absorbers, etc. so that I can package bulk amounts of flour, beans and rice. Status: Yep, did this, too.
- Exercise at least 3 times per week. Status: I started off strong, but as the month went on it slowly started to peter out. I tend to be an all or nothing kind of gal, so my instinct is to give up completely. I'm going to keep at it and remember that something is better than nothing.
Thursday, September 23, 2010
Bug Out Bags to the Rescue in an Everyday Emergency
Baby Dear woke up at a quarter to 5 this morning. My eyelids behaved like they were fused together, but I managed to lumber out of bed, pad over to his crib, and take him to the living room. I didn't fancy having all the children awake that early, so I tried to be as stealthy as possible. We sank down into my favorite chair, I popped a bottle in his mouth and turned on the morning news.

Gag.
I tried googling the lot numbers of recalled formula. All sites, including the FDA's, directed me to the Similac webpage. The Similac page wouldn't load, presumably overwhelmed by worried parents. Next, I tried calling their consumer hotline. There was a recorded message directing me to their non-functional website and then it hung up on me.
It appeared that I could possibly have several cans of the recalled formula, but I didn't panic. Thanks to our BOBs, Baby Dear did not have to go hungry or eat beetle larva. I had packed 3 days worth of Ready to Feed formula, which was not in the recall. This will give us time to sort out what's really going on.
 (Yes, I'm well aware that if I was nursing Baby Dear, this would not be a problem at all. No one has recalled a breast before, unless you count defective implants! Breastfeeding is best choice from both the nutritional and preparedness standpoints. Unfortunately, that didn't work out for me this time around.)
 Prepping is essential for the big emergencies, but it is also important for those that can happen every day. Score one for this prepared momma!
Tuesday, September 21, 2010
The Long Winter

The Thinker is in the middle of The Long Winter and I have been looking forward to discussing this book with her ever since I got into prepping.
For those of you who may not have read the "Little House" series, shame on you! Get thee to a library and check them out. In the meantime, here is a quick summary of The Long Winter,which is a mostly factual account of a real event:
The people of the tiny town of De Smet, South Dakota nearly starve to death during the "Long Winter" of 1880-1881. A cheerful topic for a children's book, eh? Back to back blizzards mean the trains cannot run, stranding the townspeople for months without food and fuel. Laura's family heats their home by burning hay and survive on plain brown bread made from wheat laboriously ground in a coffee mill.
There are so many lessons and modern day parallels in this book that I'm not going to attempt to detail them all. These are simply the first ones that struck me.
Provisioning:
The endless cycle of blizzard after blizzard meant that the stock in the grocery stores was depleted rapidly. Folks nearly starved, avoiding this only because of the bravery of two men who managed to find some wheat for the townspeople. It was months and months before a train could finally make it through.
I've heard it said that the average grocery store in America only has enough stock on hand for about 3 days. If there's ever a disaster that disrupts the food supply, a critical situation will assuredly develop. You need to have food storage and be prepared to feed your family for a length of time.
Ingenuity:
The Ingalls family would have frozen to death except Pa Ingalls had the foresight to harvest a huge amount of hay the previous summer. Normally, hay burns up very quickly, but Pa figured out a way to twist the hay into sticks to extend their burning time.
You need to be able to think outside the box and be creative enough to find solutions in a crisis. To be able to do this, you need to have your head on straight, which leads me to my third point.
Mental state:
"It can't beat us!" Pa said.
"Can't it, Pa?" Laura asked stupidly.
"No," said Pa. "It's got to quit sometime and we don't. It can't lick us. We won't give up."
Then Laura felt a warmth inside her. It was very small but it was strong. It was steady, like
a tiny light in the dark, and it burned very low but no winds could make it flicker because it
would not give up.
-From the chapter entitled "It Can't Beat Us", The Long Winter
The difference between a victim and a survivor often is a matter of psychology. Your will to survive, the belief that you will make it through whatever trial besets you, and a faith in a higher power are key. You can have all the survival gear and gizmos on earth, but if your head isn't right, you'll never make it.
You need to believe you can survive in order to survive.
--------------
I've barely scratched the surface of this book. The Long Winter may have been written for children, but there is enough in this book to interest and educate any adult. Pick up a copy and draw your own conclusions.
Sunday, September 19, 2010
Using your Food Storage: No-Bake Cookies

My mother-in-law's recipe is the best I've ever tried. The one my Mom used while I was growing up tended to be finicky about weather and humidity. This one always turns out great regardless of the barometer. I like to use crunchy peanut butter instead of creamy for extra peanutty goodness.
No-Bake Cookies
2 c. sugar
1/4 c. cocoa
1/2 c. milk (or powdered milk, reconstituted according to directions)
1 stick butter (I keep pounds of butter in my freezer at all times.)
Mix together the above ingredients in a large saucepan and let come to a boil. Remove from heat and add:
1 t. vanilla
1/2 c. peanut butter
3 c. quick oatmeal (It's not very good with regular rolled oats.)
Stir together and drop on waxed paper in whatever size dollops you prefer. Allow to cool and then enjoy.
Friday, September 17, 2010
Month Four: Vehicle Kit, Part Deux
 |
| Hubby Dear's Mini-Vehicle Kit: Enough to get him home. |
I purchased the supplies for the van as part of my Month Four Preps and took advantage of a quiet evening to myself to put it all together and shoehorn it into place. I had to contort myself like I was playing a demented game of Twister, but I got it done. The workout I received from my efforts was an added bonus, I guess!
In various stashes throughout my van, I have:
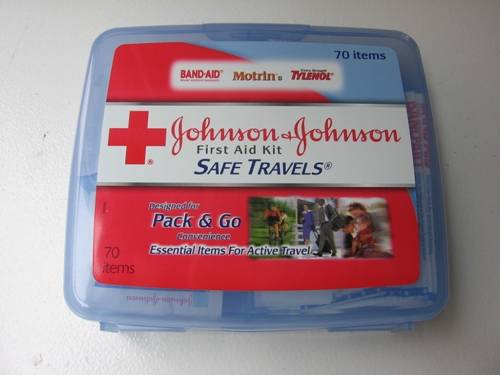
- First Aid kit, feminine hygiene items
- LED Headlamp
- Basic survival kit stuff - multitool, matches, whistle, etc.
- Empty water bottles
- Aqua Literz
- Ration bars
- Ponchos and emergency blankets for each family member
- Hand and Body Warmers
- Fleece blankets
- Toilet Paper
- Handcrank radio, flashlight and cell phone charger
- Road Atlas
- Duct Tape
- Roadside kit - jumper cables, tools, etc.
- Foldable shovel
 |
| So true, isn't it? |
I also made an inventory sheet to place in my glove box that lists all of my items and where they are located. I'm bound to forget where I put some of that stuff, especially if I'm under stress.
If you haven't seen it already, take a look at one of my favorite channels on YouTube, AnalyticalSurvival. He modified the trunk in his wife's car to hold an extremely complete vehicle kit. That won't work in my situation, but it may in yours. Plus, it's just cool!
If you are like I was and think you don't have room in your vehicle for some preps, take another look. You might appear as graceful as a hippo doing the cha-cha while you stash them away in every nook and cranny, but you'll be thankful in the long run that you have your preps in place.
Wednesday, September 15, 2010
Square Footin' it
It's September and most people are winding down their gardening year. Not so at the Harried Homemaker Acres. We're working our tails off getting our garden ready for next year.
First a little background. We have very unfortunate soil. Think about the most hard packed clay you can imagine - that's about what we have. We've lived here for three years and despite our efforts to improve the soil, we aren't making much progress.
Exhibit A:

That was our pitiful stand of corn in late June. It should have been taller, greener, and much more filled in by that point. All we seem to be able to grow is weeds!
We decided to experiment with a way to circumvent the soil and weed problem all together. We didn't abandon our traditional row garden completely this year but we decided to try out Square Foot Gardening.
First we made a 4' x 4' garden box.

It was constructed out of cedar 2x6s and wood lathe. The wood lathe grid is to divide the box into square feet. You can plant a certain number of plants per square foot, depending on the type of plant and its growing habit. Square Foot Gardening allows you to grow much more produce in a smaller area.
Then we had to mix the soil, which is a special preparation called "Mel's Mix", named after the originator of the Square Foot Gardening concept.

Mel's Mix consists of 1/3 peat moss, 1/3 compost, and 1/3 vermiculite. You'll notice that we have several types of compost materials. This is to insure that you have a wide variety of nutrients available to your plants. Ideally, you'd have 5 different types of compost if you aren't using your own. We could only find four types.
Then, you spread out some little weed cloth, put the box on top, and fill it with Mel's Mix. We decided to plant our Square Foot Garden with two varieties of green beans. We figured we would have to do better than the previous year. In 2009, we harvested exactly 3 green beans out of our two rows.
Yep, we did better this year.
Exhibit B:

This was taken at the same time as Exhibit A, several weeks before our bountiful green bean harvest. We actually had enough beans to eat fresh and can. And weeds? We pulled a total of 15 the entire season.
Right then and there we decided to completely redo our garden for next year. We spent Labor Day weekend creating this:

That is the equivalent of 19-4'x4' boxes. It takes up less than half the space of our previous garden and yet it should yield much more food. We need to make a ton of Mel's Mix to fill the boxes. Unfortunately you can't buy it premixed in bulk around here like you can in Utah. Everything is better in Utah! We intend to cover the weed cloth on the pathways with mulch or gravel. As you can tell, Hubby Dear and I have a lot of hard, dirty work ahead of us.
Next year we plan on doubling the size of our garden yet again.
If you're interested in growing lots of vegetables with less effort in little space, check out Mel Bartholomew's book, All New Square Foot Gardening.
Tuesday, September 14, 2010
Fall canning fun
Our family stopped by a local fruit farm last weekend and I bought a bushel of apples. I have been canning for three years, but up until now I've only used the produce from our garden or that of my parents.

Since this was my first time canning apples, I naturally thought I needed one of these:

A Food Mill. This makes perfectly smooth applesauce. I had been eyeing one of these for some time to use in canning tomato sauce.
I also wanted one of these apple peeler/slicer/corers.

Although I ordered both of these some time before our trip to the orchard, they have not arrived yet. Amazon's Super Saver shipping may be free, but quick it ain't.
What else was I to do but find recipes that did not require either of those two useful gizmos?
I broke out my favorite canning book, Blue Ribbon Preserves by Linda J. Amendt, and made a batch of Apple Preserves. Holy glycemic index, Batman! There are 5 cups of sugar in this recipe.

They are very tasty, though I would reduce the amount of nutmeg the next time I make it.
The other recipe I made was Chunky Family-Style Applesauce. Since you are aiming for a chunky texture, it doesn't matter if you lack a food mill.

When I tried it, it tasted like biting into a perfectly ripe, tart apple. Delish! I used fresh apple cider in both of these recipes which I think enhanced the end result.
I have 7 half-pints of Apple Preserves and 7 quarts and a pint of Chunky Applesauce to show for my efforts. I have enough apples left for one more batch of something. I'm thinking about making Apple Butter.
Wherever you live, I encourage you to preserve fall's bounty so that you can enjoy it this winter. I'm going to make another trip to the apple orchard soon, so I'm going to be busy for a while.
THE RECIPES
Apple Preserves
Makes about 6 half-pint jars (Emily's note: It made 7 for me.)
7 c. cored, peeled and sliced 1/4 inch thick tart apples
1 c. apple juice (I used cider.)
2 T. strained fresh lemon juice
1/2 t. unsalted butter
5 c. sugar
1-3 oz. pouch liquid pectin
1 t. nutmeg
1/4 t. ground cinnamon (I am going to add less nutmeg and more cinnamon next time.)
In an 8-qt pan, combine the apples, apple juice, lemon juice and butter. Over medium heat, bring the apple mixture to a boil. Reduce the heat and simmer, covered, until the apples are tender, about 8 to 10 minutes.
Remove the cover and add the sugar, 1 cup at a time, stirring gently between each addition. Heat, stirring constantly, until the sugar is completely dissolved. Increase the heat to medium-high and bring the mixture to a full rolling boil, stirring constantly. Stir in the entire contents of the pectin pouch. Return to a full rolling boil, stirring constantly. Boil, stirring constantly, 1 minute. Remove the pan from the heat. Skim off any foam. Gently stir in the spices.
To prevent floating fruit, allow the preserves to cool 5 minutes before filling jars. Gently stir the preserves to distribute the fruit then fill the jars, leaving 1/4" headspace. Process half-pints in a 200 degree water bath for 10 minutes, pint jars for 15 minutes.
Chunky Family-Style Applesauce
Makes about 4 pint jars or 2 quart jars (It made 2 quarts and nearly a pint for me.)
7 lb unblemished firm apples
2 c apple juice or water (I used cider.)
1 1/2 to 2 cups sugar
2 T strained fresh lemon juice
Core, peel, and chop the apples.
In an 8-qt pan, combine the apple juice or water and 1 c. of the sugar. Over medium-low heat, stirring constantly, heat the mixture until the sugar is completely dissolved. Add the apples.
Over medium-high heat, bring the fruit micture to a boil. Reduce the heat, cover and boil gently until the apples are soft and translucent, about 20 minutes. Stir occasionally to prevent sticking. Remove the pan from the heat.
Using a potato masher or the back of a large spoon, gently crush the apples to the desired texture. Stir in the remaining sugar to taste and add the lemon juice.
Over medium-low heat, stirring constantly, heat the mixture until the sugar is completely dissolved. Increase the heat to medium and bring the mixture to a boil. Reduce the heat and simmer, stirring frequently, until the sauce thickens, about 10 minutes. Remove the pan from the heat.
Ladle the sauce into hot jars, filling the jars about 1/3 full. Using a plastic spoon, press out any trapped air bubbles. Fill jars 2/3 full and repeat. Fill the jars, leaving about 1/2 inch headspace. Using a plastic knife or bubble freer, remove any remaining trapped air bubbles. Process both pint and quart jars in a 200 degree water bath for 20 minutes.
Sunday, September 12, 2010
Does Amelia Bedelia work at Emergency Essentials?
I drove Hubby Dear's vehicle when I went shopping this week. As I was loading my groceries into the vehicle, I noticed this inside his car kit:

This Aqua Literz had somehow leaked out all of its water, drenching the contents of the car kit. A couple of items were ruined, but for the most part everything survived. The strange thing was that the container wasn't opened and hadn't been ripped, torn, shredded or otherwise mutilated.
I had just received a large supply of Aqua Literz to put in my vehicle and I wanted to make sure that that the same thing wouldn't happen again. So I shot off an email to Emergency Essentials:
"I purchased one of your Aqua Literz for my husband's vehicle kit in May. I stored it in a plastic container along with the other items of the kit. I was dismayed to open up the kit yesterday and find that the Aqua Literz had exploded and ruined a couple of the items in the kit.
Are Aqua Literz and Aqua Blox truly OK for car kits as advertised?"
"Thanks for your email. I am so sorry to hear of any damages or complications. I have never heard of the Aqua Blox or Literz exploding. They only contain water which is not combustible. In our experience, the only way they would break, leak or damage is if they are not secured in the trunk of the car and thus thrown around until they are damaged. Sincerely, Scotty"
This cracked me up. "Scotty" is either extremely literal or has a wicked sense of humor. In fact it reminded me of something Amelia Bedelia would write.
Instead of describing the Aqua Literz as exploding, I guess should have said, "oozed out its contents in a manner that cannot be determined". I probably also should have mentioned that the Aqua Literz had been very carefully packed in a hard plastic container. Oh well.
There are two lessons to be learned from this episode:
2. Check your inventory periodically to make sure it is in good condition and ready
to go. I'd rather find out about this problem now rather than when Hubby Dear
needs to use his car kit.

I had just received a large supply of Aqua Literz to put in my vehicle and I wanted to make sure that that the same thing wouldn't happen again. So I shot off an email to Emergency Essentials:
"I purchased one of your Aqua Literz for my husband's vehicle kit in May. I stored it in a plastic container along with the other items of the kit. I was dismayed to open up the kit yesterday and find that the Aqua Literz had exploded and ruined a couple of the items in the kit.
Are Aqua Literz and Aqua Blox truly OK for car kits as advertised?"
I received (promptly I might add) the following reply:
"Thanks for your email. I am so sorry to hear of any damages or complications. I have never heard of the Aqua Blox or Literz exploding. They only contain water which is not combustible. In our experience, the only way they would break, leak or damage is if they are not secured in the trunk of the car and thus thrown around until they are damaged. Sincerely, Scotty"
This cracked me up. "Scotty" is either extremely literal or has a wicked sense of humor. In fact it reminded me of something Amelia Bedelia would write.
Instead of describing the Aqua Literz as exploding, I guess should have said, "oozed out its contents in a manner that cannot be determined". I probably also should have mentioned that the Aqua Literz had been very carefully packed in a hard plastic container. Oh well.
There are two lessons to be learned from this episode:
- Be very careful and specific with your word choice!
2. Check your inventory periodically to make sure it is in good condition and ready
to go. I'd rather find out about this problem now rather than when Hubby Dear
needs to use his car kit.
Friday, September 10, 2010
Month Four Preps: Butane in my veins
I like to write posts named after lyrics from songs from my youth. I probably should have called it "Come on Baby, Light My Fire", but that would be from my parents' youth. We'll stick with the 90s today.
---------------
Without electricity, how am I going to cook any of this food I am so frantically storing?
 Around here it is de rigueur to have at least a 500 gallon propane tank on your property. Ours runs our furnace and gas cooktop. Depending on the season and the weather conditions, a full tank will last us between 2 and 6 months. We are members of a fuel co-op and have regular deliveries to keep our tank topped off. We also buy our winter fuel ahead of time, locking the price of propane in place and paying for everything in advance. If Hubby Dear should lose his job, that's one bill we wouldn't have to worry about for a few months.
The only problem with this set up is that the starter-spark thingy that lights the gas in both appliances is electric. The furnace also uses electricity to run its fans. I can't do much about that until we get a generator, but we can easily use our stove even in an emergency with aid of a handy-dandy butane lighter.

 I bought four extra cans of butane this month. I'll get more butane as well as additional MPLs later on.
The third item I'm planning on buying for potential fire starting needs is a firesteel. I first saw one of these demonstrated on The Discovery Channel's "Dual Survival" (Here's a link that describes all the methods they used to start a fire on that show). You rub small metal striker perpendicularly down the steel. It produces a very hot spark that will light the gas on my stove or the tinder I gather for a fire outdoors.

At some point, we're going to have to consider getting a wood stove and/or a generator for backup power. For now, though, we can be sure of a hot, home cooked meal whether or not the power is on.
---------------
Without electricity, how am I going to cook any of this food I am so frantically storing?
 Around here it is de rigueur to have at least a 500 gallon propane tank on your property. Ours runs our furnace and gas cooktop. Depending on the season and the weather conditions, a full tank will last us between 2 and 6 months. We are members of a fuel co-op and have regular deliveries to keep our tank topped off. We also buy our winter fuel ahead of time, locking the price of propane in place and paying for everything in advance. If Hubby Dear should lose his job, that's one bill we wouldn't have to worry about for a few months.
 The only problem with this set up is that the starter-spark thingy that lights the gas in both appliances is electric. The furnace also uses electricity to run its fans. I can't do much about that until we get a generator, but we can easily use our stove even in an emergency with aid of a handy-dandy butane lighter.

I love this Zippo MPL. It is very easy to use and is refillable. And did I mention it is pink? :)
I bought four extra cans of butane this month. I'll get more butane as well as additional MPLs later on. Of course there's always matches. You can never have too many of those. I have some in our kitchen and others in our BOBs. I'm going to stock up on more as part of Month Five of my Prepping Plan.
The third item I'm planning on buying for potential fire starting needs is a firesteel. I first saw one of these demonstrated on The Discovery Channel's "Dual Survival" (Here's a link that describes all the methods they used to start a fire on that show). You rub small metal striker perpendicularly down the steel. It produces a very hot spark that will light the gas on my stove or the tinder I gather for a fire outdoors.
Speaking of tinder, I've started collecting dryer lint. Finally, a use for dryer lint! I'm filling small ziplock bags with it and putting it in our BOBs. If we do have to bug out and make a fire, having dry tinder at the ready will be vital.
If the electricity goes off, my electric oven won't work. There are a few options for baking food without electricity:
- A solar oven, either homemade or store-bought. That method will only work if it is sunny.
- A homemade box oven.
- Baking on the dashboard of my van on a hot day. For real.
Thursday, September 9, 2010
Month Four Preps: Long Term Storage
 For our food storage this month, I decided to stock up on some of the most important things a prepper can store - staples. No, not the kind you use to attach paper together, but staples of your diet. My part of the country doesn't have places where you can buy bulk wheat or other such items, but I do have Sam's Club available to me. They stock a few items that I can package myself and thereby save some money.
 I grabbed a flat-bed cart at the front of the store and awkwardly wheeled it over to the aisle with dry goods. I kid you not when I say that I nearly took out the jewelry counter with that runaway flat-bed. Next time I think I'll stick to a regular shopping cart. I loaded up with 50 lb pinto beans, 100 lb rice and 50 lb all-purpose flour.
 You would think that you could avoid scrutiny when you buy items in bulk at Sam's, but I attracted several curious glances as I pushed my load up to the checkout counter. One lady asked me what I was going to make with all of this. Then the checkout girl asked Hubby Dear if all those kids were his. Not ours, his. Some people just don't have any home training! But at least I neatly avoided answering the first lady's question.
 Anyway, back to the point. I bought a bunch of real-deal survival food and Hubby Dear and I spent last evening packing it for long-term storage.
There are two main ways to store basics like these for long-term storage.
1) #10 cans - Rodent and bug proof! As long as you keep them from rusting, they have awesome longevity. If you have access to an LDS cannery, you can put up beans, rice, wheat, etc. in these cans. The other option is to buy them from a food storage company. It's pretty pricey to get all of your food storage canned like that.
2) Food-grade plastic buckets and/or mylar bags and oxygen absorbers - Some people feel that a plastic bucket is enough to store hardy items like wheat and rice. Others use only the mylar bags for storage since the bag is actually much less permeable to oxygen than the bucket. Oxygen = spoiled food.

The amounts and types of oxygen absorbers to add are also a matter of debate. James Wesley, Rawles, author of How to Survive The End of the World As We Know It and survival guru, even goes so far as to advocate using buckets, bags, oxygen absorbers, a dessicant, AND dry ice. I have no doubt that food packaged that way would last for a long time.
 We took an approach somewhere in the middle. We obtained a bunch of 6-gallon food-grade plastic buckets and lined them with mylar bags. Then we filled each bucket to within 1" of the top. There was still plenty of bag leftover, which was a good thing.
It is essential that you move quickly during the next few steps. Once you open the package, your oxygen absorbers start working immediately. If you do not seal your bags stat, the absorbers can lose their mojo. I don't know much, but I do know that it's not good when O2 absorbers lose their mojo.
So, we quickly threw in the O2 absorbers

and sealed the bag up. It is helpful to have two people for this part.

You can use a fancy (and expensive!) sealer made for this purpose or just heat your iron to full blast. We placed Hubby Dear's metal level across the bucket, expressed as much air as possible from the bag, drew the sides of the bag up, and pulled it taut across the level.
I ironed the bag using the level as a stable surface to create a seal. Be careful! The mylar (and level) heats up quickly and stays surprisingly hot for a while afterwards.

Check the bag to make sure it sealed all the way across, push it down in the bucket, place your lid on and seal tight. Over the next 24 hours, the O2 absorbers will get to work and remove the remaining air from your bag.

So, now that I've gone to all of this trouble, how long will it last? The rice and beans could very well be good for 30 years if I keep them stored in a cool, dark place. The flour has a much shorter short shelf-life, but by packing it in mylar with oxygen absorbers, it should be good for at least two years.
Now these are some preps I can take pride in - we did it ourselves. And the Fed Ex man is pretty happy, too.
Sunday, September 5, 2010
Financial Preparedness, Part III

---------------
Budgeting. The dreaded "b word". Few words can cause simultaneous consternation and boredom like the word "budget" can.
Budgeting causes wailing and gnashing of teeth, but it's the only way you can take control of your money. And it's definitely the only way you're going to accomplish Baby Step One (saving $1,000) and Two (paying off your debt).
Hubby Dear, being the sexy geek that he is, put our finances into Quicken for years. He'd categorize all of our expenses and enjoyed shocking me with some of the facts of our excessive lifestyle.
"Hey honey, did you know that we've spent $2,500 on dining so far this year?", he'd say. My hair would stand on end, we'd promise to do better next month, and then promptly forget all about it.
Then I started listening to Dave Ramsey. We've been following a budget for 16 months now and seen the power of writing out a budget ahead of time and sticking to it. Budgeting has allowed us to make sure we have extra money each month that we can put towards savings or debt.
So how do you make a budget? It's one of those things that can be intimidating to approach, but it's not really that hard. Sit down with your honey and decide how much money you will spend on each category of life during the next month. Look back at what you have been spending, think of anything you can do to economize, and then write the resulting number down. Don't forget to keep some money in your budget for prepping. It's not officially part of the Dave Ramsey plan, but as I heard directly from the man himself, he's OK with that.
Here is a link to Dave's online budgeting forms:
http://www.daveramsey.com/tools/budget-forms/
This is a great place to start. Dave's book, The Total Money Makeover, also has a bunch of these forms and much more information on budgeting.
You might wonder what is a reasonable amount to be spending in each budget category. You can plug your monthly income into this calculator and get an idea of what your food allowance should look like, for example.
When Hubby Dear and I were first married, our goal was to spend about $75 dollars or less on food and toiletries per week. That was OK for a couple of childless twenty-somethings in the 90s, but that would definitely not work for us today! Sometimes people (usually men) think you can feed and clothe a family for pennies. If you can manage that, more power to you, but try to be reasonable in what you allow for each category in your budget.
The first month you try budgeting is going to be tough. You'll want to meet with your spouse frequently and review how things are going. It does get easier as you go along, I promise!
If you're not already budgeting, take the time to learn how. Then tighten up your spending and put your plan into action. It's the key to getting debt free and moving on down the road towards financial preparedness.
Coming Soon: Financial Preparedness, Part IV: I'm debt free, so now what?
Friday, September 3, 2010
Using Your Food Storage: Bierocks
I was making one of our family favorites for dinner tonight when inspiration struck. This delectable specialty of Chez Harried Homemaker could be easily turned into a food storage recipe. My family will definitely be down with this whole food storage business if it can include bierocks.
What is a bierock? Unless you are from my part of the country, chances are you have no clue. A bierock, pronounced "beer rock", is a specialty here on the Plains. It was brought over by German immigrants and basically consists of meat and cabbage wrapped in bread dough and baked. It is absolutely delicious and total comfort food. What better type of food to serve than comfort food when you need to use your food storage?
I have to admit that I didn't really use many food storage items when I cooked these today, but I'm sure that you could easily substitute them in this recipe with fabulous results. This is not a fussy recipe! Next time I make bierocks, I'll definitely give it a whirl.
 First you make the filling. You cook ground beef and onions together and then stir in some shredded cabbage. I'm a lazy bum and I actually used bagged coleslaw mix. I stirred in a couple of cups of the preshredded cabbage and carrots, let it wilt a bit, and then seasoned it with salt and pepper. Season it well! Add garlic powder or seasoning salt if that floats your boat. Then you set the mixture aside to cool in the fridge.
Then I made the bread dough. It is a simple yeast bread recipe. After an hour of rising time, it was doubled in size and ready for action. Now for the sort-of-but-not-really-tricky part: shaping the bierocks.

 Then you press two opposite corners of the square together like so.
 Then repeat with the other two corners.

 Repeat with all the remaining dough.
Bake for a mere 15 minutes and prepare for the lusciousness. The short baking time would be a boon if and when you need to conserve fuel.
 I like to eat my bierocks with nothing more than a dab of mustard. Hubby Dear grew up eating them with mustard, ketchup, and mozzarella cheese sprinkled on top. (That's probably because his mother doesn't season her filling very well and you need all that extra mumbo jumbo. But you didn't hear that from me.)
So how could you convert this to a food storage recipe?
Instead of chopped onion, use dehydrated chopped onion, rehydrated.
Instead of ground turkey or beef, use home canned ground beef, rehydrated freeze-dried beef crumbles or TVP.
Instead of milk, use dried Milk, reconstituted according to the package directions.
Instead of plain vegetable oil, use whatever you you have. I used the extra virgin olive oil that I store. You could also melt shortening to use in this recipe if that's what you have on hand.
Instead of fresh eggs, use dry powdered eggs, reconstituted.
Instead of bread flour, you could substitute all purpose flour. It will work OK, but will make the bread slightly less chewy. You could also add 1 t. of vital wheat gluten for every cup of all purpose flour. That would approximate bread flour. You probably could easily substitute freshly ground whole wheat flour for half of the regular flour without any issue.
Instead of finely shredded cabbage, use home grown cabbage from your verdant garden. :) OK, this is the tricky one. Lacking said verdant garden, you could try dehydrated or freeze-dried shredded potatoes, reconstituted mashed potatoes, or whatever canned vegetables you have on hand. I bet sauerkraut would work if that's something you have on hand. Use whatever you think would taste good with bread and beef.
Give bierocks a whirl!
Filling:
1/4 cup chopped onion
1/2 pound ground beef or turkey
2 cups finely shredded cabbage
1/2 teaspoon freshly ground black pepper
1/4 teaspoon salt
Dough:
1/4 cup sugar
1 package dry yeast (about 2 1/4 teaspoons)
1/2 cup warm water (100° to 110°)
1/2 cup milk
1/4 cup vegetable oil
3/4 teaspoon salt
2 large eggs, lightly beaten
4 cups bread flour, divided
To prepare filling, cook the onion and beef until meat is browned, stirring to crumble. Add cabbage; cook until cabbage wilts, stirring constantly. Stir in pepper and 1/4 teaspoon salt. Cover and chill.
To prepare dough, dissolve sugar and yeast in warm water in a large bowl; let stand 5 minutes. Stir in milk, oil, 3/4 teaspoon salt, and eggs. Add 3 1/2 cups flour to yeast mixture, and stir to form a soft dough. Turn dough out onto a lightly floured surface. Knead until smooth and elastic (about 8 minutes); add enough of the remaining flour, 1 tablespoon at a time, to prevent dough from sticking to hands (dough will feel tacky).
(I used my stand mixer with dough hook instead of doing this by hand.)
Place dough in a large bowl coated with cooking spray, turning to coat top. Cover and let rise in a warm place (85°), free from drafts, 1 hour or until doubled in size. Punch dough down; cover and let rest 5 minutes.
Divide dough in half. Roll each half into a 10 1/2 x 7-inch rectangle on a lightly floured surface. Cut each rectangle into 6 (3 1/2-inch) squares. Working with 1 portion at a time (cover remaining dough to keep from drying), spoon about 1/4 cup filling into center of each portion, and bring 2 opposite corners to center, pinching points to seal. Bring remaining 2 corners to center, pinching points to seal. Pinch 4 edges together to seal. Place the bierocks, seam sides down, on a large baking sheet covered with parchment paper. Cover and let rise for 20 minutes.
Preheat oven to 375°.
Uncover bierocks. Bake at 375° for 15 minutes or until bierocks are browned on the bottom and sound hollow when tapped. Remove bierocks from pan, and cool on wire racks. Yield: 12 servings (serving size: 1 bierock)
Note: To freeze, cool completely, and wrap individually in foil. Place wrapped bierocks in a heavy-duty zip-top plastic bag; freeze for up to 3 months. To reheat, thaw in the refrigerator. Place foil-wrapped bierocks in a preheated 350° oven for 15 minutes.
What is a bierock? Unless you are from my part of the country, chances are you have no clue. A bierock, pronounced "beer rock", is a specialty here on the Plains. It was brought over by German immigrants and basically consists of meat and cabbage wrapped in bread dough and baked. It is absolutely delicious and total comfort food. What better type of food to serve than comfort food when you need to use your food storage?
I have to admit that I didn't really use many food storage items when I cooked these today, but I'm sure that you could easily substitute them in this recipe with fabulous results. This is not a fussy recipe! Next time I make bierocks, I'll definitely give it a whirl.
 First you make the filling. You cook ground beef and onions together and then stir in some shredded cabbage. I'm a lazy bum and I actually used bagged coleslaw mix. I stirred in a couple of cups of the preshredded cabbage and carrots, let it wilt a bit, and then seasoned it with salt and pepper. Season it well! Add garlic powder or seasoning salt if that floats your boat. Then you set the mixture aside to cool in the fridge.
 Then I made the bread dough. It is a simple yeast bread recipe. After an hour of rising time, it was doubled in size and ready for action. Now for the sort-of-but-not-really-tricky part: shaping the bierocks.

I divided the dough in half and rolled each part thin-ish. I scored the dough with a knife to make portions that are approximately 3 inches square.
You put about 1/4 c. of the filling in the center of each dough square.


Seal all the edges carefully and PRESTO! You've made a bierock! Place your bierock (seam side down) on a greased baking sheet.


So how could you convert this to a food storage recipe?
Instead of chopped onion, use dehydrated chopped onion, rehydrated.
Instead of ground turkey or beef, use home canned ground beef, rehydrated freeze-dried beef crumbles or TVP.
Instead of milk, use dried Milk, reconstituted according to the package directions.
Instead of plain vegetable oil, use whatever you you have. I used the extra virgin olive oil that I store. You could also melt shortening to use in this recipe if that's what you have on hand.
Instead of fresh eggs, use dry powdered eggs, reconstituted.
Instead of bread flour, you could substitute all purpose flour. It will work OK, but will make the bread slightly less chewy. You could also add 1 t. of vital wheat gluten for every cup of all purpose flour. That would approximate bread flour. You probably could easily substitute freshly ground whole wheat flour for half of the regular flour without any issue.
Instead of finely shredded cabbage, use home grown cabbage from your verdant garden. :) OK, this is the tricky one. Lacking said verdant garden, you could try dehydrated or freeze-dried shredded potatoes, reconstituted mashed potatoes, or whatever canned vegetables you have on hand. I bet sauerkraut would work if that's something you have on hand. Use whatever you think would taste good with bread and beef.
Give bierocks a whirl!
BIEROCKS, originally published in Cooking Light
Filling:
1/4 cup chopped onion
1/2 pound ground beef or turkey
2 cups finely shredded cabbage
1/2 teaspoon freshly ground black pepper
1/4 teaspoon salt
Dough:
1/4 cup sugar
1 package dry yeast (about 2 1/4 teaspoons)
1/2 cup warm water (100° to 110°)
1/2 cup milk
1/4 cup vegetable oil
3/4 teaspoon salt
2 large eggs, lightly beaten
4 cups bread flour, divided
To prepare filling, cook the onion and beef until meat is browned, stirring to crumble. Add cabbage; cook until cabbage wilts, stirring constantly. Stir in pepper and 1/4 teaspoon salt. Cover and chill.
To prepare dough, dissolve sugar and yeast in warm water in a large bowl; let stand 5 minutes. Stir in milk, oil, 3/4 teaspoon salt, and eggs. Add 3 1/2 cups flour to yeast mixture, and stir to form a soft dough. Turn dough out onto a lightly floured surface. Knead until smooth and elastic (about 8 minutes); add enough of the remaining flour, 1 tablespoon at a time, to prevent dough from sticking to hands (dough will feel tacky).
(I used my stand mixer with dough hook instead of doing this by hand.)
Place dough in a large bowl coated with cooking spray, turning to coat top. Cover and let rise in a warm place (85°), free from drafts, 1 hour or until doubled in size. Punch dough down; cover and let rest 5 minutes.
Divide dough in half. Roll each half into a 10 1/2 x 7-inch rectangle on a lightly floured surface. Cut each rectangle into 6 (3 1/2-inch) squares. Working with 1 portion at a time (cover remaining dough to keep from drying), spoon about 1/4 cup filling into center of each portion, and bring 2 opposite corners to center, pinching points to seal. Bring remaining 2 corners to center, pinching points to seal. Pinch 4 edges together to seal. Place the bierocks, seam sides down, on a large baking sheet covered with parchment paper. Cover and let rise for 20 minutes.
Preheat oven to 375°.
Uncover bierocks. Bake at 375° for 15 minutes or until bierocks are browned on the bottom and sound hollow when tapped. Remove bierocks from pan, and cool on wire racks. Yield: 12 servings (serving size: 1 bierock)
Note: To freeze, cool completely, and wrap individually in foil. Place wrapped bierocks in a heavy-duty zip-top plastic bag; freeze for up to 3 months. To reheat, thaw in the refrigerator. Place foil-wrapped bierocks in a preheated 350° oven for 15 minutes.
Subscribe to:
Posts (Atom)


