Friday, June 29, 2012

Our Chickens at 15 Weeks

I realize that this blog is titled "The Harried Homemaker Preps", not "The Harried Homemaker's Poultry". The problem is that I've been spending all my prepping money and free time on poultry-related projects, so this blog reflects that. I do think keeping poultry is an excellent preparedness project, but I know not all of my readers can have chickens. To that I say (only slightly in jest) you should move to somewhere you can keep poultry. Hang in there with me and I promise to return to a greater variety of topics. :)

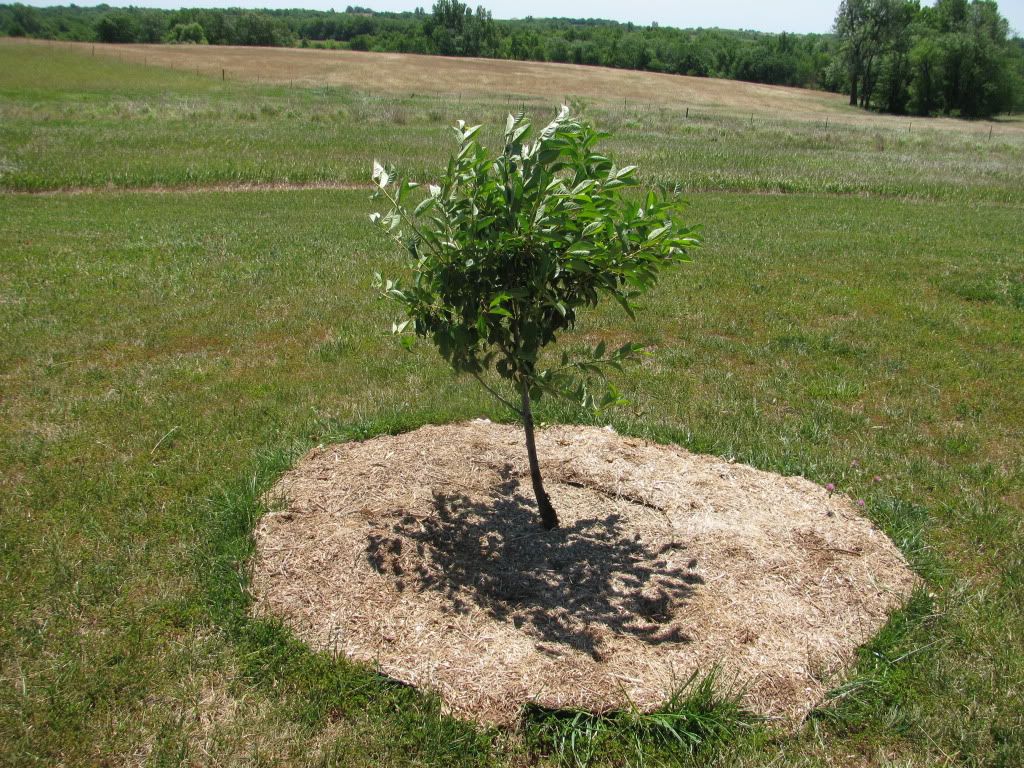
Foraging in the cool of the evening


My chickens are 15 weeks old and haven't given me a single egg yet. If they were from one of the high-output hybrid breeds, I might expect my first eggs in the next week or so. Since they are heritage breeds, I have longer to wait. It can take up to the age of 24 weeks or so to start laying. Most will begin in the 20 to 22 week range. 

If I desired, I could start butchering the chickens. Most of them have reached a size where they would dress out as a nice sized carcass. We are not planning to eat any of our chickens yet but will probably cull them for the soup pot when they slow down their egg production in a couple of years.

Other than being ornamental and fun to watch, our chickens have already done a lot for our homestead. They have made a massive dent in our food and garden waste. They eat food that would normally get scraped off a plate into the trash or garbage disposal. They covet the strawberries that the ants got to before we did and slurp down tomato hornworms like spaghetti. How cool is it that the very stuff we throw away can be turned back into yummy eggs and meat?
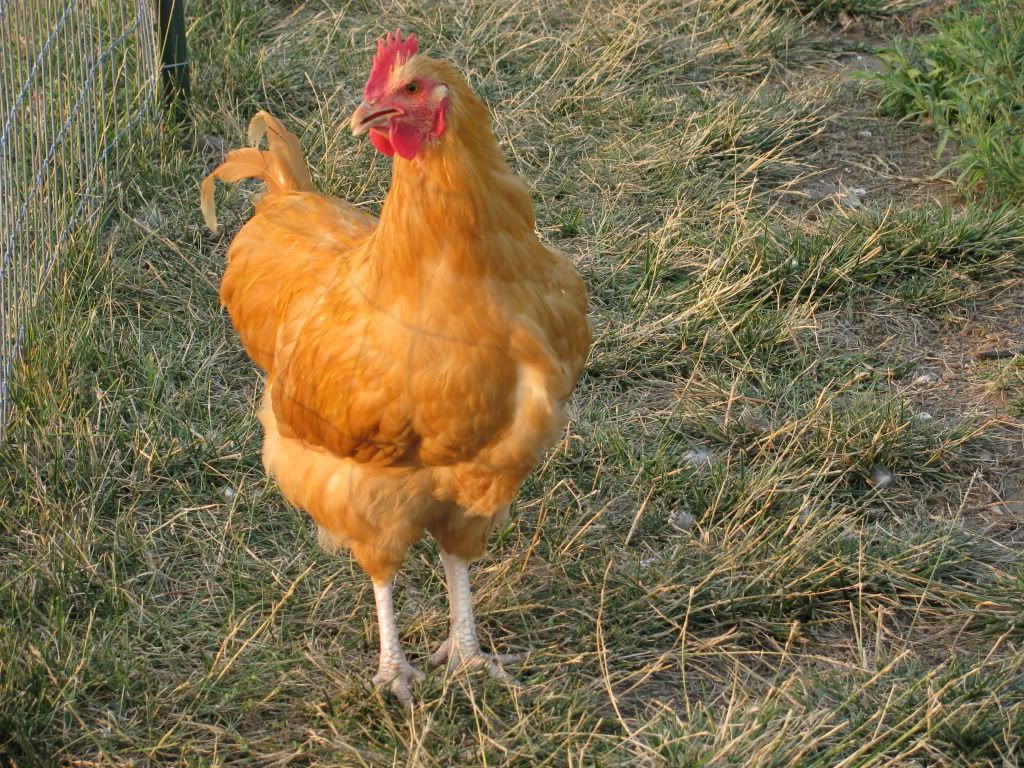
Our roo-in-training

Here's our Buff Orpington cockerel. (Until one year of age, boy chickens are referred to as cockerels. After one year old, they get the venerable title of rooster.) I was slightly leery of purposely ordering a future rooster since they have a reputation for being mean. I really want the option of hatching our own chicks, however, so a rooster was a necessity. So far, he seems to be pretty nice and I think he is awfully handsome, too.

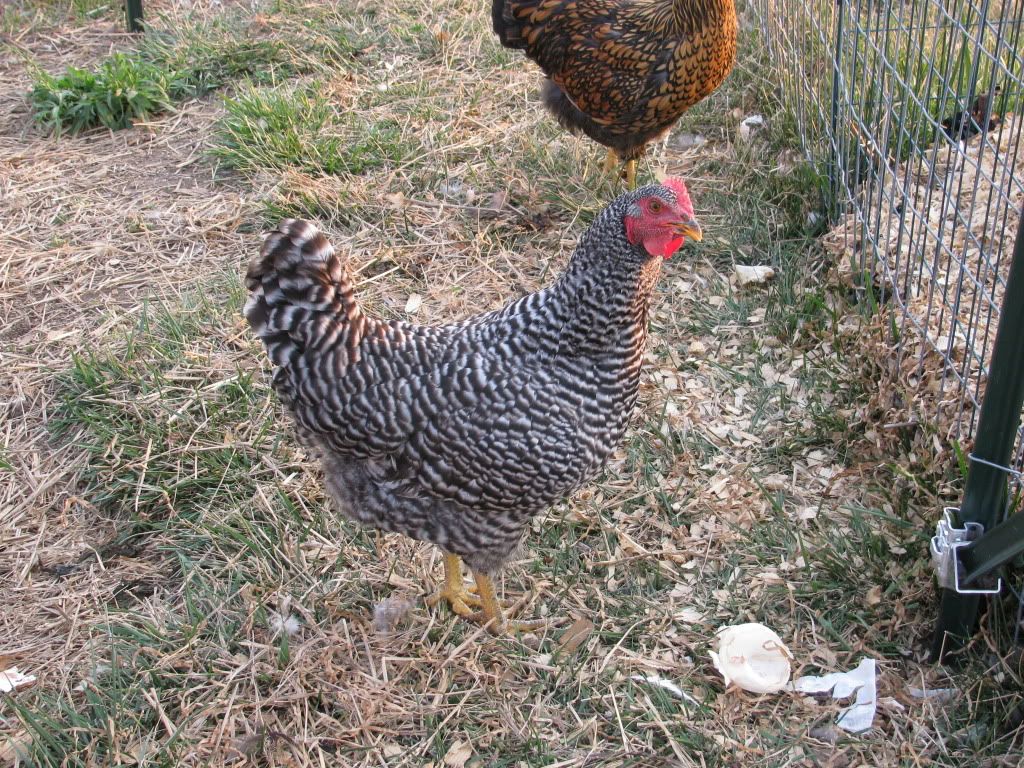
One of our Barred Plymouth Rock pullets

My favorite chickens are our Barred Rocks. They aren't an exotic breed, but I really think they are pretty and they are the most friendly of our chickens. This one is pretty advanced in her comb and wattle development, so it may be that she will be one of the first of our pullets to begin laying.

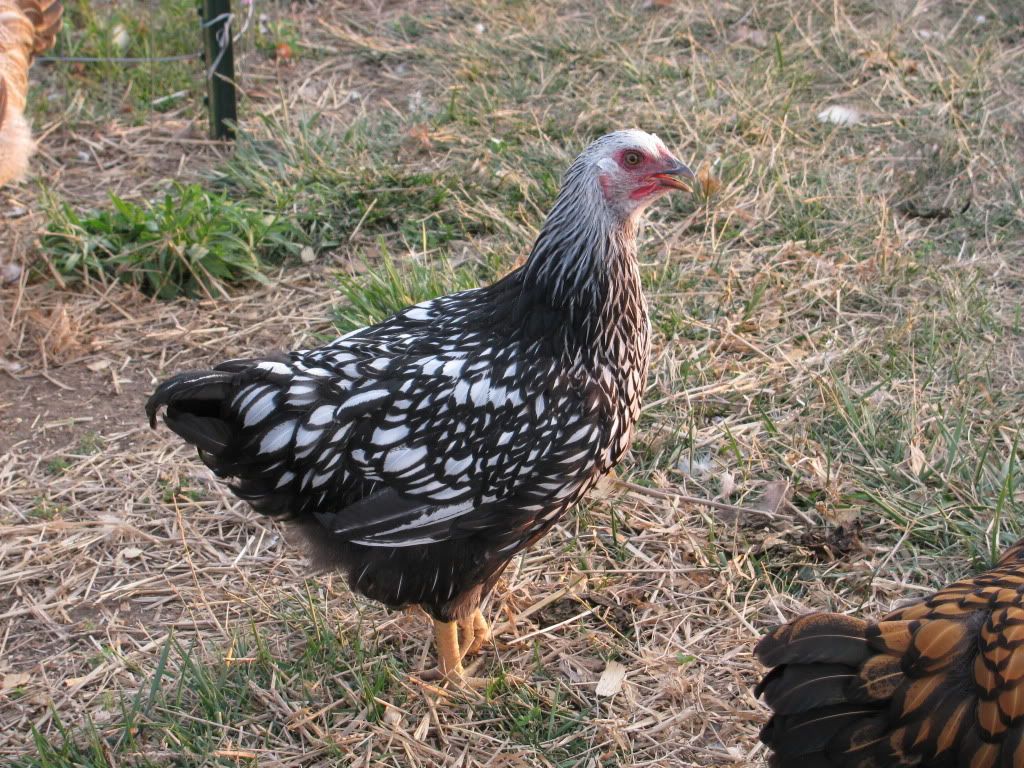
"Little Silver" the Silver Laced Wyandotte

It seems like I lucked out when I pulled the last Silver Laced Wyandotte out of the bin of straight-run birds at Tractor Supply Company. I'm pretty certain I ended up with a pullet. I think she's pretty. But then again, I think all my birds are pretty. :)

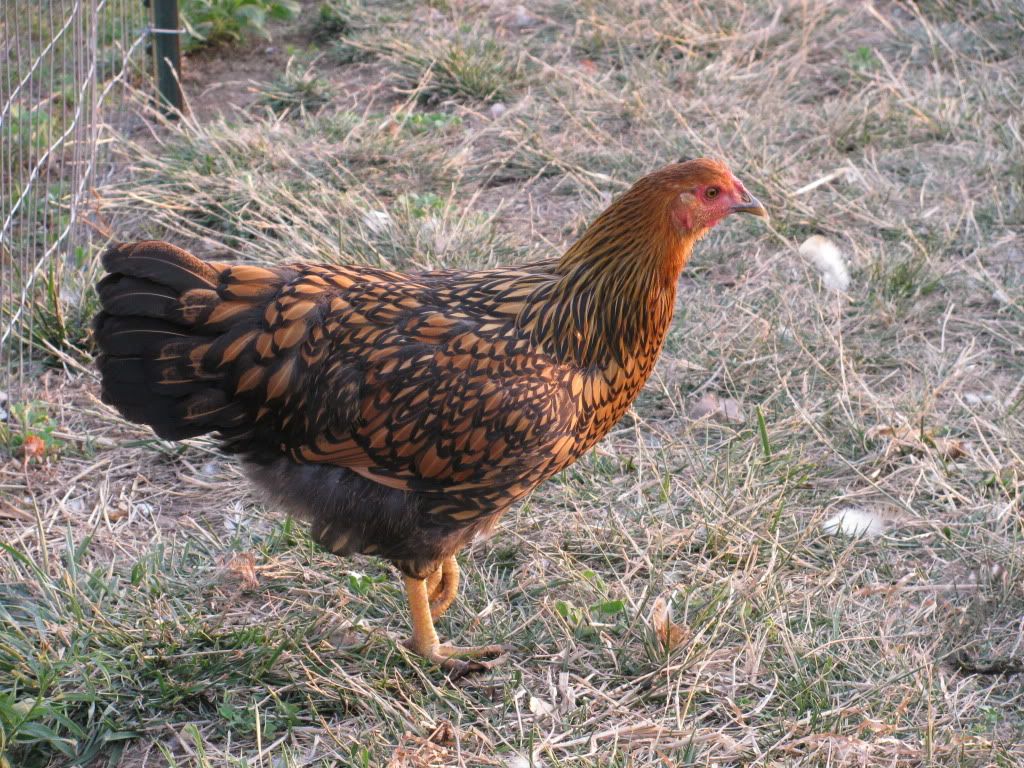
A Gold Laced Wyandotte

Here's a Gold Laced Wyandotte for comparison. None of my Wyandottes are particularly friendly. But none of them are as skittish as the Silver Lakenvelder.


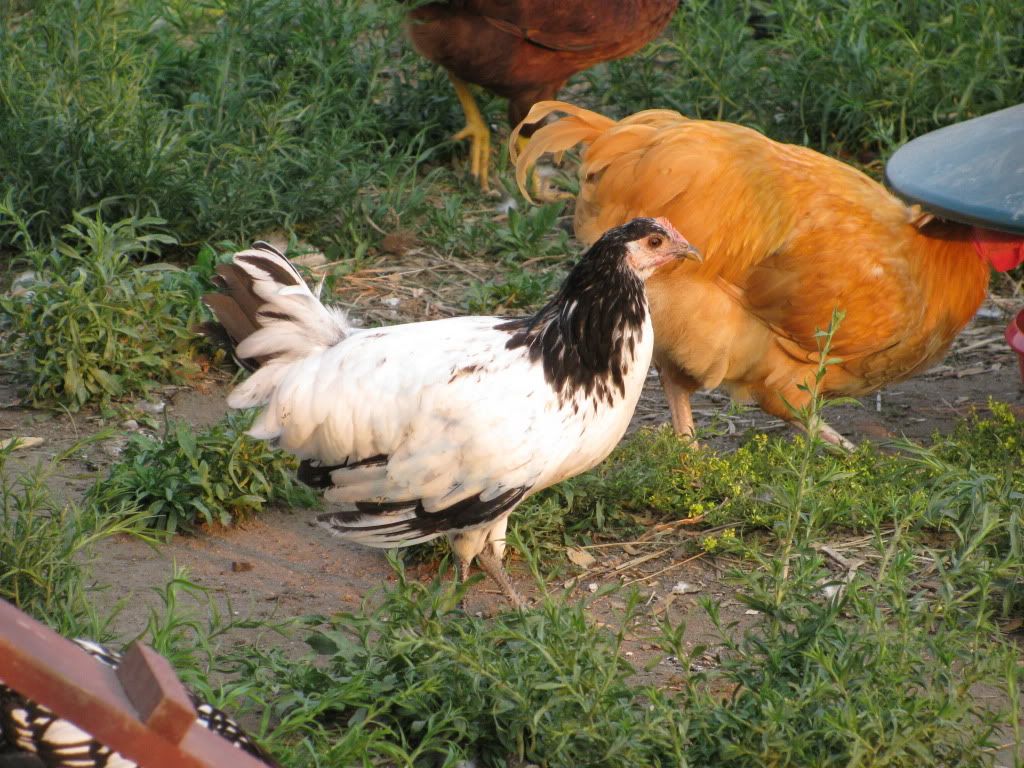
"Noodles" the Silver Lakenvelder

Noodles is a complete nutcase. She is convinced that humans are evil and she does her best to stay out of sight when I'm around. This is the one breed of chicken I wouldn't get again. I don't need lap chickens, but I prefer to work around birds that aren't so neurotic and skittish.

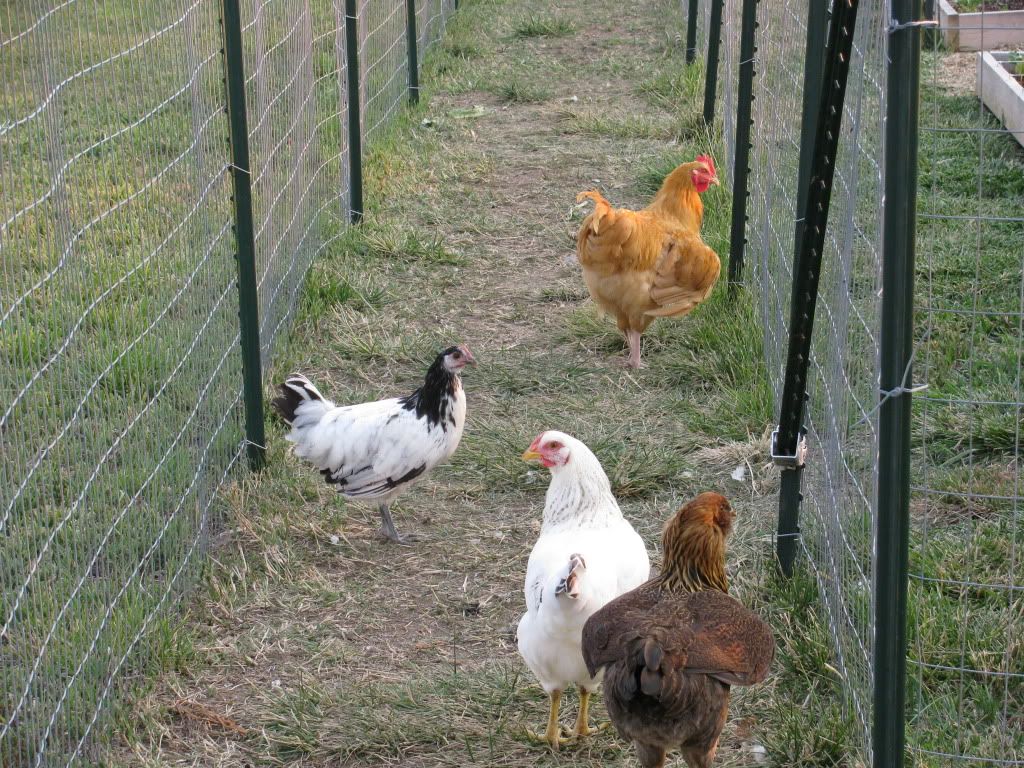
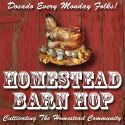
The chicken moat turned out to be a great idea

Here's Mr. Man leading some of the ladies (Noodles, Prissy the Delaware, and Tawny Kitaen the Easter Egger) down the moat. The chickens keep the weeds and grass down just enough that they don't kill it completely but we don't have to mow the moat. They hunt insects and eagerly wait for the treats of bugs and weeds we throw into the moat from the garden.


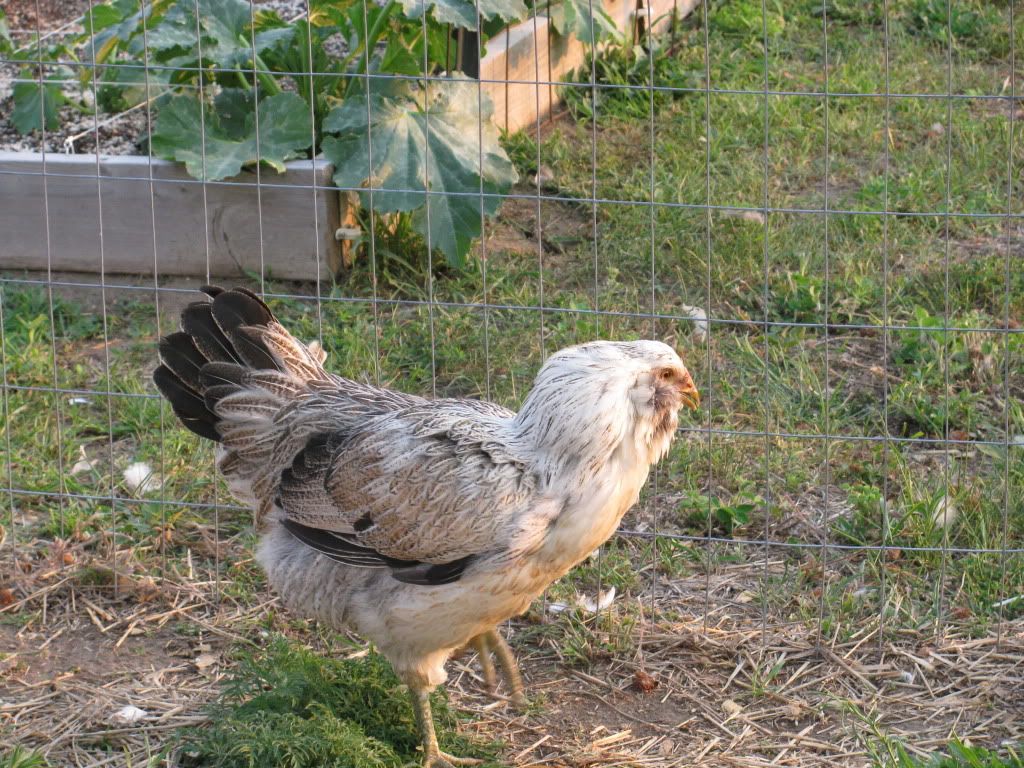
"Lita Ford" the Easter Egger

None of our chickens were supposed to get proper names under the theory that it's easier to eat something that you haven't named. Well, the kids started naming them and then I got into the act. I thought the Easter Eggers looked like they had big 80s hair, so I named them after 80s icons Tawny Kitaen and Lita Ford. I've started to wonder if Lita Ford is actually a cockerel, though. Any guesses?

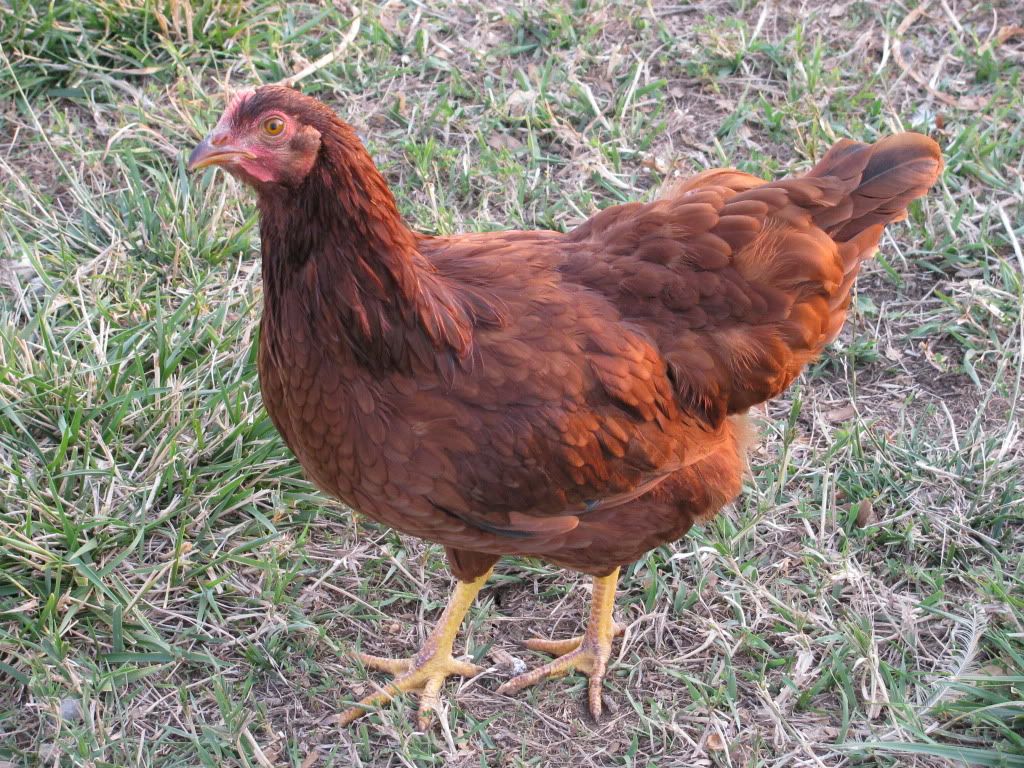
"Little Red" the Rhode Island Red


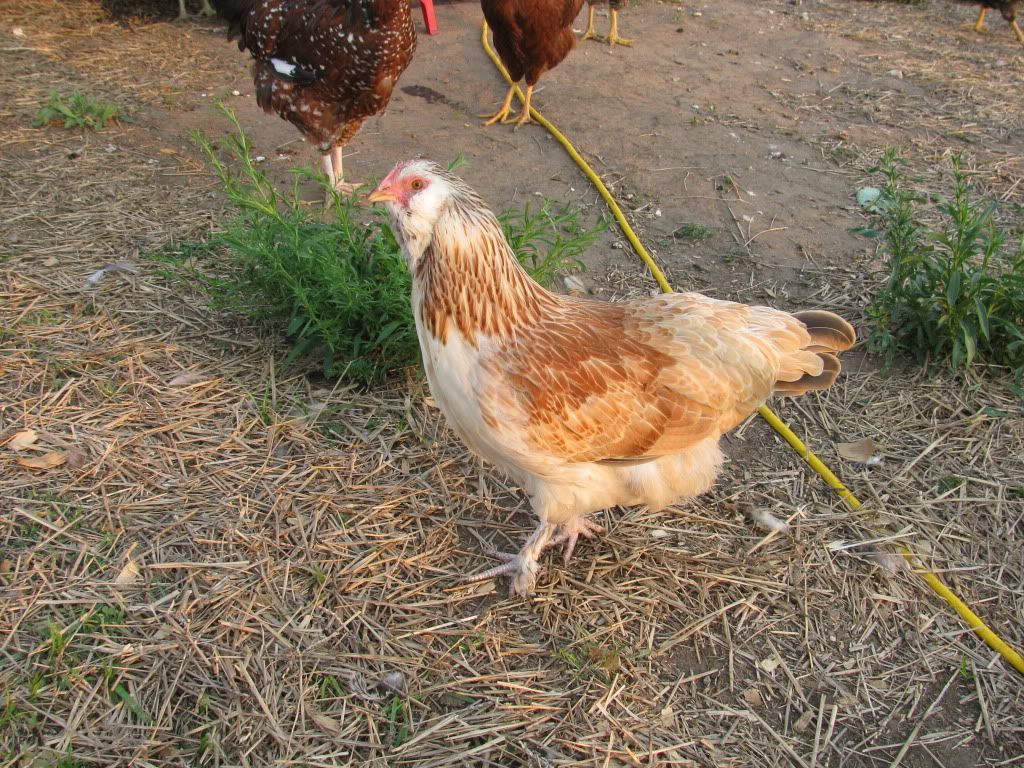
"Bella" the Salmon Faverolle

Poor Bella. Faverolles have feathers on their legs and hers always look messy and muddy. I think I'll stay away from feather-legged breeds in the future. She's a nice bird otherwise.

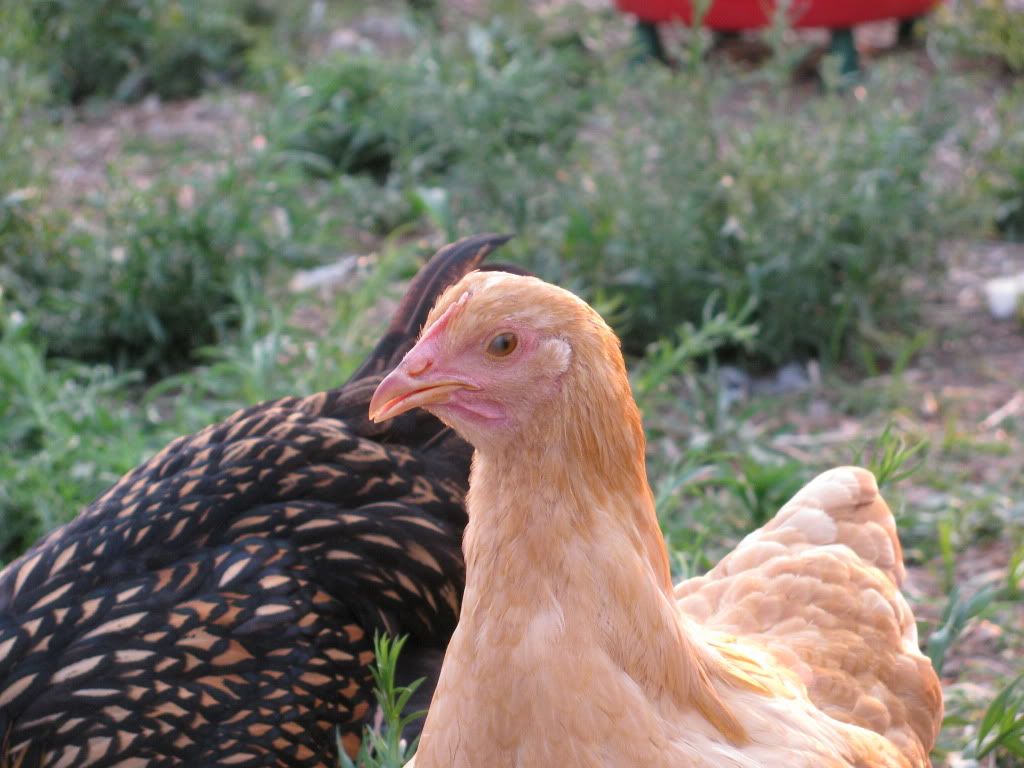
A Buff Orpington pullet

The Buff Orpingtons just kind of blend in with the crowd. From the looks of their comb and wattle development, they will be one of the later birds to begin laying. Compare this photo to the one of the Barred Rock above.

In the next week or so, I will remove the barricade that is keeping the chickens out of the nest boxes. I'll place nesting material and fake eggs in the the boxes to encourage them to lay there when they start feeling the urge. We will also be moving the turkeys into the chicken moat and our duck eggs will hatch. Plenty more   action in the poultry department on our homestead!

Fellow Poultry Keepers: What's new in your flock? 


Thursday, June 21, 2012

Mid-June Garden and Orchard Update

It's been a while since I did a garden update, so I thought I'd share what's going on. 

Unfortunately, May was extremely hot and dry here, which caused our cold weather crops like peas, lettuce, and spinach to die prematurely.  If it's not one thing, it's another. 

Our garden on June 18. It's looking bare since so much has been harvested or pulled out. 

The chickens have the right idea. 

The chickens spend the hot part of the day underneath their coop. 

When it's hot like this, it's best to just stay in the shade! I've been spritzing their run with the hose a couple of times a day and putting ice cubes in their water. They seem to be weathering the heat well. Hopefully by this time next month I'll be getting eggs from my lovely ladies! 


Drying garlic

We harvested around 40 heads of garlic. We gathered them into bunches of five or six heads and have suspended them in our garage to dry for a month or so. Once they are dry, I'll cut them off their stalk - we grew 'Music', a type of hard-neck garlic - and put them into storage. I plan to save our best heads back to use as seed garlic for next year's crop. I am also going to try dehydrating garlic in my Excaliburand grind my own garlic powder.

'Copra' onions

The onions are doing well and will probably do even better now that the garlic is gone. Our garlic plants were three feet tall and were shading them.


Our green beans had spotty germination

Our green beans had spotty germination, as did our carrots, cucumbers, watermelon, zucchini, and cantaloupe. We replanted the bare spots. We also planted extra vine plants in the space vacated by the peas. We will soon have a riotous mess in those bare areas!


Lots of varieties of heirloom tomatoes


Ripen already!! I can't wait for that first homegrown tomato of 2012.


We planted some black oil sunflowers in this open area

We are growing some Peredovik black oil sunflowers for a treat for our chickens.


Sunflower bud


The Berries

The heat has led the blackberries to begin ripening a full month earlier than last year.


I've only picked enough to eat out of hand, but in the next week or so, we should be harvesting buckets of berries. Time to dig out the canner and make some blackberry jam!


Barn swallow nest

One of the things we are doing to help control the wasps that plagued our blackberries last year is allow barn swallows to nest on our property. We had been knocking down the nests simply because the birds make such a mess on our porches and deck. Barn swallows eat an amazing amount of insects, however, so we are leaving them alone this year. Hopefully this will cut down on the wasps sucking the juice out of my berries!

We're getting a few strawberries from our everbearing plants and little bits of raspberries, too, though our big raspberry harvest will be in September. Or August, the way things are going this year!

Only about half of the new raspberries appear to have survived

The good news about the raspberry canes we planted this spring is that we have a few survivors. Hopefully they will make it through the heat of summer and we can fill in the row with extra canes from our established raspberries.


Blueberries going strong

Our blueberry bushes seem to be doing well and they've grown quite a bit. We planted two year old bushes, so hopefully we'll get a crop from them next year.

The Orchard

Our little orchard faced some struggles this month. Two of our newly-planted apple trees came down with a bad case of Cedar Apple Rust. 

Our Jonafree apple tree has managed to overcome the Cedar Apple Rust 

The GoldRush? Not so much. It's growth is being stunted by its struggle with rust.

I really didn't think we'd have to worry about disease pressures this early! And I didn't think Cedar Apple Rust would be a problem since we don't have any cedar trees on our property.


What's that right across the road from our orchard?


Earth to Emily! There are cedar trees right across the road! After I did more research, I found out that to eradicate the chance of Cedar Apple Rust, I'd have to get rid of all the cedar trees within a square MILE of our property. As that's not going to happen, I'm going to have to pay close attention to the weather conditions next spring so I can stay ahead of the rust. In the mean time, I have been using an organic disease control spray that seems to be helping somewhat.

Our pecan trees

Perhaps the most impressive growth has been from our three pecan trees. They might not look so impressive to you, but considering they were mere twigs when we planted them last November, I'm pleased.

Oh, but I'm forgetting the real star of the show, our cherry tree.

Our not-quite-as-dwarf Montmorency cherry

We got this tree for free four years ago and have pretty much neglected it. This year we have lavished it with care. It got a proper mulching, fertilization, and holistic sprays in the spring. It has responded with enthusiastic growth of nearly two feet!

I also pre-ordered the new additions to our orchard for the fall - two standard-sized pear trees (Starking Delicious and Seckel) and an All-in-One Almond tree. I was really tempted to order a lot more but I remember how hard Hubby Dear and I have to work to bust through our concrete soil. Three trees at a time is probably all we can handle.


Between the garden and my poultry projects, we've been busy. What's growing at your house? 


Sunday, June 10, 2012

How to Incubate Shipped Duck Eggs

I have wanted Ancona ducks since I read about their virtues in Carol Deppe's book, The Resilient Gardener. They are friendly, forage well, destroy garden pests and are good for both eggs and as a meat bird. They are also ridiculously gorgeous.

Ancona ducks come in a wide variety of patterns and colors
Image from http://boondockers.sharepoint.com 

Anconas are patterned like Holstein cows or pinto horses; no two ducks are alike and they can have spots that are black, brown, lavender, or blue in color.

There's just one problem - Ancona ducks are a critically endangered breed. There are very few hatcheries that sell them and those that do have a variety of issues (huge minimum orders, poor quality birds, and/or sold-out for 2012).

All of this persuaded me that there was no better way to get my own Anconas than to incubate eggs shipped  from an Ancona breeder across the country.

First, a little incubator terminology

An incubator is simply a device that holds fertilized eggs at the optimal temperature for embryo growth. You can make your own incubator on the cheap, or or buy one of the many models out there at a variety of price points.

There are two basic types of incubators, still and forced air. Forced air incubators have a fan so that air is circulated and the temperature is more or less equal throughout the incubator. Both types work well, you just need to adjust your incubation procedures based on your model's performance.

I was in a bit of a rush when I ordered my incubator. I had already ordered my eggs and I needed to get an incubator, pronto. I settled on a forced-air Hova-bator.


The bottom of the incubator


The Hova-bator's exterior is actually made of styrofoam. I guess that's why all those homemade incubators made from coolers work so well! The bottom is lined with a plastic tray that has channels to hold water. You control the humidity by adding water to the tray. Over the top is a wire rack. You can place your eggs directly on the wire and this is where the ducklings will be born. 


Automatic Egg Turner

Or if you are lazy and forgetful like me, you can buy an automatic egg turner. It plugs in and gently rotates the eggs once every 4 hours. If you don't have an automatic turner, you need to turn your eggs by hand three times a day.  This particular turner holds 42 eggs. 


I set the the incubator and got it to the correct humidity and temperature well before I put the eggs in.

The incubator was very easy to put together and came with easy to follow, full-color instructions. I set up the incubator in our basement storage room. The same characteristics that make it an ideal place for long-term food storage - steady temperature, lack of direct sunlight - are perfect for incubating eggs. 

Pre-heating the incubator

According to Dave Holderread, one of the foremost authorities on waterfowl and author of Storey's Guide to Raising Ducks, you should start your incubator at least 48 hours before you set your eggs. That way you can make sure you dial in on the correct temperature and humidity. For ducks, you want to start off at a temperature between 99.25 and 99.5 degrees F and about 55% humidity if you have a forced air incubator. If you have a still air incubator, your numbers will be different; check your manual. 


Some of my hatching eggs resting after their long trip

Challenges with Shipped Eggs

I located an Ancona breeder and bought 10 hatching eggs from her. I honestly don't need any more than five ducks, but shipped eggs can have a lower hatch rate due to the traumas of a cross-country journey. The lady I bought my eggs from was extremely generous and shipped 15 eggs. If I have an amazing hatch rate, I'm going to have to re-home some of the little cuties!

If you look in the right places, you can find hatching eggs of all sorts of rare breeds. Search for hatching eggs on Ebay or on the Buy-Sell-Trade section of the Backyard Chickens forum.

The seller individually wrapped each egg in bubble wrap and then packed them carefully in a Priority Mail box. As I took each egg out of the box, I candled each one to make sure there were no cracks and that the air cells were not detached in shipping. That sounds hard but it wasn't. I simply used a small penlight to shine a beam of light into each egg. I gently rotated the eggs to make sure the air cell was attached to its proper place at the large end of the egg.

Shipped eggs should be rested at least 6-12 hours before they are placed in the incubator. I received my eggs at 2:30 PM on Thursday and they were put into my warmed incubator at 1:30 AM Friday morning. I was up late working on our duck house project and couldn't wait any longer!


I have a thermometer and a thermometer/hygrometer to monitor conditions

Starting the Incubation

Place the eggs in the incubator with the small side down. If you are not using an automatic turner, simply put the eggs on the wire bottom and try to arrange them so the large end is slightly raised.

You should have a way to monitor the temperature and humidity from outside the incubator. My Hova-Bator came with a little thermometer to place on top of the eggs. I bought an additional thermometer/hygrometer. The thermometers don't read exactly same temperatures, so I just average the two.

If you do not have an automatic turner, you're going to need to rotate your eggs three times a day. Make a mark on each egg in pencil and that will help make sure you are rotating your eggs completely. The rotation is necessary to ensure the yolk doesn't stick to the shell.

The Waiting Game 

Ducks take about 28 days to hatch; chickens only take 21 days. For the first 25 days, the eggs need to be rotated and the temperature and humidity needs to be maintained. You should candle the eggs on day 7, 12, 19, and 24. This is a good link that shows what proper egg development looks like on each day of the incubation. Discard infertile or dead eggs as you discover them lest you find a nasty exploded egg inside your 'bator one day!

Holderread recommends spraying the eggs with lukewarm water on days 6-24. Supposedly this helps the eggs dry out the perfect amount for the ducklings to hatch properly.

On day 26, remove the automatic turner and stop rotating the eggs. Make sure you place the eggs with the large end up or the duckling may not be able to hatch out. Bump up the humidity as high as it can go without clouding the glass on your incubator. You are now on "lockdown" and you should not open the incubator until the hatch is over.

Once the ducklings have hatched, you can decrease the humidity, allow them to dry off, and whisk them away to the brooder.

------

It's only day four of our incubation process and I'm already watching over those eggs like a protective parent. Even though I'm not really supposed to be candling the eggs yet, I went ahead and looked at three of them. I think I saw the beginnings of veins in two of the three eggs. Good signs!

Resources:

1) Storey's Guide to Raising Ducks  by Dave Holderread


Have you ever incubated your own poultry? Have any advice for me? 

Photobucket

Friday, June 8, 2012

My June Lunacy, I mean, Preps

In case you haven't noticed, my thoughts, time, and prepping budget have been dominated by poultry-related purchases recently. Hubby Dear has come up with a term for the disease from which I suffer - Poultry Acquisition Disorder, or PAD for short. I don't think PAD is such a bad thing; Hubby Dear begs to differ!

There is a consequence of PAD, however; the cute little buggers grow up and then you have to figure out where you are going to house them. My June and July prepping budgets will be spent on turkey and duck housing and associated paraphernalia.

Oh, you didn't know I had ducks? Technically speaking, we will have ducks in 28 days since my ducks are still in ovo. I've got a batch of Ancona duck eggs in an incubator. Stay tuned for a tutorial on incubating duck eggs in an upcoming post.

We have three big projects underway.

1) Build a duck house


Hubby Dear and I shelled out big bucks for a pre-made chicken coop, but you can't just buy pre-fab duck houses. And using a chicken coop for ducks can be problematic as ducks have different requirements. For one thing, they don't roost. Their legs are also more delicate than chicken legs, so some of the taller designs with long ramps aren't ideal. They also need the nesting boxes to be at floor level.

We considered a lot of different options and nearly settled on converting a doghouse kit into a duck house identical to this, but we wanted something larger and with more versatility.

I ended up buying a chicken coop plan from the very cool Fresh Eggs Daily blog and Hubby Dear and I are building it ourselves. The coop is very duck-friendly and is large enough to house up to 9 Ancona ducks. We don't have a very good track record with home improvement projects, but so far it is going well. If you are handy, you probably don't need to buy the coop plan since she has a pretty detailed blog post about the coop, but Hubby Dear and I appreciate the cutting diagram and parts list.

The pile of supplies. We had to buy a circular saw and jigsaw plus all the lumber and miscellany, so the total came to
about $400 dollars. If you have the tools already, plus some scrap lumber on hand, this could be FAR cheaper. 

We're still cutting all the plywood, etc. and priming everything before we put it together.

Primed bits and pieces

Since ducks are so notoriously messy, I'm going through the extra step of painting the duck house both inside and out. I hope this will make cleanups easier in the long run. Right now it just seems to be slowing the process down!


2) Figure out the turkey housing situation

A brooder in my basement isn't going to cut it for my turkey poults much longer.

I think my turkeys are around 3 weeks old. They are already larger than my chickens were
when I allowed them out of the coop and into their run. Thank goodness I only bought four!

For one thing, I'm going to need my brooder for the ducklings in less than a month. And the turkeys are ready to get out of the brooder. They've already escaped several times despite the bird netting! They are little Houdinis, that's for sure.

Here's the problem: turkey poults are very delicate and disease-prone. Should they get too hot, too cold,or  too wet, they'll drop dead. People tend to baby their poults until they are 8+ weeks old, and even then many people will keep them indoors or in wire cages.

My tentative plan is to move them out into the duck house (with an attached run) when they are 5-6 weeks old. I'll give them plenty of shade and ventilation and hope for the best. They can get to know their new chicken roommates, and hopefully by the time I'm ready to move the ducks outside, I can integrate the turkeys in with the chickens. I'm taking a bit of risk by keeping our turkeys with the chickens (chickens can potentially give turkeys a disease called blackhead), but I'm willing to chance it.

Eventually the turkeys will be too big to go in and out of either the duck house or chicken coop, so they will get their own shelter. We plan to build a smaller version of the range shelter shown in Storey's Guide to Raising Turkeys. It will look similar to this:

Turkey range shelter - Ours will be quite a bit smaller because we only have four turkeys!
Image from http://www.freetimesw.com/blueoakranch/turkeys.htm 


3) Expand and fortify our chicken moat

Our chicken coop is attached to a moat that goes around our garden.

Current plan of the chicken moat


Since we're adding in a 4'x6' duck house plus a turkey range shelter and a whole bunch of new birds, we need to expand the run.

We seriously considered using electronet and making pens for the new birds out in the pasture. (You can see what that would look like in the photo of the turkey range shelter.) The birds would love that and we may do that in the future, but we have a special needs child and a toddler so I am concerned for their safety.  We decided instead to expand the chicken moat. We will bump out the right side of the moat to match the existing left side, giving a total of about 1,150 square feet for the birds to roam in safety.

We are also going to add a layer of chicken wire to the bottom of the fencing. We used welded wire mesh with 2"x4" openings to build our fence and little ducklings will easily be able to slip through for the first couple of months. And if any of my chickens go broody next spring and hatch some chicks, we'll be all ready for that!


A duckling could slip out or get stuck in the holes in the fence. We'll cover the lower
2 feet with chicken wire just to be safe. 


As you can see, I've got plenty to keep me busy over the next month and a half! I'm just trying to refrain from adding geese to the mix!

Friday, June 1, 2012

Deal Alert! Sale on Tattler Reusable Canning lids

Straight off the Tattler Facebook page:


SALE TIME!!! TELL YOUR FRIENDS!

You have been asking for a sale, so here it is. 

Beginning Friday June 8, 2012 we will be offering our 200 pc bulk mix of Tattler Reusable Canning Lids at 25% OFF! 

This is our most popular package size, and supplies will be limited to the first 300 customers. Use coupon code "special" at checkout to receive the 25% discount.


I bought a 200 count bulk mix of Tattler lids in January when they were on sale on markdown.com. I love Tattler lids and can assure you that you should definitely grab this deal if you need to stock up on canning lids. 

Go to www.reusablecanninglids.com next Friday and do it EARLY. They sold out in record time the last time they had a sale. The sale begins at 12:01 AM (Mountain Time). Limit two packs per customer.