Showing posts with label beef. Show all posts

Friday, December 9, 2011

Using Your Food Storage: Crockpot Sloppy Joes


I've been meaning to share this recipe with you all for the longest time. This is the best version of sloppy joes that I've ever tried and it uses a slow cooker, the favorite appliance of harried homemakers everywhere. You know what's even better? Using food storage will streamline the preparation of this meal and make it come together very quickly. Try it - you won't be disappointed.


Crockpot Sloppy Joes
Recipe adapted from Not Your Mother's Slow Cooker Cookbook

1 lb lean ground beef (OR 1 pint of home-canned ground beef, drained)
1 onion, finely chopped (OR approx. 3 T. dry onions, rehydrated according to package directions)
1/2 large red bell pepper, finely chopped (OR about 1/4 c. dry bell pepper, rehydrated according to package directions)
1 large rib celery, finely chopped (OR about 2 T. dry celery, rehydrated according to package directions)
1 clove of garlic, minced (OR 1/4 t. garlic powder)
1-6 oz. can tomato paste (OR 3 oz. tomato powder mixed with 3 oz. water)
2 T. apple cider vinegar
2 T. firmly packed brown sugar
1 t. paprika
1/2 t. dry mustard
3/4 t. salt
1/2 t. chili powder
1/4 t. ground black pepper
1 t. Worcestershire sauce
Dash of Tabasco sauce
Dash of cayenne pepper
Buns for serving

If using fresh ingredients: Brown beef in a skillet with onion, bell pepper, celery and garlic. When the meat is cooked through, transfer the mixture to your slow cooker. Add the remaining ingredients and stir to combine.
OR

If using food storage: Heat the canned meat and rehydrated vegetables together in a skillet. When the mixture is warm, transfer it to your slow cooker, add the remaining ingredients, and proceed with recipe.

Cover and cook on low for 5 to 7 hours. If you let it cook past 5 hours, keep an eye on it because it might start to get overcooked on the sides, depending on how "hot" your slow cooker cooks.

Ladle mixture on buns and enjoy.

Tuesday, March 22, 2011

Using Your Food Storage: Dirty Rice

I love it when I cook a great meal for my family and no one knows it's from food storage! I made food storage-friendly dirty rice the other day and thought I would share this simple and tasty recipe with you.

In case you are not familiar with dirty rice, it is a dish that hails from Louisiana. I spent three years in Louisiana as a teenager, long enough to pick up a cute southern accent and a predilection for Cajun food. The accent didn't stick around very long after I moved away, but I still love Cajun food. The version of Dirty Rice that I make gets its "dirty" look from ground beef rather than the chicken giblets and liver that are traditional.

One thing I should mention is that this recipe includes a bit of ground red (cayenne) pepper. We don't think it is spicy - my children scarf it up without complaint - but I have some relatives with weaker palates that would think I was trying to kill them. If you are sensitive with heat, start off with just a little cayenne or skip it and add Tabasco to taste at the table.


Dirty Rice - savory and delicious

Dirty Rice

1 lb lean ground beef (OR 1 pint canned ground beef, drained OR freeze-dried beef or TVP, reconstituted)
2 garlic cloves, minced (OR 2 t. garlic powder or freeze-dried garlic)
2 celery ribs, chopped (OR 1/4 c. dry celery, rehydrated according to package directions)
1 medium onion, chopped (OR 3/4 c. dry onion, rehydrated)
1 T chopped fresh parsley (OR 1 t. dry parsley)
1 green bell pepper, chopped (OR 1/2 c. dry bell peppers, rehydrated)
1 t. salt (Omit if using bouillon)
1/4 t. ground red pepper or to taste
1/4 t. ground black pepper
1 T. Worchestershire sauce
1 c. white rice
1 can beef broth (OR bouillon prepared to equal 2 cups. Omit salt if using bouillon.)
3/4 c. water

Cook ground beef and next 5 ingredients in a large skillet or Dutch Oven over medium-high heat, stirring until beef crumbles and is no longer pink. If you are using canned beef and reconstituted dry vegetables, simply cook together until items are warm.

Stir in salt and next 3 ingredients; stirring well. Add rice, broth, and 3/4 c. water, stirring well. Bring to a boil; cover, reduce heat, and simmer 25 to 30 minutes or until rice is tender. Stir as necessary to prevent sticking to the pan and add a bit of water if it gets too dry before the rice is cooked through. Taste and adjust seasoning if necessary. Enjoy!

Saturday, March 5, 2011

Using Your Food Storage: Beef and Barley Soup

The recipe that I'm going to share with you today is one of my family's favorite winter meals. The ingredients are so simple that it might seem boring, but I promise you that this recipe is transcendent. This soup has such a wonderfully beefy flavor. And if you serve it alongside a slice of bread made from wheat you ground yourself? It's divine!

One of the main ingredients in this soup is barley, which is a great addition to your food storage. If the only barley you've ever had is the mushy stuff in canned vegetable beef soup, you're in for a treat! Barley has a mild nutty flavor and a pleasant chewiness. If you don't have any barley on hand or have some sort of weird aversion to it, I have also made this recipe using egg noodles. I just throw them to cook in with the soup about 15 minutes before the soup is done.

I have listed the food storage substitutions for the fresh ingredients below. If you use all food storage ingredients, especially canned beef, I have written revised directions. You don't need to brown the already cooked canned beef and you can allow the dehydrated vegetables to rehydrate in the soup while you cook it.


Beef and Barley Soup, adapted from a recipe published in Cooking Light magazine

2 lb beef stew meat, trimmed and cut into 1-inch pieces (OR canned beef [home-canned or store-bought])
2 t. vegetable oil
2 c. chopped leek  (OR 2 c. chopped onion OR about 1/2 c. dry onion)
2 c chopped carrot (OR about 1 c. dry carrots)
4 garlic cloves, minced (OR 2 t. freeze-dried garlic OR garlic powder)
6 c. water
1-1/2 t. salt (Omit salt if using beef bouillon. Reduce according to taste if you're not using reduced sodium broth.)
1 t. dried thyme
1/2 t. freshly ground black pepper
4 bay leaves
2-14 oz. cans less-sodium beef broth (OR beef bouillon prepared to yield 4 cups broth)
1 c. uncooked pearl barley

Heat a large Dutch oven over medium-high heat. Coat pan with cooking spray. Add half of beef; cook 5 minutes, browning on all sides. Remove from pan. Repeat procedure with remaining beef.

Heat oil in pan over medium-high heat. Add leek, carrot, and garlic; saute 4 minutes or until lightly browned. Return beef to pan. Add water and next 5 ingredients and bring to a boil. Cover, reduce heat, and simmer 1 hour. Add barley; cook 30 minutes or until beef and barley are tender. Discard bay leaves and serve.

Food Storage Items Only Directions:

Omit browning beef and sauteing vegetables. Place liquid ingredients, an additional cup to 1-1/2 cup water, seasonings (omit salt), and vegetables in Dutch oven and bring to a boil. Reduce heat, cover, and simmer for 45 minutes to an hour. Drain liquid from canned beef and cut beef into 1" chunks, if necessary. Add beef and barley to the soup. Cook 30 minutes or until barley is tender. Taste broth for salt and add additional salt if necessary. Discard bay leaves and serve.

Thursday, December 9, 2010

I Canned Chicken and Ground Beef...and Lived to Tell About It

I did something recently that had intimidated me for the longest time: I canned chicken breast and ground beef. For some reason, canning meat has always seemed mysterious, difficult, and possibly dangerous. After all, it was only this past summer that I used my seriously vintage (60-70 years old and going strong) pressure canner for the first time and canned green beans from our garden. I made Hubby Dear check and double-check that I was following the directions correctly so that I didn't blow up my kitchen. We survived and my canning confidence grew exponentially. Yesterday I threw caution to the wind and stepped into the world of canning meat.

Folks, if you have been holding back on canning meat for any of the reasons I listed above, stop! Canning meat is so easy. In fact, chicken breast is the easiest thing I've ever canned, period. It really couldn't be simpler. Here's how to do it.
  1. Pack your jars with chicken. I trimmed and sliced chicken breasts into large chunks and placed the pieces in clean canning jars. A pint jar will hold about 1 lb of chicken. Maintain 1" headspace. (For those new to canning, that means fill the jar with meat up to 1" from the top of the jar.)
  2. Chicken packed into jars
  3. Pour hot water into the jars over the chicken. Some people skip this part. A couple of my canning books said to add water, and I followed their advice.
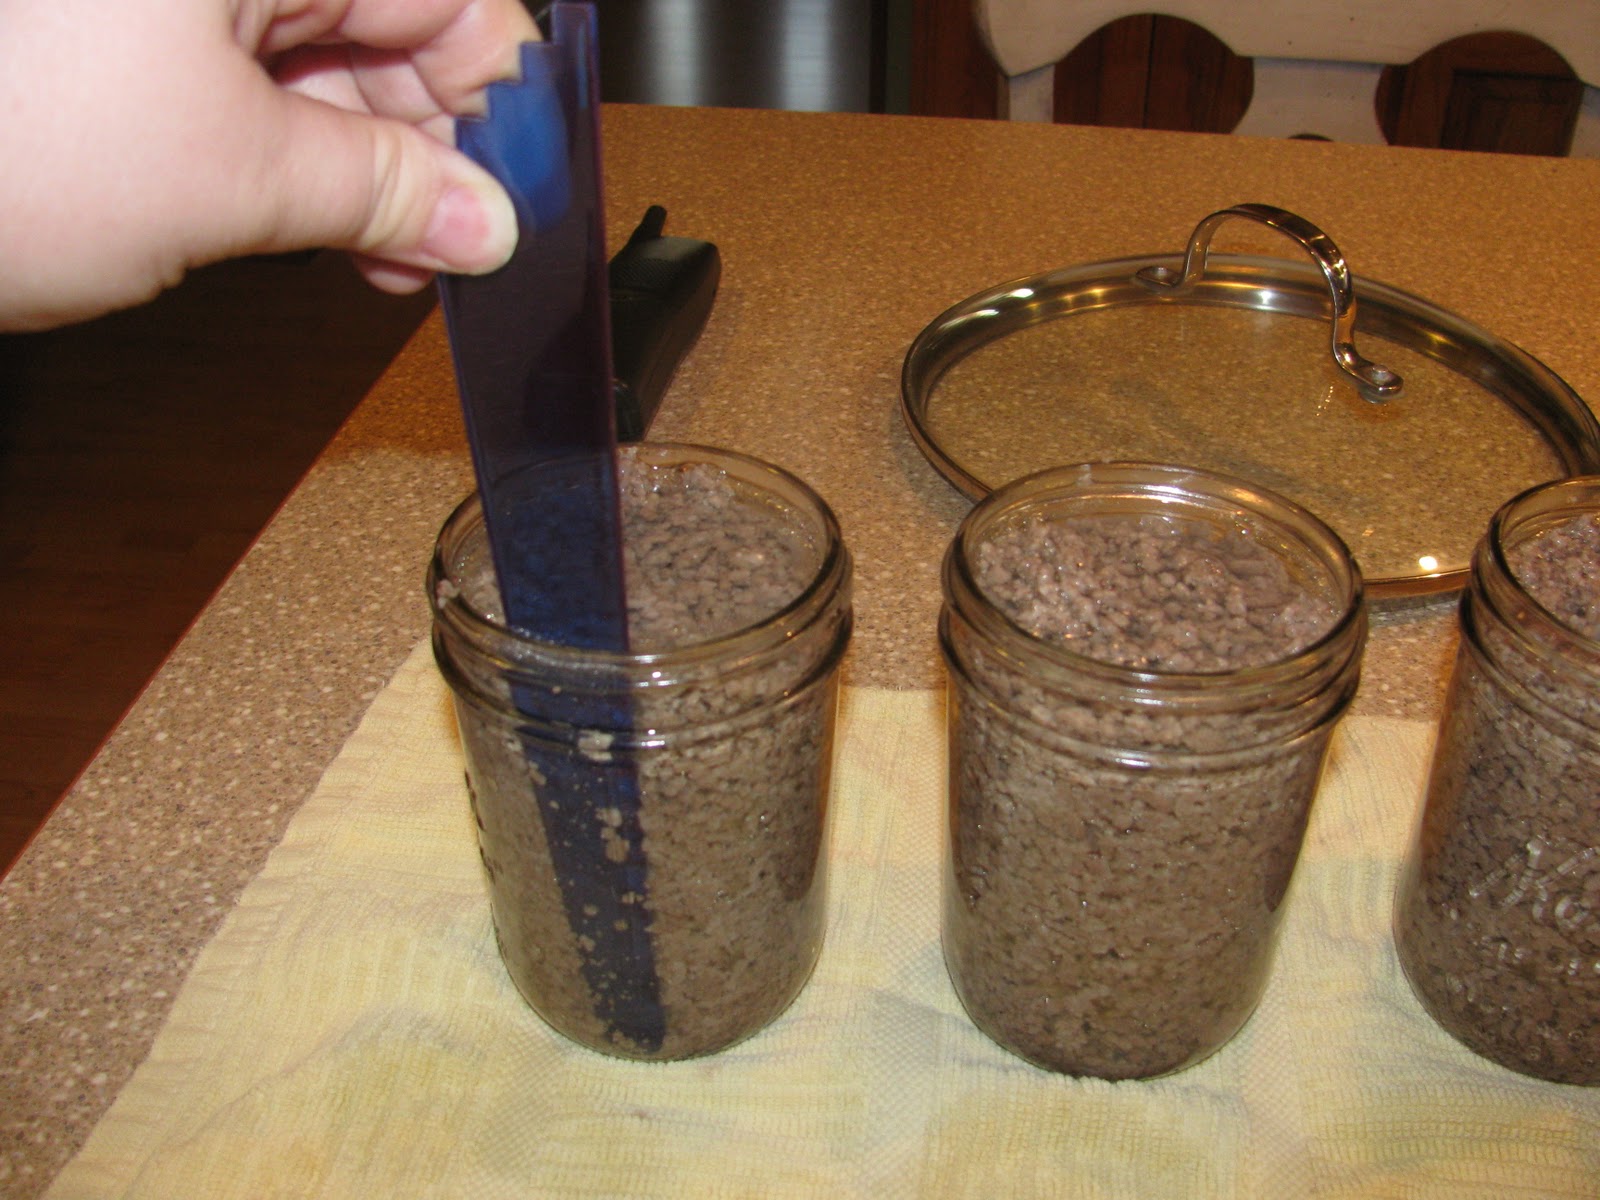
  4. Free any bubbles and adjust water to maintain the 1" of headspace. Run a plastic knife or bubble freer around the edge of the jar a couple of times. It was amazing just how many bubbles were trapped in the jar. I had to top each jar up with water to keep the headspace at 1".
  5. Using the bubble freer to release any air from the jars
  6. Clean off the jar rims with a damp paper towel. I had chicken gunk all over the rims of mine. If you don't take the time to clean the rims, your jars might not seal properly.
  7. Place boiled lids on the jars, tighten rings to "finger tight", and can it!
Ready to can
Put 2-3" of water in the bottom of your canner and then load your jars in. Put the lid on and allow to heat. Once you see steam exiting the top of your canner, start timing. The steam needs to exhaust for 10 minutes. After the 10 minutes, I shut the petcock (the vent where the steam exits - this controls the pressure in the vessel) and watched until the pressure in the canner reached 10 lb. I have a dial gauge canner. You might have a weighted gauge canner which is different. Check your manual for instructions specific to your model. Process at 10 lb of pressure for 75 minutes. If you are at an altitude higher than 1,000 ft above sea level, you will need to check a canning reference for adjusted times/pressures.

  6.     Check every so often to make sure your canner maintains 10 lb of pressure for the full 75 minutes. 
          You might have to adjust the temperature on your stove. It takes remarkably little heat to keep the
          canner going.

  7.    After the 75 minutes, turn off the heat. When the pressure reads zero, open the petcock. I wait a
         couple of minutes before I open my canner, just for insurance. Open the canner lid AWAY from
         you and remove the jars. They are still very hot, so be careful.

  8.    I let the jars rest on my counter undisturbed for at least 12 hours. My jars and lids were a
         bit greasy and schmutzy, so I put some white vinegar on a kitchen towel and wiped them clean.

   9.     Label jar with the contents/date canned and enjoy! For best quality, use within a year.


The finished product

Canning ground beef is very similar, but there are a few differences.
  1. You need to brown your beef ahead of time.
  2. 5 lb of ground beef, browned and ready to be canned
  3. Put the browned beef in clean, hot, canning jars (a pint holds just under 1 lb of cooked ground beef), reserving 1" headspace, and pour some boiling water up to the 1" level. 
  4. Freeing bubbles from the beef and water
  5. Free any bubbles, adjust headspace if necessary, wipe rims, etc. The remainder of the process is identical to the chicken. Process for 75 minutes at 10 lb of pressure.  

Et voila!

What's the point?

Why should you can your own meat? Well, if you like to eat meat, you'll definitely want to have some on hand if you're living off your food storage! I know Hubby Dear gets grumbly if I feed him too many vegetarian meals in a row.

Does home canning meat save you money? Here's what I found:
Sam's Club chicken
5-13 oz cans of "Member's Mark" chicken at Sam's Club - $9.98, not including tax. When I add in our crazy-high local taxes, it came out to 15 cents per ounce.

Vs.

7 lb of boneless, skinless chicken breasts - 14.05 + tax
12 pack of pint jars with lids - 10.69 + tax

I added in tax and prorated the cost for the 7 jars I filled with chicken. It came to 18 cents per ounce. If I hadn't had to buy any canning jars or lids, it would have cost me only 13 cents an ounce.

If you get a crazy good deal on chicken and have a ready stock of canning jars, home canning meat will indeed save you a few pennies.

What about the taste? 

I don't know! I haven't tried it out yet, but I've heard great things about home canned meats. I'm going to do a blind taste test of my home canned chicken vs. the Member's Mark chicken I have in storage and I'll post the results.