Showing posts with label dehydrator. Show all posts

Wednesday, July 31, 2013

The Easiest Fruit to Grow for Survival, Plus, How to Make Blackberry Fruit Leather

If I could only grow one kind of fruit or berry, I think it would have to be blackberries. They grow wild in many parts of the country, but they are also incredibly easy to grow in your yard or garden. They pretty much take care of themselves. All we do is fertilize them with organic fertilizer in the spring, spread mulch around the canes, and keep the area weeded. That's it. Complex spraying regimes are unnecessary and our bushes have always been untroubled by insects or diseases.


'Triple Crown' blackberries require a trellis while 'Chester' blackberries do not.

You can find varieties of blackberries that will grow well in USDA hardiness zones 5-10. We live in zone 5, so we bought two varieties of thornless blackberries that can withstand cold temperatures. The 'Triple Crown' variety is my favorite. It does require a trellis to support its long, floppy canes. Those long canes, however, yield huge numbers of berries, up to 30 lb PER VINE.


A 'Triple Crown' berry cluster.


After all the berries have been harvested for the year, you have to cut the spent canes back and tie up the new canes that grow to take their place. Simple. 


Blackberries! And a few raspberries. Raspberries are pretty easy to grow, too, but
they are not nearly as bountiful producers for us. 


Blackberries are also exceptionally nutritious. Each cup of berries contains 50% of your RDA of Vitamin C, plus large amounts of fiber and cancer-fighting antioxidants.

About the only drawback to blackberries is that the fruit is highly perishable. If you pick them when they are dead ripe on the vine, you really only have a few days to eat them before they are past their prime. They are easily preserved, however. 

I can blackberry jam and freeze many pints of whole berries to use in cobblers later in the year. You can also dehydrate the berries whole or try this recipe for blackberry leather (aka fruit roll-up). The leather will last up to a year when stored properly. 

How to make Blackberry Fruit Leather: 


There are only two ingredients in this recipe: 

5 lb blackberries
1 lb applesauce. I used sweetened applesauce that I canned myself. 

The first, and most difficult, task is to seed the blackberries. You can stew them and then press the softened berries through a fine-mesh sieve, but that will drive you bonkers and possibly stain your entire kitchen with blackberry juice. It is much easier to use a food mill of some kind. 

I recommend this Roma Food Strainer. It definitely will get the job done.  

My Roma Food Mill, ready for action. 

I use the berry screen attachment (sold separately) and it keeps every single one of those tiny blackberry seeds out of the juice. I usually pass the pulp through the mill three times just to make sure I get out all of the juice and then I feed the remaining pulp to my chickens.


The blackberry juice and applesauce mixture

Stir in the applesauce and you are ready to make fruit leather. (The applesauce is used to improve the texture of the final product. You can't really taste it.)

I have an Excalibur Dehydrator that I really like and recommend. If you don't have a dehydrator, you can try making this in your oven, though I haven't tried it and can't vouch for it. You would want to keep your oven at the lowest possible setting, use parchment paper instead of plastic wrap, and check on it often. 

Assuming you have a dehydrator (and if you are a gardener or prepper, you really should!), this is how to proceed:

Line the dehydrator trays with plastic wrap, taking special care to make sure the wrap is secure. I left an 1" margin on both sides of the tray so the air could circulate more easily.

Fruit on the prepared tray

Spread the fruit mixture on the plastic wrap. You are looking for a depth of approximately 1/4", but you want the edges to be thicker than the center. That will help the whole sheet of fruit dry evenly.

Loading up

This recipe filled 6 of the 9 trays of my Excalibur. I set the temperature at 135 degrees. After about 5 hours, I checked on the leather and it was making excellent progress. I turned it down 20 degrees, just to make sure that the leather remained pliable and did not get brittle. After a total of 15 hours, the leather was at the perfect consistency. It was tacky to the touch, but not wet. The time it takes your batch of leather to dry will be dependent on many factors - your dehydrator, the humidity, how thick you spread the fruit, etc.

Done!

Then all you have to do it remove the plastic wrap from the tray and roll it up like a scroll.


I cut each roll in half so they would could fit in quart canning jars for storage.


Next, I used my Food Saver's accessory attachment to vacuum seal a clean, used canning lid to the jar.


Et viola! A healthy, homemade snack that will last until next year's blackberry harvest. If I can keep it hidden from my kids, that is...

Sunday, August 12, 2012

How to dry garlic

The one crop we've grown this year that surpassed my expectations is garlic. Garlic will last for a long time when stored in cool, dry conditions, but we have so much of it that I am worried that it will start to go bad before we use it all.  Time to find a way to preserve it before I lose it!

When I don't have garlic I grew myself (i.e. any time prior to now), I generally buy the pre-minced garlic you can find in a jar at the grocery store. Ideally, I would can all my garlic up and use it that way. You can read about how Patrice Lewis of the Rural Revolution blog cans her garlic here.

Although I am an experienced canner, I tend to follow the established guidelines and not venture into the "grey areas" of canning such as canning bacon, butter, and, as it turns out, garlic. Here is a link to an article about the safe preservation of garlic. If you read through it, you will see that they do not recommend canning garlic. It seems that pressure canning destroys much of the flavor of garlic and so canning authorities have never bothered to establish the proper processing times for garlic. That's too iffy for me and so I decided to forgo canning garlic.

With canning out, I decided to dry much of my garlic. Here's how I did it.

Drying Garlic


Peeling the garlic and trimming off the root end

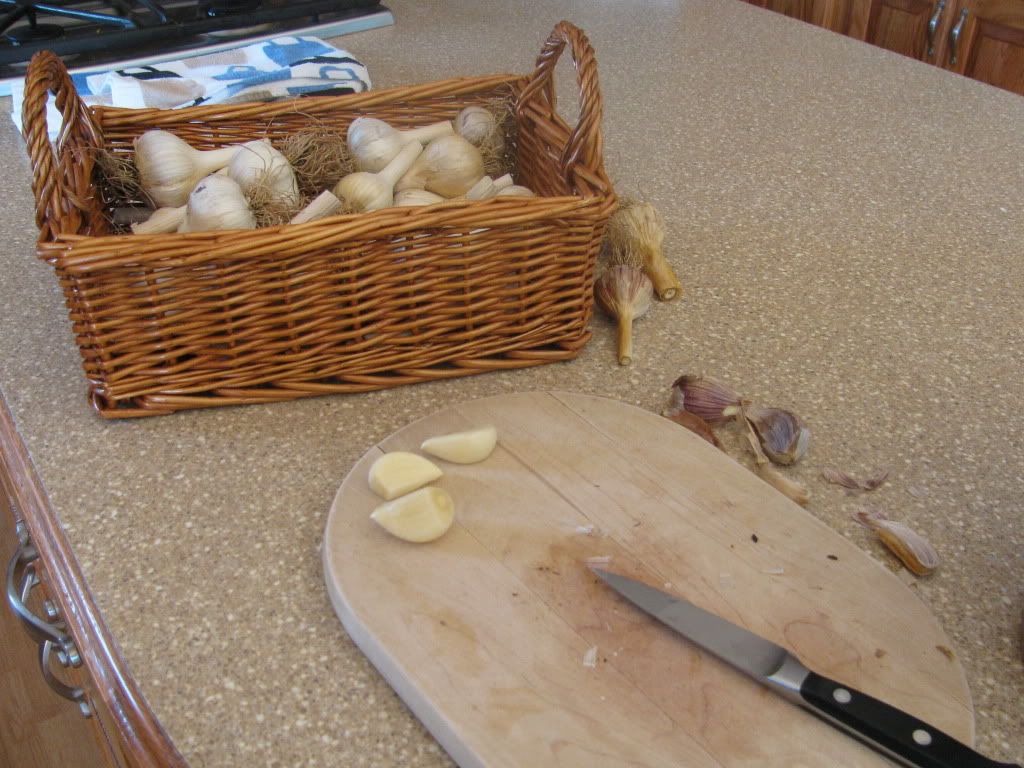
I won't lie: the first step of the process is very tedious. Gather your heads of garlic and separate them into cloves. Then, peel the cloves and trim off the root ends. One reason I have mostly used pre-minced canned garlic for all these years is so I don't have to deal with the sticky, papery, garlic peels. I peeled so many heads of garlic this time that my fingers were covered with garlic juice. The peels then kept getting stuck to my fingers and transferred to the clean garlic cloves, cutting board, and pretty much everywhere else in the kitchen. It was a mess, but the good news is that the rest of the procedure is really, really easy.


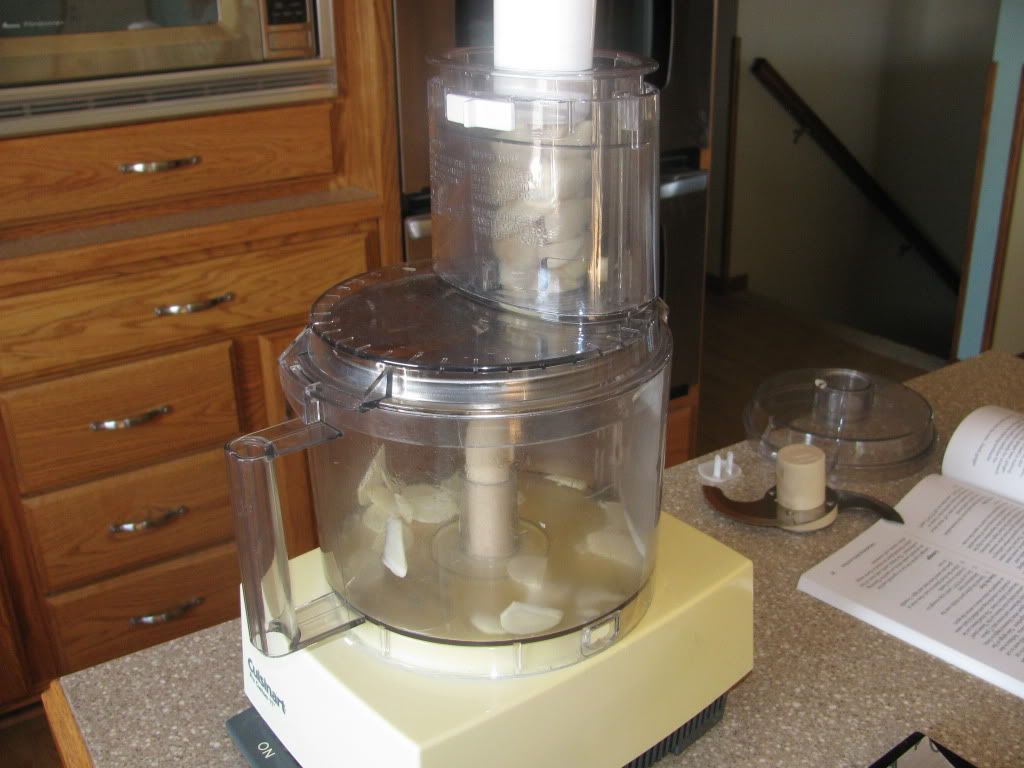
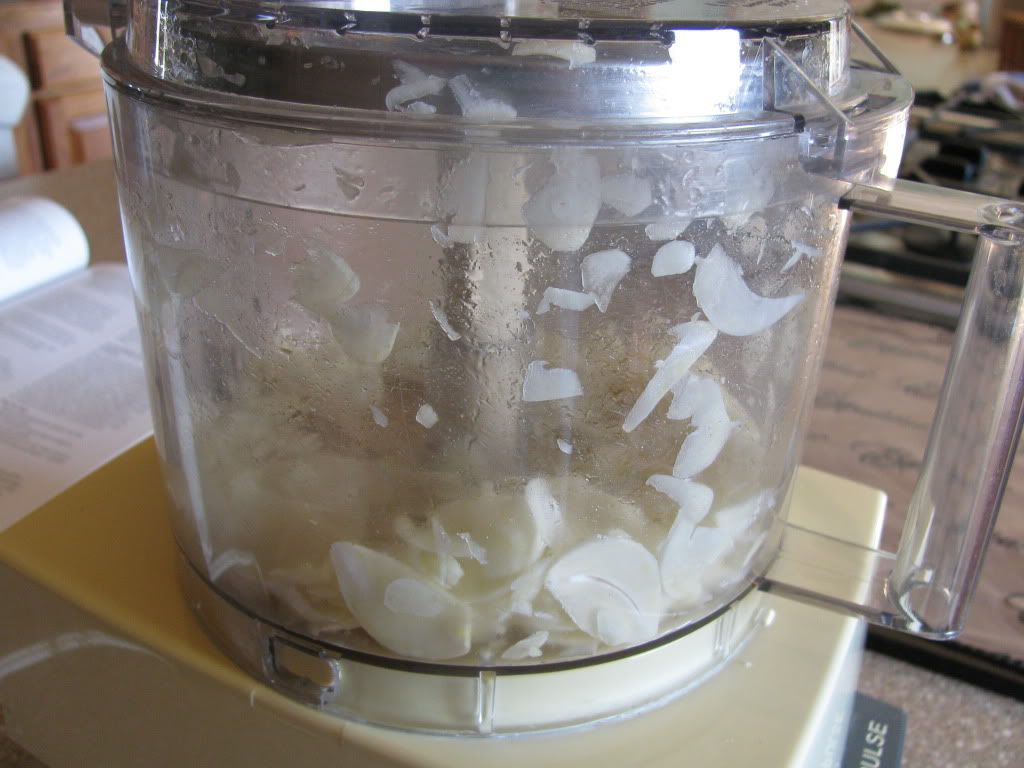
I used the slicing blade on my food processor to slice the garlic into uniform pieces

Now you need to slice your garlic by hand or with a food processor. You can mince the garlic into smaller bits if you desire, but be aware that they may fall through the mesh of your dehydrator screen.


The food processor makes quick work of this task

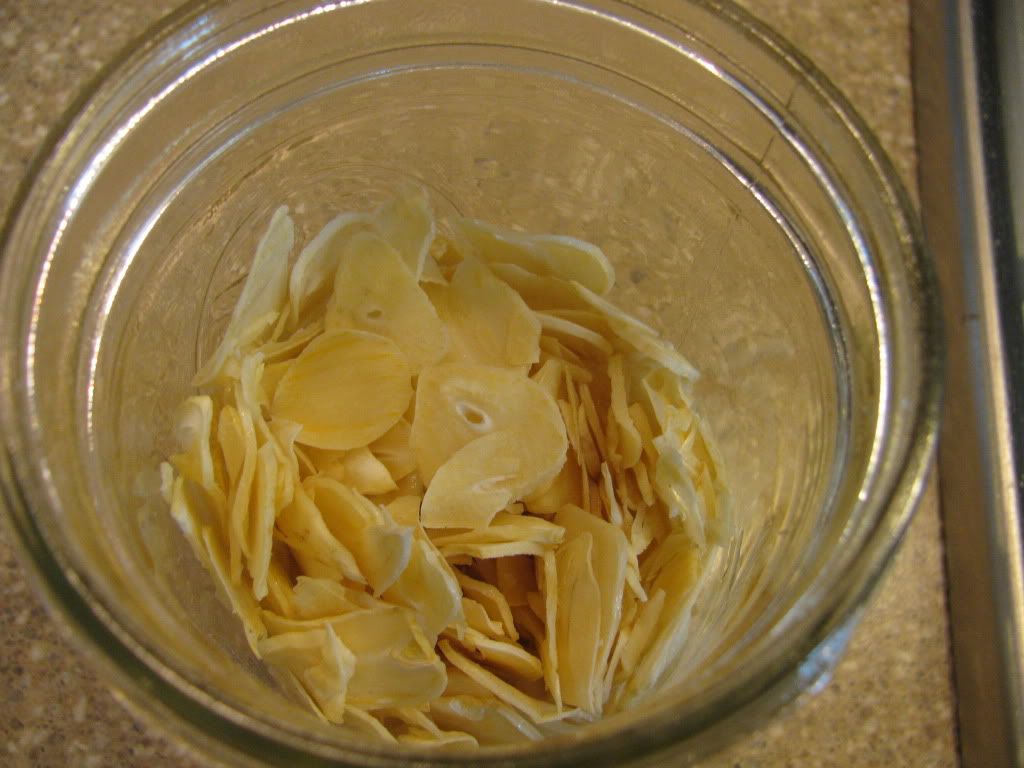
Once your garlic is sliced, it's time to dry it. I have an Excalibur food dehydratorand I looked up the correct temperature to dry garlic in my owner's manual. I set the thermostat at 105 degrees and placed the garlic slices on the drying trays. I was worried that some of the garlic pieces were small enough to fall through the trays as they dried and shrank, so I lined the trays with plastic wrap before I put the garlic on.  I checked on the garlic every few hours and stirred it once. It took about 8 hours before it was completely crisp and dry.


The finished product

If you don't have a dehydrator, I have also read about people drying garlic in the oven. The lowest temperature my oven goes to is 170 degrees, so drying garlic in there would take careful monitoring to prevent over-browning. Ever eaten a piece of scorched garlic before? Yuck! I would turn your oven to the lowest temperature it goes, stir often, and consider propping the oven door open a bit.

What do you do with dried garlic? 

  •  Throw a few pieces into a soup or stew. It will reconstitute while it cooks and lend its flavor to the meal. You might want to fish the larger pieces out after you're done cooking the dish, though, because these babies pack quite a wallop. 
  • Grind the dried garlic in a food processor or spice grinder to make your own garlic powder.
  • My favorite: Soak a clove's worth of dried garlic in some warm water until soft. Mince and use in recipes in place of canned minced garlic!  

Enjoy! 

Monday, December 26, 2011

My Top Five Prepping Successes of 2011

I hope you all had a very merry Christmas. We had a lovely time with our extended family and it was quite a jolt to have to get back to everyday life on Monday. We homeschool our children and I wanted to squeeze in a few more school days in the hopes that we might complete our school year in May. This sounded like a perfectly sane and logical plan when I concocted it in November, but as I sat at the kitchen counter helping The Thinker with her Latin lesson, I seriously regretted my decision to forgo Christmas break. This led me to entertain some fanciful ideas about what I would do if I could get my hands on the ancient Roman responsible for the evil grammatical construct known as the declension. My fantasies were surprisingly creative considering the general stupor I was in at that time of the morning. That, my friends, is a classic case of  Post-Festivity Latin Declension Disorder (PFLDD for short) and is a key reason why you should never skip Christmas break.

Now that I'm mostly recovered, it's time to turn my attention to cheerier matters than dead languages: my top five prepping successes of 2011.

-----


5. The Great Chicken Moat Build

This little fencing project was a huge undertaking

The chicken moat is not technically finished, much less put to use, but I had to put it in this countdown because of the sheer amount effort that went into it. Hopefully the chickens that will live in this moat will greatly cut down on the insect and weed pests in our garden, contribute delicious meat and eggs to our diet, and will be a source of fertility for our soil. The potential benefits made this difficult project worthwhile.


4. No more store-bought bread! 

Much better than sliced bread!

I have been baking bread since I was a teenager, but I never before attempted to make all of my family's bread products. After I bought a NutriMilland then a Bosch Mixer,it became ridiculously easy to grind wheat and bake as much bread as we consumed. So I started doing just that and even figured out how to use a Sun Oven to bake bread.

It feels really satisfying to make something so delicious and healthful for my family.


3. Explored new ways to preserve food

I have a few new tricks up my sleeve when it comes to food preservation. I've been water bath canning for a few years now, but pressure canning was new territory. Not only do I now pressure can with the best of them, but I regularly can meat, something that was very intimidating to me in the beginning.

Dehydrating oregano

I also learned the ins and outs of dehydrating. My new Excalibur Dehydrator is awesome, though I must admit I find it very tedious to place all the pieces of food meticulously on the trays.

Vacuum sealing with the FoodSaver

My favorite new trick, however, is using a FoodSaverto vacuum seal mason jars of dry goods. I have stored brown sugar, nuts, chocolate, raisins, shortening, herbs, and many other items with this little gadget.


2. One year of food storage*


Some of the comfort food items I bought during our Food Storage Blitz Month 

We finally have one year's worth of food storage! Sorta. If you go by the number of calories stored, we do, but we are still short several key nutrients (such as calcium and Vitamin C) and I want to add more meat to our supply. And then we'll need to add more food as our children grow and need more calories. And more fruits and vegetables would really be nice... You get the picture.

I can't exactly rest on my laurels here, but I'm pleased with what we've accomplished.

1. Garden re-do

Our new square foot gardening boxes

Hubby Dear deserves most of the credit here. He transformed our decidedly sub-par garden of years past to the Garden of Eatin' by adding square foot gardening boxes. That involved a lot of carpentry and an insane amount of soil toting and mixing.

This year was so successful that we plan on adding 19 more square foot boxes to our garden, albeit in stages. This will double the size of our current garden. I can't wait! (Read this post if you are unfamiliar with square foot gardening.)


What accomplishments in the area of preparedness are you the most proud of? Was 2011 a banner year or a bust? 

Thursday, September 1, 2011

August 2011 in Review and September Preps

I'm a bit late with my monthly summary, but here it is. To cap off a very interesting August, both of our water heaters died last weekend. It took five days for the parts to come in and for the water heaters to get fixed. No hot water when you have four young children home making messes all day in the middle of canning season? Life gets complicated and everything takes about twice as long to get done. It's going to take a few days to unearth my house from under the debris of dirty dishes, kids, and laundry.  I'm hoping September will be a better month.

August Garden:

Here's the bad news: the germination rate hasn't been great for our fall plantings.

Cauliflower hanging in there

We have a few tiny cauliflower and broccoli plants.

The Box of Death

This is the box we have christened "The Box of Death". All the strawberries we planted last spring died and now only one cabbage seedling remains. Lots of seedlings sprouted, but they mysteriously died. What gives?

Brandywine tomato plant gone wild

Our tomatoes are in a holding pattern. The insanely hot weather of July and early August caused the plants to drop flowers rather than produce fruit. Now the weather is better and flowers are setting, but we have to wait until the fruit is produced and ripe.

But there's good news.


The pumpkins are looking great. It won't be long before they're ready to pick. Our cucumbers and cantaloupe are consistently producing, too.

I'm harvesting and drying tons of cayenne peppers.

Green beans in September?

And, miracle of miracles, we have fresh green beans! Lots of them! Hubby Dear picked nearly two pounds just yesterday.

I reported last month that the green beans died, right? Well, in two of the boxes, the green beans bounced back and began producing with the mild weather we've been having.  How strange is that? It's fun to have some garden serendipity instead of garden catastrophe.


August Preps:
  • In addition to the odds and ends I picked up at Cabela's, I bought some more items for our long term food storage: local honey, oil, mayonnaise, molasses and evaporated milk. I broke down and shelled out the mega bucks for a case of dry milk. We are getting so close to having a full year's supply of food. Exciting!
  • I also added to our three-month supply: dry carrots, dry fruit, cornstarch, granola bars and cereal. My family is a crazy bunch of cold cereal addicts, so we have to build a big stockpile of it. Cereal is getting more and more expensive (like everything else these days) so it's a challenge to find bargains. 
  • Speaking of stockpiles, my budding toiletry stockpile was getting out of control. I had been just pitching items in the cabinets in our master bathroom and it was pretty chaotic. To solve this problem, I bought five storage bins and divided the stockpile into five categories: oral care, body wash & soap, skin care, deodorant, and hair care. The bins should hold about a year's supply of these toiletries for my family and items are much easier to find now.  
The beginnings of my hair and skin care stockpile

What's coming up this September? 

  • I'm so excited! Global Sun Oven is lending me a Sun Oven to take for a test drive.  I can't wait to put it through its paces. Will it really work? Is it worth the hype? Is it better for baking cookies than my mini-van? You'll be along every step of the way.
  • Of course I'll continue building our food storage. I plan to dehydrate a bunch of herbs and freeze pesto. Apple season is upon us so I'll begin canning applesauce, apple butter, and try my hand at dehydrating apples, as well. 
  • The advent of cooler weather reminds me that we need to get a back-up form of heat for our house. We plan to get a wood stove at some point, but for now, a propane heater will have to do. 
  •  I'm cutting back a bit on my prepping budget this month to start saving for my chicken coop. Hubby Dear and I are going to begin building the chicken moat this month. Since the two of us are ridiculously un-handy, that should be fun times indeed. Thankfully our marriage is strong enough to survive the trials and tribulations that are sure to unfold. ;) 

What did you do to prep or in the garden during the month of August? What do you have planned for September? 


Thursday, June 30, 2011

Reaction to Doomsday Preppers, Month Thirteen in Review and July Preps

I hope you all got a chance to watch "Doomsday Preppers" on Monday night. I enjoyed the show a lot and was pleasantly surprised it didn't have more of a "preppers are crazy" slant. Not that it was perfectly balanced and truthful, mind you. Read the Survival Mom's take on her appearance on the show if you haven't already. Some things (such as the night delivery of food storage) were staged by the production company and/or edited for dramatic effect. If you wanted to watch the show but don't have the National Geographic Channel, here ya go. (If you're reading my blog in a feed reader, you may have to come to my actual blog site to get the YouTube box to show up.)


What I accomplished in June:


1. A whole lot of gardening. Gardening may be work, but it is so rewarding to reap the rewards from your efforts. We ate all of our radishes. Our lettuce and salad mix keeps producing and has yet to turn bitter. We've also been eating regular English peas and pod peas all month, though they are pretty much done. I made a few pickled beets from The Thinker's crop and they were d-e-l-i-c-i-o-u-s! The Thinker also provided us with cabbage that I made into bierocks. Who knew homegrown cabbage was that much better than store-bought? It had such a delicate flavor and super-crisp texture.

Time to make hay while the sun shines!

2. Got a dehydrator and experimenting with drying garden produce and herbs. We bought an Excalibur 9 Tray Dehydrator and a ParaFlexx Non-Stick Drying Sheet (Yes, only one for now. I want to try it out on some fruit leather before I buy enough sheets for all my trays.) The only thing I have dried thus far is oregano, but I know I'll be giving it quite the workout over the next few months. I'll post more reviews as I try other applications.

3. Stocked up on canning supplies. I did go ahead and buy 6 dozen Tattler Reusable Canning Lids. I haven't needed to use them, so I can't really give an opinion about them yet. I did happen to buy some for my mom for Mother's Day (We're a practical family, can you tell?) and she seems to like them. I really need more jars, but they weren't in the budget this month.

Tattler Reusable Canning Lids


4. A bit more food storage, of course. I got some bottled lemon juice for canning purposes, a case of dry milk, and some spices.

5. First Aid. I picked up another box of nitrile gloves. I really was intending to buy more in this category, too, but you'll see that I spend the remainder of my budget on #6.

6. Added to our Survival Library.  I love books, real books. You won't find me anywhere near a kook Nook or Kindle. I selected these titles to add to our Survival Library:
Reviews are forthcoming. I have a review of Where There Is No Doctor that I'll post as soon as Hubby Dear finishes his contribution. Yes, Hubby Dear will finally get his say on my blog. :)

Oh, and the book about chickens? Let's just say there's something called a chicken moat in our future...

7. Hubby Dear and I also did a massive de-cluttering and reorganization of our storage room. We dropped off the kids for a weekend of candy-fueled hyperactivity with Grandma and completely filled our van with items to donate.

After: Glorious Floor Space!

I forgot to take a "before" picture, but it was bad. The middle of the room was pretty much covered with stacks of buckets and pieces of disused furniture.

Buckets tucked out of the way

Now the buckets are tucked underneath the stairs with my water storage. The process of taking everything out of the storage room helped me to update our inventory spreadsheets. Now we have a very good idea just what we have and what we need to purchase.

8. I also learned how to make yogurt from dry milk and had waaaaaay too much fun doing it. I've become such a food storage dork! Click here to read how to do it. It's easy and it really works.


JULY PREPS:

I have changed my prepping plan for July about five or six times already. Originally, I had intended to split my budget between several categories (defense, first aid, food storage, and miscellaneous). Then I started watching the Sun Oven videos posted by Crystal from EverydayFood Storage.Net and so I wanted to buy one of those. I still do want to buy a Sun Oven and everything else on my list, but I feel Spirit's whispering to me to finish our food storage. It's never a good idea to ignore the Holy Spirit (remember what happened to Jonah?), so I think July will be one of those mega-food storage months.
  1. Add to our long term food storage. We're getting much closer to having a year's supply!
  2. Try to find an aloe plant. Not really food storage (though some people drink aloe juice), but something good to have on hand.
  3. Keep up in the garden.
  4. Eat, can, freeze, or dehydrate our garden produce. Stock up on canning supplies.
What did you do to prepare in June?

    Thursday, June 16, 2011

    The Excalibur 9 Tray Dehydrator: A Review in Progress

    I'm calling this post a review in progress because I've had my Excalibur dehydrator for a just few days and I've only had a chance to try it out on one type of food. So far, though, I'm pretty happy with my purchase.

    Hubby Dear pruned back the oregano in my herb garden this morning and brought in a large pile for me to process.

    
    Mama mia! That's a lot of oregano!
    

    The best time to harvest oregano is right as it goes to flower. We cut it back to about 10" in height, which gives me an ample supply of oregano to dry for use over the next year. Normally, I dry oregano by hanging it up for a couple of weeks in my laundry room.
    
    Yes, my laundry room is the color of Pepto-Bismol. Want to make something of it?
    
    It works well and doesn't use electricity. I just had to try out my new dehydrator, though, so that's what I opted to do this time.

    Here's the Excalibur 9 tray dehydrator. It's not a small appliance.


    I've owned microwave ovens that were smaller than this.

    It's not something I would want to leave out on my counter every day. I'm not sure where I'm going to store it, though, so I'd better work on figuring something out!


    The door on the front of the dehydrator comes off, revealing 9 trays that slide in and out.

    I started out removing the leaves one by one from the stems and placing them on the tray, but I soon got tired of that. After I finished one tray like that I started loading in entire stems. 


    The dehydrator was easy to figure out how to run, even for a technophobe like me.


    I plugged it in, turned the dial, and the dehydrator took care of the rest. The instruction manual said herbs should take 2-4 hours at 95 degrees to dry. That may be true for some herbs, but not oregano on the stem! In total, it took 6-8 hours for everything to get completely dry.

    I ran my fingers down the stems and was able to easily pull the dried leaves off. I placed the dry oregano in canning jars and vaccuum sealed them with my FoodSaver.

    Last year's harvest gave me 1-1/2 pints of dried oregano leaves and I've still got a bit leftover. By the time I'm through with that pile on my table, I'll have more than 2 quarts of it. Anybody need some oregano? ;)


    Last year's oregano harvest. Multiply this by 3 for this year.

    In the future, I think I'll stick to air-drying with oregano. The Excalibur did a nice job, but it is easier to just hang it up in bundles and let time do the work. I'm curious to see if all the great reviews for the Excalibur are also true when it comes to things like fruit leathers, vegetables, and jerky.

    Sounds like a part two for this review is in order!