Showing posts with label seed starting. Show all posts

Friday, March 22, 2013

Link to a Must-Read Post PLUS DIY Seed Starting Rig Update

First, I wanted to share an interesting post about how many seeds to store/how much land you need to survive from The Survivalist Blog. If you haven't read it yet, be sure to check it out as it has some food for thought. You need to store many more seeds than you may think!

Second, remember that DIY Seed Starting Rig I made? We have been putting it to hard use and have made a few adjustments to it with experience.

Here is what it looks like today. There are plants growing on four levels of the shelving unit. If we massively increase our garden in years to come, we'll definitely have to add another shelving unit, but this will work for now.


The rig in use


We started out with only one shop light per level, but soon found that the seedlings on the outer edges of the flats were bending toward the light.


Two shop lights work better than one. You can use one in a pinch, though. 


We rotated the plants so all would have nice, straight stems, but found that it was better to just add another shop light to each level. I am so pleased with the results that we have gotten so far.


'Dwarf Blue Curled' Kale


'Farao' cabbage. These babies need transplanted soon. 


'Waltham 29' Broccoli' 

Our broccoli plants are getting extra TLC at the moment. They got a little stressed for water (see below) and  appear to need some additional fertilization. I'm paying close attention to their moisture levels and dosing them with liquid kelp and effective microbes.

The above plants were all started a month and a half ago and are certainly large enough to be hardened off and transplanted outdoors. There's just one problem: we keep getting snow! We're supposed to get another 1/2 ft. of snow this weekend.


'Purple of Sicily' cauliflower - started on March 10. We just thinned the seedlings to one per pot.

You might also notice that we have ditched the toilet paper roll seed starting pots. They work fine, but they hold so little soil that they get dried out quickly and require transplanting up into large containers. I am lazy enough that those factors make a difference for me.


'Five Color Silverbeet' - Rainbow Chard

Last weekend we planted our first seeds that require additional heat to germinate - eggplant and peppers. Tomatoes are also in that category and will be started this weekend. We bought some seedling heat mats to place under the flats that hold heat-loving plants. They raise the temperature 20 degrees above the ambient temperature of the room.


The eggplants have sprouted

Apparently it is working because we have baby eggplants. I've never grown eggplants before.

Eight shoplights + two seedling mats = a perceptibly warmer room. We think the additional warmth in the area is one of the causes for the stressed broccoli. We are paying very close to attention to moisture levels so they will outlive the lingering winter weather and survive to get transplanted outdoors.


Have you started your spring garden yet? What is growing at your house? 

Thursday, February 28, 2013

Indoor Seed Starting 101, Part Two

This is the second post in my series about starting seeds indoors. Click here for part one if you have not read it yet.
---------

Once your seeds have germinated and had a chance to grow a bit, it is time to thin your seedlings to one per pot.


Day Seven: Before Thinning


Snip, snip! 


Pick strongest seedling in each pot and use a pair of scissors to snip off all of the other seedlings. It can feel almost painful to cut healthy little seedlings, but I assure you that it is very important. You want to give the remaining seedling all the space, light, water, and nutrients so that it will grow big and strong.  We fed our thinned seedlings to our rabbits, which helped ease the pain a bit. Happy bunnies will cheer anyone up!


After thinning

                            
Tip #9: Thin your seedlings to an appropriate spacing. 

As the seedlings grow taller, keep an eye on the distance they are from your lights. You will have to move the lights up to maintain a 1-2" distance between the plants and the light. Don't forget to keep the soil moist, but not sodden, as well.

Tip #10: Check on your seedlings daily to monitor light and moisture levels. 

One extra thing you might consider doing is to set a fan blowing gently over the seedlings. This will help to strengthen their stems so they will be able to better withstand the elements when they get transplanted outdoors. Or, if you really want to be hands-on, you can softly run your fingers over the tops of the seedlings for one minute, two times per day. This supposedly will have much the same effect.

Tip #11: Strengthen those stems by running a fan. 


This is the sight that greeted me on my daily checkup seventeen days after sowing our cabbage, kale, and broccoli seeds.


'Farao' cabbage seedlings


'Dwarf Blue Curled' Kale


'Waltham 29 Broccoli'

All the seedlings were doing well, but we noticed that it was time to transplant the ones growing in the tiny toilet paper roll pots.


We moved the seedlings from the toilet paper roll pots into larger containers. 

The toilet paper roll pots work fine, but they do dry out more quickly than the plastic pots we made from recycled materials (pop bottles, milk jugs, etc.) and they only hold a tiny amount of soil. Rapidly growing plants need a bit more room.

It can be a bit tricky to transplant such tiny seedlings without harming them, but if you remember to only handle the seedling by the seed leaves (NOT the stem!), you will avoid damaging the plants.


Tip #12: Transplant as necessary. Handle only by the seed leaves, not the stem.

At this time, you should consider fertilizing your seedlings. The seed starting mix we are using is fortified with fish meal and provides enough nutrients for plants to make it to the transplant stage without additional fertilization. Many seed starting mixes are essentially void of nutrients, however, so you will need to fertilize. Use a gentle fertilizer like liquid kelp diluted in water and fertilize about once a week during one of your routine waterings. You can even make your own organic liquid fertilizers for free if you so desire.


Tip #13: Fertilize with liquid fertilizers once plants have true leaves. 


Keep caring for your seedlings like this until it is time to transplant them outdoors. Before you throw them out in your garden, however, you need to first harden them off.


See what a difference a decent light rig makes? Last year's transplants were super leggy, but at
least I hardened them off properly! Here they are hardening off on a shady porch
 between a rosemary plant I overwintered indoors and a blueberry bush. 

Hardening off is the process by which plants get acclimated to the outdoors. Start by placing a tray of seedlings in a shady area outdoors for a couple of hours. Gradually build up the time the plants spend outdoors and the amount of sunlight the plants are exposed to over a week or so. This is an essential step for happy plants that survive their final transplanting into the garden.

Tip #14: Don't forget to harden off the plants. 


That's it! Now you have all you need to know to grow healthy plants from seed indoors. Happy gardening!

Friday, February 15, 2013

Indoor Seed Starting 101, Part One

There may still be snow on the ground, but it is the perfect time here in Zone 5 to get our 2013 garden started. We had variable success starting seeds last year, but after Hubby Dear's research and an investment in infrastructure, we feel confident that this year will be more fruitful. Here's how we started our broccoli, cabbage, and kale transplants.

First, gather whatever pots you want to start your seeds in.


Toilet paper roll pots aren't just cheap - they really work great! 


We are using a mix of containers. Here is the link to my tutorial on making little pots out of toilet paper rolls.


Recycled containers drying after being dipped in a bleach solution


We are also recycling a variety of plastic containers. We washed them, drilled several holes in the bottom of each pot, and sanitized them prior to planting in a 10% bleach solution. Seeds and baby plants can be very delicate and mold or bacteria growth from an improperly cleaned container could kill them.


Tip #1: Sanitize recycled or previously used seed starting containers. 


In addition to containers, you will need a seed-starting mix. Seed-starting mix is different from regular potting soil in that it is sterile. Sterile conditions will greatly improve your chance to avoid the dreaded damping off disease and other issues that can plague seedlings started in potting soil.

You can make your own seed-starting mix. Here are a couple of "recipes" you can try: this one or that one.  We decided to go ahead and buy a large bag of it from Johnny's Selected Seeds and I noticed that even our local Wal-Mart is carrying organic seed-starting mix.


Tip #2: Buy or make a proper seed-starting mix.


The night before we planted our seeds, we poured out the amount of seed starting mix that we estimated we would need. Then we added enough water to moisten but not flood the soil. By noon the next day, the moisture level was perfect - similar to a wrung-out sponge.

Mini Me demonstrating the proper consistency of the seed starting mix

Since the soil would be consistently moist throughout, the seeds would get a serious head-start to germination.


Tip #3: Pre-moisten your soil prior to planting. 


Now that you have sanitized containers, moistened seed-starting mix, and, of course, some seeds, it's time for the fun part. Scoop the soil mix into the pots and then tap the container several times against whatever work surface you are using.


Tapping the pot

You will be surprised just how much the soil will settle when you tap the pot and eliminate air pockets. This is a simple trick that can make a huge difference in your results. Top off with more seed-starting mix if necessary and then lightly press the soil down with your finger


Tip #4: Tap, tap, tap that container! 


Then add your seeds. We put two seeds in each container.


Covering the seeds. These are "Farao" cabbage seeds. 

Then we lightly covered the seeds with soil so that the seeds would be at the depth recommended on the seed packet - about 1/4" deep for the type of seeds we planted (all are brassica or cole crops).


Planted! 

The next step was to lightly water the containers. We chose to use a spray bottle so we could gently mist everything.


Next, we placed a dome over our seed starting tray. We happened to buy a dome kit, but you don't need to get fancy. You can slide the whole apparatus into a plastic bag and it will work just as well. The point is to keep moisture in until germination occurs.


Tip #5: Keep things covered until the seeds germinate. 


Sprout little seeds! Note: we have our lighting rig on, but it is not necessary for germination. 

About 48 hours after we planted the seeds, the first cabbage sprouts poked their sleepy heads above the soil. Success!

As soon as the first seedling pokes out of the soil, take OFF your dome or plastic bag. Turn on your lights or put the seedlings in a sunny window. Here's the post about the DIY seed starting lighting rig we put together. The seedlings need a lot of light to grow into strong, sturdy plants. We have our lights on a timer so that the plants get about 16 hours of light a day.

Our cabbage sprouts on day three

Broccoli, cabbage, etc. will sprout just fine in our cool basement. The lights are 1-2" above the plants; this is to give the seedlings the optimum amount of light but it also warms them ever so slightly. We will have to provide supplemental heat for our tomato, pepper, and eggplants, however, since they are heat lovers.

Tip #6: Check heat requirements for the optimum germination. 

Cabbage on day five. 

I can already tell that this year's plants are going to be more sturdy than those we started in 2012. It is amazing how much of a difference the correct amount of light makes.

Tip #7: Let there be light! Lots and lots of light. 

Since the lights are on a timer, it takes very little of my time to care for the seedlings. They need to stay moist, but too much water can cause the seedlings to rot. We are watering from the bottom in an attempt to minimize that problem. We pour water into the bottom tray, let the plants soak up the water for 30 minutes, and then pour off any remaining water.

Tip #8: Water from the bottom. 


Don't forget to read Part Two of this post. I cover thinning, fertilization, transplanting to large containers, and hardening off in the next installments. 


Some Helpful References:

Best Tips for Starting Seeds Indoors, by Barbara Pleasant, "Mother Earth News", Dec 2012/Jan 2013
Mini Farming: Self-Sufficiency on 1/4 Acre by Brett Markham

Monday, February 4, 2013

How to Make Seed Starting Pots from Toilet Paper Rolls

We have less than a week before we sow our first seeds of broccoli, kale, and cabbage. I am so excited to be getting started with this year's gardening tasks. While the year is young and nature is still hibernating, it's easy to be full of optimism and forget the failures of last year's growing season.

Hubby Dear and I are using mostly recycled materials as pots to start our seeds in. This is quite perplexing to my mother-in-law. She really doesn't get our homesteading activities - she grew up on a farm and is very happy to live in boring suburbia today - but when she heard about what we were going to do, she actually tried to drag Hubby Dear to a home improvement store so that she could buy us some "real" (plastic) pots! No thank you, mom.

I saw a picture of toilet paper roll pots on Facebook somewhere. I wish I remember where so I could cite the source, but it seems to be a pretty common idea. This exercise in frugality is also a great way to recycle toilet paper rolls, which are something that we have in abundance. Here's how to do it.  

Hubby Dear makes a great hand model, doesn't he? ;) 

Take a toilet paper roll.


Flatten it out in one direction.


And then flatten it in the opposite direction.


This will give your toilet paper roll four corners.


While the toilet paper roll is flat, cut it in half. You can make two tiny pots of the size suitable for seed starting from one toilet paper roll. We also used paper towel rolls and were able to get 5 pots from one of those rolls.


Now make small (1/2") cuts on the corners that you created by flattening the tube in two directions. There are four corners, so make four cuts.


Here the tube has been cut and is now ready to be folded.


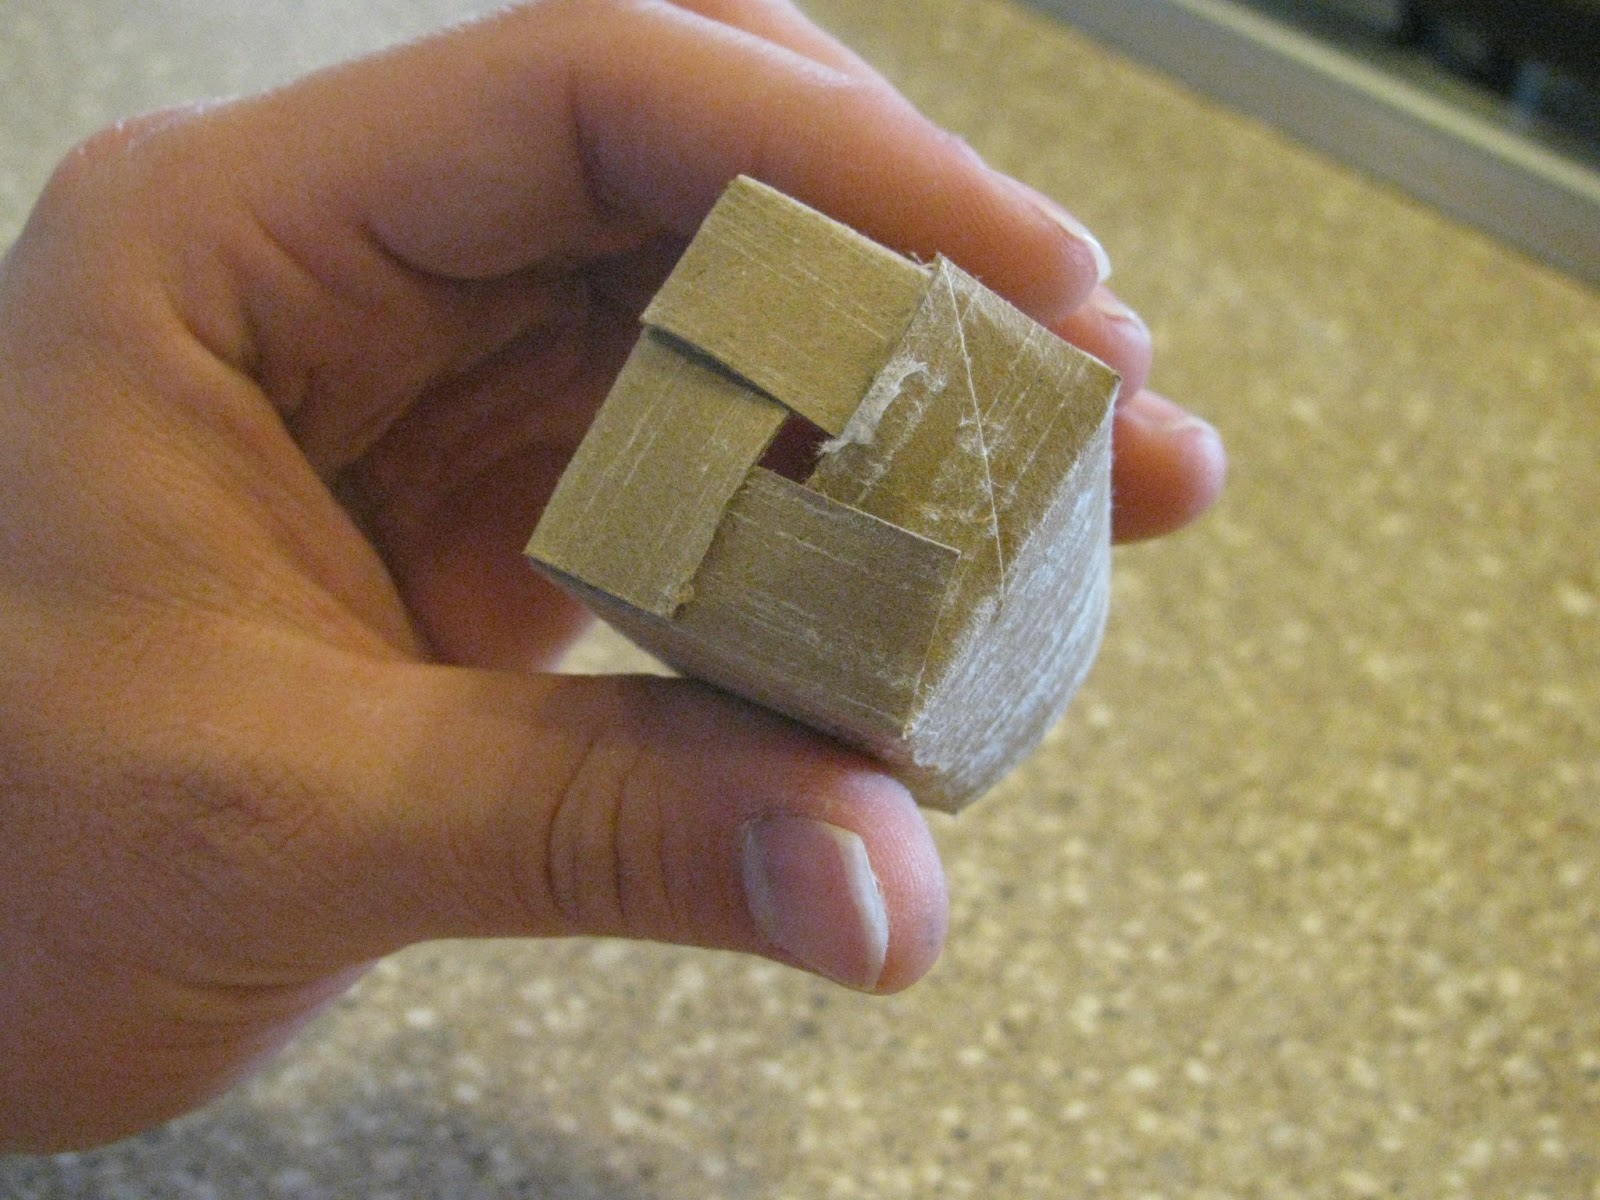
Start folding the flaps in to create the bottom of the tube.


If you tuck the flaps under just so, they will stay in place perfectly. It is just like how you can secure the top flaps of a cardboard box under each other.

The finished product

That's it! The finished pot is about the same size as the pots made from Jiffy Peat Pellets.  Once you get the hang of it, they come together very quickly.


We have about 64 of these little guys already made.


Eventually, the seedlings started in pots like these will grow too big for the container and will have to be transplanted. That's why we've saved our milk jugs, 2 liter bottles, etc. for the last month. No need to buy pots here!

We will plant our first seeds in less than a week, so I'll be able show these pots in action soon.

Saturday, February 2, 2013

2013 Garden Plan

I thought it was high time for me to share our 2013 garden plan. As usual, we have high hopes for a fabulous year in the garden. As I shared last month, we are going to start many of our crops from seed indoors using our DIY seed starting rig. We will grow several new species of plants as well as a few varieties that are new to us. Hubby Dear has been spending a lot of his spare time reading about new techniques that we can use to boost yields in our garden. In an attempt to fight back against the wee vicious beasties (a.k.a. squash bugs) that devastated our zucchini crop last year, we are incorporating some flowers to attract beneficial insects and will also try using row covers. 


The north half of the garden. 

I'm sorry the plan came out so blurry, but hopefully you can read it well enough to follow along. Assuming there are people following along. I know not everyone finds garden plans as entrancing as I do! We bought our seeds from a variety of catalogs. Baker Creek Seeds, Seed Saver's Exchange, Johnny's Selected Seeds, and Peaceful Valley are my favorites. I also bought a few seeds I couldn't get elsewhere from Southern Exposure Seeds and Territorial Seeds.

Zucchini - We're trying Costata Romanesco again this year. The one tiny zucchini we ate before the wee vicious beasties destroyed our plants last year was fabulous.

Watermelon - Golden Midget is another re-do from last year. Our vine plants just were eaten up by bugs and didn't produce much.

Cucumber - Boston Pickling We grew 'Double Yield' from Seed Saver's Exchange last year and it was a total bust. Time to try something new.

Corn - We are planting Golden Bantam again this year. Despite living in the corn belt, we have the worst luck growing corn. We think Golden Bantam would have been a good choice for us but we planted it too late last year. If at first you don't succeed...

Pumpkin - We have successfully grown 'Baby Pam' in the past, but decided to try Winter Luxury Pie Pumpkins this year. I wish I had room for all the varieties of squash I'd love to grow.

Kale - Dwarf Blue Curled  I'll be honest. I've never tried Kale before. Not that I haven't wanted to, but it is not something that our podunk small town grocery store carries. Everyone I know raves about how good kale is (especially in chip form) and how good it is for you, so I thought it was time to grow some. If we don't like it, at least poultry will appreciate it.

Garlic - We grew Music variety garlic last year, enjoyed a nice harvest, and saved back some of the best heads for this year's crop.  You can read about how we planted our garlic this past fall here. Now that I have finished using all our garlic from 2012, I know how much more I should have planted for this year. I need to double or triple this next year!

Onion - We hope to get the hang of seed starting this year so we can start our onions indoors from seed next year. In the meantime, we are buying pricier plants of Patterson storage onions.

Strawberries - Our plants from 2011 and 2012 survived the summer and have nicely filled in. The Lord willing, we should have an excellent harvest of Earliglow and Tribute strawberries this year.

Lettuces - We are planting Encore Lettuce Mix and Winter Density, two favorites of ours. We are also adding Forellenschluss, a pretty spotted lettuce whose name means 'Speckled Trout Back'. Fun!

Spinach - We grew 'Corvair' last year and really liked it. I only eat spinach as a baby salad green and I don't like savoyed leaves, so it worked great for us. Unfortunately, Johnny's no longer carries that variety so we will be growing its replacement, Pigeon.

Tomatoes - Ah, the king of the summer garden! We have some new tricks up our sleeves to use on our tomatoes this year. Our yield was drastically reduced by the weather, but we think that with sufficient mulching, proper watering, and pruning, we might do better this year, even in a drought. We are growing Amish Paste, Green Zebra, Brandywine (Sudduth's Strain), Gold Medal, Italian Heirloom, and Dester varieties. Baker Creek sent us a free packet of Gypsy tomato seeds, so we will be attempting to start that variety from seed. The rest will be transplants. We didn't want to chance our whole summer's crop on beginner seed starter's luck!

Peppers - Peppers will be one of our most challenging plants to start from seed this year. More on that in mid-March when we start them. We are growing Bull Nose Bell, Chocolate Beauty, Traveler Jalapeno, Aurora, and King of the North.

Broccoli - We hope that by starting Waltham 29  indoors that we will actually get to taste some homegrown broccoli. We're planting broccoli, cabbage, and kale in mid-February, so more on that soon.

Cauliflower - Hubby Dear really wanted to grow Purple of Sicily which is, unsurprisingly, a purple cauliflower. I remain skeptical about this choice.


The south half of the garden. Next year we will finally have all our garden boxes
built for a total of  608 intensively managed sq. ft.

Green beans - How could we not go with our famous "zombie beans"? Just when you think they are dead from the heat of summer, they spring back to life and produce a second crop. Provider it will be again this year.

Cabbage - Farao is one of the very few hybrids that we still grow, but I am very loyal to this variety. It is easy to grow and tastes great. I just need to learn to like sauerkraut so I don't have to make umpteen batches of  bierocks when the cabbages all get harvested at once!

Radish - Radishes were one crop that we were never short of last year. We are growing Early Scarlet Globe, Watermelon, and White Icicle this time around. I vaguely remember reading about someone using White Icicle Radishes as a trap crop for aphids and other pests, so that is why that variety got added to the mix.

Cantaloupe - We will grow Kansas again.

Carrot - The carrot is our gardening nemesis. It doesn't matter what permutations we have tried with watering, depth of planting, etc., we have not had very good luck with carrots at all. Hope springs eternal, because we're trying again, this time with Bolero pelleted seeds.

Peas, Pod - Sugar Sprint, another repeat.

Peas, Shelling - We're switching to Little Marvel for reasons of economy. We really liked the Lincoln variety we grew last year but this kind is much cheaper. Those pennies add up.

Beets - We're trying Chioggia again as well as Detroit Dark Red.

Swiss Chard - Five Color Silverbeet We're growing an awful lot of this vegetable and no one in our family even likes it! It is very pretty and the poultry loves it.

Eggplant - Again, not a vegetable that most folks in my family will eat, but Mini Me wants to grow it and we're starting Florida High Bush eggplant from seed.

Potato - Yukon Gold again.


We've got our fingers crossed that the insanely hot temperatures and drought abate this summer so that all the love we're pouring into our garden will translate into some actual food. While I love square foot gardening, we found out the hard way that heat and drought hits a raised bed filled with Mel's Mix much harder than it does the soil at large. That's one reason we'll be deepening our boxes in upcoming seasons.


Beneficial Insect Attractants/Companion Plants: 

We garden organically, so the only pesticides we will use in our garden is my pest repellent spray, a bit of Bt (a type of bacteria that kills caterpillars) for cabbage worms, diatomaceous earth for creepy crawlies, and some neem oil for wee vicious beasties like squash bugs.

This year we decided to focus on attracting the good kind of insects to our garden, the kinds that will eat the baddies up while leaving our veggies alone. Certain flowering plants attract beneficial insects and our plan is to sprinkle them liberally around the garden. They include:


Calendula
Marigold
Borage
Nasturtium
Dill and Basil - We usually plant these only in my herb garden near the house, but they are also awesome beneficial and companion plants.

I'll be interested to see what difference these plants will make in our garden. At the very least, it will be more colorful!


Out of the garden:

We never have enough room for all the plants we want to experiment with.

Jellymelon - Hubby Dear has been intrigued by this plant for years. Also known as the African Horned Cucumber, it supposedly tastes like a mix of pomegranate and citrus. I wasn't willing to substitute this for cantaloupe or another of our regular vine plants, so we will try to grow this among the baby trees in our orchard.

Sunflowers - We grew Peredovik black oil sunflowers for our birds last year. They loved it! We are tripling the amount we are going to plant, plus adding American Giant sunflowers and a Sunflower Mixture just for fun. The sunflower patch will be sited south of our main garden and east of our orchard.

"Chicken Mix" - We are going to build our birds their very own square foot garden (covered with hardware cloth so they can't scratch it up) in their run and sow it with an Omega 3 chicken forage blend.


That, more or less, is what we have planned. Have you made your garden plans and purchases yet? 


Saturday, January 19, 2013

DIY Seed Starting Set-Up

Now, I'm not the kind of girl that needs to have the latest or most expensive kind of purse or shoes. Far from it, actually. I have exactly one black leather handbag which I bought in 2004. I spent $90 on it back then, so I feel like I should be able to get at least another couple of years out of it.

Those kind of objects don't tempt me to spend a lot of money, but homesteading gadgets and gewgaws do. When I saw this lovely seed starting set-up from Gardener's Supply Co., I nearly started to salivate. 

3-Tier Sunlite Garden, sold by Gardener's Supply Co.

We attempted to start some of our vegetable plants from seed last year and had mixed results. The main problem was that the plants got leggy due to lack of adequate light. This doodad would completely eliminate that problem. There's room to start quite a few seedlings or nuture larger transplants and the level of the light fixtures is easily adjusted.

There's just one problem. The Sunlite Garden costs $599, shipping not included. Ridiculous, isn't it? No worries. You can create your own, even larger version of this set-up for a fraction of the cost. 

Here's how we did it:

Materials List: 
  1. One  74"x 48" 5-Tier Shelving Unit - $79.97 at Lowe's 
  2. Four 48" T8 fluorescent shop lights - $17.98 each at Lowe's
  3. One 12 pack of 4' T8 Cool White Fluorescent bulbs - $29.98 at Lowe's
  4. Eight S-hooks - 78 cents for two at Lowe's 
  5. One power strip with timer  - $13.98 at Amazon.com
GRAND TOTAL FOR HARDWARE: $198.97 plus tax

We assembled the shelving unit and then hung the shop lights from each shelf

I found out from my research that you don't have to use special lights to grow strong seedlings. A standard fluorescent light will work provided that you can adjust it so that it is 1-2" above the seedlings. Shop lights already come on 9" chains; all you have to do is buy a few S hooks to hang them from the shelving unit at the level you need. Seedlings need about 12-14 hours of light a day and a power strip on a timer makes it easy to provide the right amount of light while saving energy.

The level of the shop lights can be easily adjusted using the chains and S hooks

Other expenses: You will also need something to start your seeds in. You can buy sterile seed starting medium or make your own. We plan on recycling toilet paper and paper towel rolls for seed starter pots (read about how to do that here) and milk jugs for larger transplants, so those will be free.  We invested in some leak-proof seed starting flats, clear domes to cover the flats during germination, and a couple of heat mats to use with the most heat-loving plants. We will be starting seeds inside our house, but if you are planning on doing it out in a garage or cold basement, you will need to have a source of heat for the seedlings.


We'll be starting our first seeds in less than a month. I can't wait to put this system into use! I think I'll take all the money we saved and buy something truly useful.... like more chickens!

Reference:

Best Tips for Starting Seeds Indoors by Barbara Pleasant in the Dec 2012/Jan 2013 issue of Mother Earth News  

--------------

Anyone else starting seeds indoor this year? What kind of set-up do you employ?

Sunday, January 13, 2013

January has been "Prep-uary" at our Place

We've been very busy this month with prepping-related projects.


  • Hubby Dear and I cleaned and organized our storage room. It had collected a lot of odds and ends and, frankly, it was becoming a bit of a dump. I inventoried our long-term food storage and came up with a long list of items I need to buy. We've used some things that we need to replace. According to the food storage calculators, our family now consists of four adults and two children (children 7 and up are "adults" for food storage purposes), which means that I also need to increase the amount of food we store in general. 


Once we cleared out the clutter, it became apparent that we had used A LOT
of our food storage and never replaced it.


We also have a lot of canned goods that need to be eaten and restocked. Rotate, rotate, rotate! 


We still have some of the onions we grew last year left. They are stored in cheap pantyhose, which works
pretty well to keep them fresh and mold-free. You'll notice that a few of them have sprouted, though!
  • Because of some health concerns that I have, I started following a Paleo diet back in December. I no longer eat grains, legumes, dairy, refined sugars, or refined fats. In other words, I can't eat most of our food storage! I hope that this way of eating will help resolve some of the problems I have as a result of chronic inflammation in my body, but it does provide a challenge to store food that meets the criteria of my diet. I'm brainstorming a list of Paleo-friendly foods to add to our storage and this is what I've come up with so far:  sprouting seeds, canned coconut milk, coconut oil, lard, nuts in the shell, and canned tuna and salmon. Anyone else out there who is both Paleo and a prepper? I'm curious to see how you handle this dilemma. 
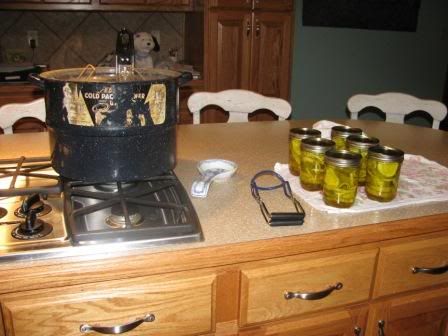
  • As I was organizing my storage room, I decided that my vintage, 1940s-era water bath canner had finally bit the dust. It is just too rusty and decrepit to use any more. Identical products on Amazon.com had very poor reviews - I guess they don't make granite ware like they used to - so I invested in a Victorio Stainless Steel Multi Use Canner.  This product can be used as either a water bath canner or steam canner and seems really sturdy. I've never steam canned before - have any of you? 
RIP, vintage water bath canner. You gave me (and others) years of good service.

  • Hubby Dear and I ordered our seeds for the spring and bought the components of our DIY seed starting set-up. I am excited to share with you our plans for the year in an upcoming post. It won't be long before we'll be sowing broccoli, cauliflower, and kale indoors. 
Seeds, glorious seeds! So much promise is inside these packets. 


  • Some friends of ours are downsizing due to job loss and health challenges. We bought a generator and some other homesteading paraphernalia from them, which served to help both of our families out. 


Our "new" 5500 W generator.

I did the math, and this generator will run one of our refrigerators and the furnace fan and that's it. It is definitely not a total solution to a long-term power outage, but it is a start. Now I need to stockpile some gas tanks, gasoline, and Sta-Bil.

Have you been celebrating "Prep-uary" at your house? Tell me what you've accomplished so far in 2013. :)