Saturday, July 16, 2011

Review of Tattler Reusable Canning Lids PLUS My Best Blackberry Jam Recipe

Last month I bought 6 dozen Tattler reusable canning lids. I finally had a chance to put them to the test last week.


The typical canning lids available everywhere cannot be used more than once. They also contain BPA, which has been shown to be a health hazard. Not only are Tattler lids reusable almost indefinitely, but they also are BPA free. I was eager to give them a shot.

Each canning lid consists of a rigid plastic lid and a flexible rubber ring. The rubber ring takes the place of the sealing compound. You must also use metal canning lid rings but they are NOT included with the Tattler lids.

The procedure for using the lids is a little different. It is easy, but it definitely takes some getting used to.


  1. Scald the lids and rings. Keep hot while you prepare your product.


  2. Place the rubber ring on the lid and center the lid on your canning jar.


  3. Barely screw on the metal ring. Make sure the canning lid is centered on the jar, then hold the lid down with one finger as you tighten the metal ring.


  4. Once the ring is tight, unscrew it by 1/4 inch to allow for venting during processing.


  5. Process the jars according to your recipe directions.


  6. Once you have removed the jars from the cannner, carefully tighten the ring completely.


The trickest part of the procedure is tightening the ring after processing. The jars are extremely hot and even though I was using a pot holder, I still managed to burn my fingers.


So, do these lids work? After processing several jars of blackberry jam both with standard and Tattler lids, I would have to say yes. My first batch of 8 jars, all using Tattler lids, yielded three that failed to seal. I have never had a jar fail to seal in all my years of canning, and so I was really disappointed. However, I have learned from sad experience that if a product has received rave reviews and I have issues with it, it is more than likely operator error! I decided to try again.


My second batch of jam had 5 jars with standard lids and three with Tattlers. All the Tattlers sealed and two of the standard lids didn't seal. In my third batch, one of the standard lids didn't seal. I think the problem is more me than the canning lids! I'm thinking that maybe I didn't clean the rims and threads well enough before I put the lids on.


All in all, if you do a lot of canning, I think Tattler lids are well worth the investment. They are more expensive initially, but last practically forever. From a preparedness standpoint, they are essential. From an environmental and health perspective, they are great, too. I recommend them.


Here's the recipe I used to put the Tattler through its paces. It is my favorite rendition of blackberry jam. I prefer to crush my berries with a food mill so I can control the amount of seeds that end up in the finished product.


Blackberry Jam

Blackberries to yield 4 c. crushed - read directions below. I find it takes me about 50 oz. of berries.
7 c. sugar
1/2 t. unsalted butter (this will help reduce foaming)
1-3 oz. pouch liquid pectin

Process blackberries through a food mill fitted with a berry screen. Run the pulp through the mill twice to extract the maximum amount of juice. Measure out 3 c. of juice and add 1 c. of the pulp back to yield 4 cups total.

(Note: If you do not have a food mill, you can just crush berries with a potato masher. Your jam will have more seeds and texture, but it will taste just fine.)

In a large saucepan, combine blackberries, sugar, and butter. Over medium-low heat, heat the mixture until the sugar is dissolved, stirring constantly. Increase heat to medium-high and bring mixture to a full rolling boil, stirring constantly. Stir in the pectin and boil for one minute. Stir, stir, stir! Remove pan from the heat and skim off any foam.

Allow jam to cool 5 minutes, gently stirring a few times. This will help keep the juice and fruit evenly distributed in the finished product. Ladle the jam into hot jars, maintaining 1/4 inch headspace. Add your lids and process the jam for 10 minutes in a 200 degree water bath.

Yield - About 8 half-pint jars

Friday, July 15, 2011

Why I'm Not Canning Green Beans This Year

We've harvested over 15 pounds of green beans from our garden so far. Assuming the garden survives the next week (the highs are projected to be in the 100s for the next seven days), we'll continue to get beans for several weeks.


Normally, I'd be canning all those green beans. Not this year. Here's why:
  1. The beans don't develop all at once. We pick beans every other day and end up with enough beans to fill about two or three quart jars. While pressure canning green beans isn't hard, processing 2-3 qts every two days for weeks on end is kind of a drag.
  2. My family really doesn't care for canned green beans. There are few things more depressing than to proudly serve my home-grown and home-canned green beans only to have everyone avoid eating them. Well, Baby Dear loves them, but everyone else only eats them out of a sense of duty.  
  3. My family will eat frozen green beans - and they couldn't be easier to prepare. They stay a vibrant green and are definitely not mushy. They also maintain more of their nutrition since they are significantly less processed.

How to prepare green beans for freezing:

Getting ready to blanch the beans
  1. Wash the beans and remove the stem ends. I remove both ends of the bean, but you can leave the little curly end on, if you prefer.
  2. Bring a large pot of water to boil.
  3. Blanch the beans in boiling water for three minutes. Drain, then chill the beans in ice water for another three minutes. Drain. While it may be tempting, don't skip this step. You must blanch the beans to deactivate the enzymes in the beans. You'll end up with a much nicer end product with the blanching/chilling process.
  4. Package and freeze.

Vacuum sealed and ready for the freezer 

As a person who has made preparedness her hobby, I get in this mindset that all my food storage has to be shelf stable. I still love to can and I believe that the majority of my food storage should indeed be shelf stable. Sometimes you just gotta do what you like and do what works for your family. We're going to eat these green beans with pleasure and be a bit more self-reliant in the process.


Are we the lone canned green bean haters out there? How do you balance shelf-stable vs. perishable foods in your food storage? 

Thursday, July 14, 2011

Fall gardening

It's prime gardening season. The cucumbers are coming by the bucket-load, we're finally getting some tomatoes, and it's hot enough to bake cookies in the car. Time to plan and plant your garden for those chilly fall days!

Believe it or not, it's true.

This is our first real effort at fall-time gardening.  In previous years, we have either been too tired or disillusioned with garden failure to attempt it, but with things going as well as they are, we decided to jump in. I hope the following tips will help you if you're toying with the idea of gardening this fall.

Research, research, research!

The first thing we did, and the first thing you should do if you're considering a fall garden for the first time, is to find out what you can grow in the fall in your area. Your state extension service (usually connected with a land grant university) is a good place to start for this kind of information. Click here if you need help finding  your state extension service.

For example, a lot of you may be able to grow peas as a fall crop. Not us. It just won't work in our area because of our torrid summer temperatures. I didn't believe the warnings from the state extension service and tried it out last year with dismal results. I learned my lesson!

After our research, Hubby Dear and I decided that we would try and plant:
  • Lettuce - We're planting the same Winter Density romaine that we had such great results with in the spring.  
  • Salad Mix - This time we're going with Johnny's Wildfire Lettuce Mix. I was attracted to this mix because it has a higher proportion of red-leafed lettuces (ie. it's purty!)
  • Spinach - This is a new crop for us. We're planting Red Cardinal.
  • Beets - The beets we planted this spring made wonderful pickled beets. I'm hoping for a bountiful crop this fall. We're planting Red Ace, the same variety from the spring.
  • Broccoli - This, as well as cauliflower, is something we've never tried to grow. We're going to direct seed it in our garden. Our state extension service both recommends direct seeding broccoli and cauliflower AND warns against it in the same document. I guess we'll see what happens! We're planting the Bay Meadows variety.
  • Cauliflower - See broccoli. We're trying Amazing, which is supposed to withstand both heat and cold. If it grows, well, that would be amazing!
  • Carrots - We've liked the Nelson carrots from our spring garden. We're going to try them again this fall.
  • Radishes - Radishes can get pithy and/or very strong tasting in the heat of summer. We're trying a new variety, Crunchy Royale, and seeing how it does. 
  • Cabbage - We loved the Farao we had in the spring, but it is a spring-only variety. We're trying the very non-poetically named Storage No. 4 for the fall.
  • Swiss Chard - I'm embarrassed to admit that I've never even tasted chard, much less cooked or grown it. This will be a new adventure all the way around. We're growing Bright Lights, which looks like it will be a beautiful addition to our garden.  


Here is the resulting garden plan:


Personalize the plan for your garden - especially if you Square Foot Garden 

All the squares in orange represent existing plantings. If you look closely, you'll notice that we had to add in a few squares of "overflow" for our pumpkins and some of the tomatoes. These plants are not behaving themselves and sticking to their assigned squares and we haven't had the heart to pinch them back. We're just going to give them wide berth and plant around them.

You'll also see our strange checkerboard of cabbage in the southwest corner of our garden. First of all, that area was supposed to be strawberries. Every single last strawberry plant there died. Major bummer and quite the head-scratcher. (Our working theory is that Hubby Dear over-fertilized them. He fertilized Mini Me's strawberries in her box at the same rate and about half survived. Who knows what happened?) We'll try again next year, but this fall we thought we'd try cabbages there. We're planting them in the checkerboard arrangement because we found that our spring cabbage got so huge that it needed extra room.  

Beat the heat

In addition to selecting the right types of plants for your climate and the best varieties of those plants for fall gardening, there are a few things to keep in mind as you establish your fall garden during the hot months of July and August.  
  1. Plant seeds slightly deeper than you would in the spring. Deeper soil will be slightly cooler and more moist, and that can increase your germination rates.
  2. You're also going to want to plant more seeds than you need. Those hot August temperatures can stifle germination, so it's better to over-seed just in case. You can always thin out the extra plants later.
  3. Lastly, don't forget to water, water, water, especially as the seeds are germinating.


Are you a fall gardener? Do you have any tips to share?


Tuesday, July 12, 2011

Can You Use a Mini-Van to Bake Cookies?

Like much of the nation, it has been darn hot around here the past few days. Day after day of 100 degree+ temperatures must have caused me to crack, because this afternoon I got the notion to try and bake cookies in my van. You've probably seen people on the news frying eggs on the sidewalk during heat waves. An egg just wasn't going to cut it; I wanted chocolate chip cookies.

A quick Google search led me to the Baking Bites blog where someone had already tried baking chocolate chip cookies in her car.  I "preheated" my van while I made the dough. I pulled my van out of the garage and pointed it towards the west-southwest, where it would get the maximum amount of afternoon sun. I used the Baking Bites recipe as a starting off point, adding in a few drops of double-strength vanilla extract and using regular size chocolate chips instead of the mini-chips specified.


Dished out and ready to bake

The Baking Bites recipe uses a slice and bake method to form the cookies. I chose to forgo this, relying instead on a cookie scoop like this to dish out equal amounts of dough. I gently flattened each cookie with my hand, hoping that would help the cookies bake evenly. The author of Baking Bites blog also lined her cookie sheet with parchment paper. I skipped this and simply sprayed the pan with cooking spray. The reason? I've watched enough videos about solar ovens to know that dark-colored cookware works best and white parchment would reflect the sun's energy. My old aluminum cookie sheets would have to do.

I placed a double layer of towels on the dashboard, placed my cookie sheet on top, shut the door, and crossed my fingers. The temperature outside was 100 degrees according to the National Weather Service, a brutal 108 degrees according to the thermometer on my deck and the perspiration on my body.


The baking begins!


Unfortunately, I didn't think to place a thermometer inside the van, so I'm not sure how hot it eventually got in there. I checked the cookies (from the outside) every 30 minutes. I didn't want to let the heat escape so I kept the door shut.

At thirty minutes - the cookies have spread out and look moist


One hour has elapsed - not much has changed, but they have spread out a little more

I'll spare you the photo at an hour and a half. It pretty much looked the same as at one hour. At this point I was wondering if this would really work.

When I went outside at two hours, I went ahead and opened the door and touched a cookie. To my utter shock, they were done!

Pallid, but cooked!


How do cookies baked in a mini-van compare to those baked in an oven?

When you cook in a mini-van (or any solar oven, for that matter) things don't brown quite like they do in a standard oven. The cookies on the left were baked in my oven; the ones on the right came out of the van. As for the taste test, I much preferred the ones from the oven, though I wouldn't turn my nose up at the mini-van ones. The Thinker actually preferred them.

 So there you go. You CAN bake in a mini-van.

Monday, July 11, 2011

Babies

I just love babies! They're so tiny and sweet. Sure, they take up a lot of time. You've got to feed them and clean up after them and sometimes, they drive you crazy. But they are just so darn cute...


Baby watermelon (Aptly named variety: Little Baby Flower)


Teensy weensie cucumbers (Alibi)


Precious little pumpkin (Another appropriate variety name: Baby Pam)


One cute cantaloupe (Minnesota Midget)


We found this egg in our raspberry brambles a few weeks ago.I don't know if the baby hatched out of this mystery egg or if something ate the contents.

What a joy it is to nuture a baby (or a garden) and watch it thrive!

Sunday, July 10, 2011

Using Your Food Storage: Spicy Raisin Flats

Before I got married to Hubby Dear, I went through my Mom's recipe collection and copied all her best recipes into a little cookbook of my own. Not surprisingly, these old-fashioned favorites are some of my most frequently used recipes.

And then there's this recipe:

My copy of the recipe for Spicy Raisin Flats


I vaguely remember my Mom making these cookies when I was a kid, but it has been at least 20 years since I've cooked or eaten a Spicy Raisin Flat.  I remember them as dense, sweet, bar cookies full of warm, spicy flavor. And the best thing? They can be made entirely from food storage.

My original copy of the recipe was missing a few key pieces of information: how long they cook, at what temperature they cook, and the quantities of the glaze ingredients. I just winged it and it turned out fine. I've re-written the recipe for clarity and to reflect my "winging".

Warm out of the oven


My kids absolutely LOVED these cookies. The Thinker said they taste like Christmas.  See if you agree.

Spicy Raisin Flats


Spicy Raisin Flats

1 c. raisins
1 c. water
1 t. ground cinnamon
1/2 t. ground nutmeg
1/2 t. ground cloves
1/2 c. shortening
1/2 c. brown sugar
1/2 c. white sugar
1 egg (or 1 T. dry egg powder + 2 T. water)
2 c. all-purpose flour
1 t. baking powder
1 c. powdered sugar
1-2 t. milk (can be reconstituted dry milk or even water in a pinch)

Preheat the oven to 350. Combine raisins and water in a small saucepan. Bring to a boil and simmer until only about 1/4 c. of juice remains. Stir in cinnamon, nutmeg, and cloves and set aside.

In a large bowl, mix together shortening, both types of sugar, and egg. (If you are using powdered eggs, just add the water at this point.)

In a medium bowl, stir together the flour, baking powder, and powdered egg (if using).

Mix the flour mixture in with the shortening mixture. Then add in the raisin mixture. Spread on a greased, rimmed cookie sheet and bake until set, about 15 minutes. These cookies are meant to be moist and soft, not crispy.

In a small bowl, slowly add just enough milk to the powdered sugar to make a thin glaze. Ice the cookies while they are still hot. The more glaze, the better these cookies taste. Allow to cool, cut, and serve.


Friday, July 8, 2011

Playing Taps for My KitchenAid and Other Miscellany

Back when I was a child bride, Hubby Dear loved to indulge me by buying kitchen equipment that we could not afford. I've never been one for jewelry, but I always want the latest, greatest kitchen gadget. For Christmas one year, he bought me the mixer of my dreams - a KitchenAid Professional 600

Rest in Peace, dear KitchenAid 

My KitchenAid served me well for over ten years. I was never totally happy with the job it did kneading bread dough; the dough seemed to just ride around and around the dough hook rather than get kneaded. Last week, I was making a double batch of EZ Whole Wheat Bread in it and things got truly ugly. First, I smelled a "hot" smell. I turned the mixer off for a minute or two, but I still had 7-8 minutes of kneading left, so I felt like I had to turn it back on. Big mistake. Smoke began pouring out and it quit running. I hoped that it would begin working again after a long cool down, but, alas, it seems like I killed it really and truly.

Hubby Dear and I debated fixing up my KitchenAid vs. buying a new mixer. From the research I did, it seems like it can be just about as expensive to fix a stand mixer as it would be to buy a new one. If I'm going to have to spend hundreds of dollars anyway, I'd just as soon get a new mixer, preferably one that is better for making bread. So I'm getting a Bosch


I don't think the Bosch will look very cute on my counter, but the fact that you can make up to 6 loaves of bread in it at once more than makes up for that! This month, many Bosch retailers are offering a $50 rebate, which helps make it more reasonable. Still, it's quite an investment. I hope it lasts me a decade like its predecessor.
----------------

I bought an aloe plant this week, too. Much easier on the budget than a Bosch! ;)


Aloe vera


I'm not much on houseplants - if I can't eat it, I'm not interested in messing with it - but it seems like my neglect won't kill it.  As I read here, aloe plants need a bit of sun and very little water. I think I can do that. Here are some of the uses of aloe plants. I think an aloe plant is an excellent addition to our first aid supplies.  
---------------

I was walking through the garden the other day and I ran smackdab into this:


Yuck! A Tomato Hornworm!


This is the first time we have ever had tomato hornworms in our garden. I can safely say that they are one of the most disgusting garden pests I have ever seen. Not only are they disgusting, but they are also very destructive. They can reduce a healthy tomato plant to a skeleton in 24-48 hours. Tomato hornworms are found most often on tomato plants (surprise), but they also like potatoes and peppers, which are members of the same botanical family.

Picking them off by hand is the preferred method of dealing with this pest. Yeah, um, no. I'm not going to do that. Have I ever mentioned that I have a serious phobia of caterpillars and butterflies? (Really. Long story involving a traumatic childhood incident.) This is the biggest, most foul caterpillar I've ever seen, and I have no intention of touching one if I can help it. Hubby Dear did remove it from the plant and then he sprayed our tomato plants with Neem Py (an organic-approved pesticide with neem oil and a bit of pyrethrin).

I was nervous that our outrageously healthy tomato plants would be consumed overnight, but when the next day dawned, everything seemed OK.

Last night, however, we saw three hornworms. There were two on two different tomato plants and one on our potatoes. Ick! Hubby Dear picked them off and then he dusted the tomatoes and potatoes with Bt, another organic-approved pesticide. Bt is actually a bacteria, Bacillus thuringiensis, that kills caterpillars. I'm crossing my fingers that this does the trick. I will cry if my tomatoes get ruined before we ever get to eat them, and by caterpillars to boot!


That's my week in a nutshell. What prepping/gardening/food storage -related things have you been up to?

Monday, July 4, 2011

This is Why I'm a Square Foot Gardening Evangelist!

Those of you who are completely uninterested in gardening are going to have to excuse me because I have more garden photos to share. When you have had a few years of gardening disappointment, you really appreciate a flourishing garden. These (woefully smudged) photos were taken in late June. We garden in zone 5.


The corn is growing up into its support


I find pumpkins to be a fascinating plant. You can almost see it grow right before your eyes.

It didn't take long for the pumpkin to sprint up the trellis.

Baby pumpkin

Our tomato and pepper plants are getting so tall and extremely bushy. They are setting fruit like crazy. I can't wait for those first ripe tomatoes!


Peppers in the foreground, Brandywine tomato in the rear.

The potatoes want to take over the world. You can see a bit of the green beans
 in the foreground. That bug repellent really works!

The blackberries are slowly turning pink.


"Triple Crown" blackberries

Now that you have seen our garden this year, take a look at these photos I took on June 26, 2010.

Our first square foot box of beans; cucumber, canteloupe, and watermelon hills; peppers, and tomatoes.


The most pitiful stand of corn in the Midwest. Our blackberries are tiny, too.


Same climate, same gardeners, many of the same varieties of plants. I'd say square foot gardening has made a remarkable difference, wouldn't you?

How is your garden doing? Any successes or failures to report?

Saturday, July 2, 2011

"Where There Is No Doctor": A Review

Over the past few months I've used my prepping budget to build up our survival library. As promised, here's the first of many book reviews I'll be sharing.
--------

Have you seen the show on the Discovery Channel called "Dual Survival"? It pairs Cody Lundin, a barefoot, New Age hippy, with Dave Canterbury, a no-nonsense army vet. The most interesting part of the show is the dynamic between two extremely different people as they work together to survive in extreme scenarios.

Hubby Dear and I are a bit like that, I guess. He's extremely no-nonsense. I'm full of nonsense, which in this analogy makes me the hippy of the relationship. Hey, I do like granola.

One of the "dual"aspects of our relationship is that Hubby Dear is a physician and I... am not. We both took a look at the Hesperian Foundation's Where There Is No Doctor and we'll give you our separate perspectives on it.


Where There is No Doctor is often recommended. But is it really worth
adding to your survival library?


The Harried Homemaker's Take:

If you're looking for a book to learn about first aid or some at-home remedies for common medical ailments, this is probably not what you're looking for. This book was written as a handbook for aid workers and/or villagers in third world countries. I'd like to hope that the USA's medical infrastructure will always be around, but if it isn't, this book would become useful.

It covers basics like hygiene and nutrition - things we all learn in grade school here in the USA. It also gives basic instructions for childbirth, treating dehydration, setting broken bones, etc. Nothing is covered in depth, but it would be a useful starting point if you are truly without access to medical care. It is written in very simple language so that anyone should be able to understand it.

In short: this book isn't a substitute for routine care by a medical professional, but it could be useful in extreme, SHTF scenarios.

Hubby Dear's Take:

This book has an excellent breadth of topics, and it goes into a good amount of detail on a number of them. It covers things as basic as first aid, to ailments of specific organs/organ systems (e.g., the eye, the skin), to delivering children. Although as a family physician I do these things on a regular basis, I always have my trusty medical supplies with me in a controlled environment. This book gives ideas on how to handle these problems with common objects and under less than ideal conditions.

The authors of this book definitely have their own viewpoints on medicine, with some of which I agree, while with others I do not. For example, they are very much against the indiscriminate use of antibiotics in our culture. As a daily combatant in the war against the overuse of these medications, I appreciated their emphasis and explanations on this subject. However, they also are very much in favor of easy access for abortions, which I very much oppose. This really did not detract from the useful information in the book, though.

One somewhat minor point that I would like the authors to correct in any future editions would be in relation to the dosing of medications for pediatric patients. In general, we use weight to dose children, not age. All of the dosing in the book is by age. I think both should be there, with weight as the default if the child's weight is available. It's just more accurate and significantly decreases the possibility of overdosing or underdosing.

Overall, this book would be very useful to have in a situation where professional medical care is not easily available, whether that be in a far away village or during a TEOTWAWKI situation.

----------
Another dual aspect to this book is that you can buy it... or not.

The Hesperian Foundation makes this book available for free download on its website. Click here if you are interested in doing that.

We chose to buy a copy from Amazon.com because:
A) I don't feel comfortable keeping important survival literature only in a digital format 

and

B) It is easier and almost as cheap (by the time you add up printer ink and paper) to go ahead and buy the book rather than print it out on my own.


Didn't Hubby Dear do a good job with his inaugural post on the blog? Maybe if I'm really nice he'll agree to do a guest post or two.  :) Do you have any topics related to medicine that you'd be interested in seeing on the blog?

Thursday, June 30, 2011

Reaction to Doomsday Preppers, Month Thirteen in Review and July Preps

I hope you all got a chance to watch "Doomsday Preppers" on Monday night. I enjoyed the show a lot and was pleasantly surprised it didn't have more of a "preppers are crazy" slant. Not that it was perfectly balanced and truthful, mind you. Read the Survival Mom's take on her appearance on the show if you haven't already. Some things (such as the night delivery of food storage) were staged by the production company and/or edited for dramatic effect. If you wanted to watch the show but don't have the National Geographic Channel, here ya go. (If you're reading my blog in a feed reader, you may have to come to my actual blog site to get the YouTube box to show up.)


What I accomplished in June:


1. A whole lot of gardening. Gardening may be work, but it is so rewarding to reap the rewards from your efforts. We ate all of our radishes. Our lettuce and salad mix keeps producing and has yet to turn bitter. We've also been eating regular English peas and pod peas all month, though they are pretty much done. I made a few pickled beets from The Thinker's crop and they were d-e-l-i-c-i-o-u-s! The Thinker also provided us with cabbage that I made into bierocks. Who knew homegrown cabbage was that much better than store-bought? It had such a delicate flavor and super-crisp texture.

Time to make hay while the sun shines!

2. Got a dehydrator and experimenting with drying garden produce and herbs. We bought an Excalibur 9 Tray Dehydrator and a ParaFlexx Non-Stick Drying Sheet (Yes, only one for now. I want to try it out on some fruit leather before I buy enough sheets for all my trays.) The only thing I have dried thus far is oregano, but I know I'll be giving it quite the workout over the next few months. I'll post more reviews as I try other applications.

3. Stocked up on canning supplies. I did go ahead and buy 6 dozen Tattler Reusable Canning Lids. I haven't needed to use them, so I can't really give an opinion about them yet. I did happen to buy some for my mom for Mother's Day (We're a practical family, can you tell?) and she seems to like them. I really need more jars, but they weren't in the budget this month.

Tattler Reusable Canning Lids


4. A bit more food storage, of course. I got some bottled lemon juice for canning purposes, a case of dry milk, and some spices.

5. First Aid. I picked up another box of nitrile gloves. I really was intending to buy more in this category, too, but you'll see that I spend the remainder of my budget on #6.

6. Added to our Survival Library.  I love books, real books. You won't find me anywhere near a kook Nook or Kindle. I selected these titles to add to our Survival Library:
Reviews are forthcoming. I have a review of Where There Is No Doctor that I'll post as soon as Hubby Dear finishes his contribution. Yes, Hubby Dear will finally get his say on my blog. :)

Oh, and the book about chickens? Let's just say there's something called a chicken moat in our future...

7. Hubby Dear and I also did a massive de-cluttering and reorganization of our storage room. We dropped off the kids for a weekend of candy-fueled hyperactivity with Grandma and completely filled our van with items to donate.

After: Glorious Floor Space!

I forgot to take a "before" picture, but it was bad. The middle of the room was pretty much covered with stacks of buckets and pieces of disused furniture.

Buckets tucked out of the way

Now the buckets are tucked underneath the stairs with my water storage. The process of taking everything out of the storage room helped me to update our inventory spreadsheets. Now we have a very good idea just what we have and what we need to purchase.

8. I also learned how to make yogurt from dry milk and had waaaaaay too much fun doing it. I've become such a food storage dork! Click here to read how to do it. It's easy and it really works.


JULY PREPS:

I have changed my prepping plan for July about five or six times already. Originally, I had intended to split my budget between several categories (defense, first aid, food storage, and miscellaneous). Then I started watching the Sun Oven videos posted by Crystal from EverydayFood Storage.Net and so I wanted to buy one of those. I still do want to buy a Sun Oven and everything else on my list, but I feel Spirit's whispering to me to finish our food storage. It's never a good idea to ignore the Holy Spirit (remember what happened to Jonah?), so I think July will be one of those mega-food storage months.
  1. Add to our long term food storage. We're getting much closer to having a year's supply!
  2. Try to find an aloe plant. Not really food storage (though some people drink aloe juice), but something good to have on hand.
  3. Keep up in the garden.
  4. Eat, can, freeze, or dehydrate our garden produce. Stock up on canning supplies.
What did you do to prepare in June?

    Monday, June 27, 2011

    ALERT: New Show About Prepping - TONIGHT!

    Tonight, the National Geographic Channel is airing a show called "Doomsday Preppers".   Click here to see more about it or watch the following clip from the show.


    The show looks like it features at least two preppers I've seen on YouTube, plus Lisa Bedford, a.k.a."The Survival Mom". I know I'll be DVRing it and forcing Hubby Dear to watch it with me. ;)

    "Doomsday Preppers" airs at 9pm (8pm central) on the National Geographic Channel tonight (Monday, June 27th).

    Sunday, June 26, 2011

    Using Your Food Storage: An Easy, Sneaky Trick with Wheat

    Don't you love it when you get ready to fix dinner and find out that you're missing a key ingredient? That happened to me last night.

    I got all set to make one of  Hubby Dear's favorite meals. You'll be astonished to hear that it was a casserole. ;)  Uh oh - I had only thawed 1 lb of ground beef and the recipe required 1-1/2 lbs. What was I to do? Eating out was not an option. Literally. There aren't many options unless we want to drive 45 minutes away.

    In a temporary flash of genuis, I remembered a post I had read on the Honeyville Farms Cookin' Cousins blog. What about extending the ground beef with cooked, cracked wheat? If you've been following me over the long haul, you'll remember that my first experience with cracked wheat was less than stellar. Nevertheless, I decided to give it the ol' college try.

    Getting ready to crack wheat in my blender

    My Wondermill Juniorwould have been the best choice to crack the wheat, but I was feeling lazy, so I decided to try using my blender again. I had the bright idea that the blender might do a better job cracking the wheat if I poured the wheat in while I had it running. I don't know what possessed me - maybe I was thinking of when you make salad dressings and pour in the oil slowly at the end. Needless to say, the wheat shot back at me, giving my complexion the "been in a dust storm" look and adding to the lovely lived-in look of my kitchen. 

    Much like the last time I attempted to crack wheat in the blender, I ended up with a mix of whole kernels, cracked kernels, and flour. Sigh. I decided to proceed on anyway.

    I brought a cup of slightly salted water to a boil and threw in 1/4 cup of cracked(ish) wheat. I stirred it every now and then as it cooked down and softened. It took about 15 minutes or so and then I threw it in with the cooked ground beef and onions for my recipe.

    Adding cooked, cracked wheat to the beef and onion mixture


    When you stir it in, you can barely see it


    I added the sauces and seasoning and followed the rest of the recipe as written.


    The Results:

    It worked!! My kids couldn't tell anything was different at all. Hubby Dear noticed a bit of a difference in texture, but didn't say anything until I quizzed him. I actually think I prefer it with the wheat. The slightly toothsome texture was welcome.

    I wouldn't hesitate to substitute cooked, cracked wheat for part of ground beef in a recipe. As long as it is going to get seasoned or incorporated into a sauce, the wheat just blends in with the rest of the dish.

    I never thought I'd say this but cracked wheat came to my rescue!

    Thursday, June 23, 2011

    Going Vertical in Your Garden

    No matter what method of gardening you embrace, there are many benefits to encouraging large, sprawling plants to grow up. This is especially true in Square Foot Gardening, where you pack so many plants into a small area. If we didn't go vertical, our pumpkins, tomatoes, etc. would completely smother the rest of the garden.

    Hubby Dear and I installed the last of our garden supports last evening.


    It was a gorgeous evening - perfect for working with rusty steel wire and PVC pipes!

    These are the types of support we use in our garden:

    Tomato cages


    Our tomatoes and cages right after installation (mid-May)

    We tried using store-bought tomato cages once and found that they are far too flimsy. We now use the tried and true method my Dad came up with years ago. We use steel remesh, which is wire intended for use in concrete work. The remesh comes in a large roll and is readily available at home improvement stores everywhere. Simply snip off the appropriate length of remesh with some bolt cutters, bend it into shape, and voila! Instant, mega-strong tomato cages. We secure the cages to the ground with T-posts, which are also easy to find at a hardware or farm store.


    Pumpkin, Cucumber, Watermelon, and Canteloupe Trellis

    Trellis along the north border of our garden for pumpkins and watermelon

    The thing about steel remesh wire is that it comes on looooong rolls. The only size our local Lowe's had was 150' long. This meant that we were left with a lot of remesh left over after we made our tomato cages. No problem - we needed something to use for our vining plants.


    Pumpkins

    We stretched the remesh out and attached it to T-posts. The vine plants will climb up and over the trellis. If you plan on trellising your vine plants, you need to make sure you pick the right types at planting time. The pumpkins, watermelon, and canteloupe varieties we selected have fruit on the small to medium size. Our trellising is very strong, but I'm not sure what would happen if we had a couple of 50 lb pumpkins hanging off it!

    Corn


    Another windy day on the ol' homestead. Soon the corn will be tall enough to get supported by the framework.

    Corn is not something that you usually have to support. Here's the deal: Mel's Mex is great, but it is also soft. Corn is liable to get pushed over in a high wind, even in normal soil. We got the idea for this corn support made out of PVC pipe from this post on MySquareFootGarden.Net.


    My garden looks like some crazy plumbing project now, but if it is productive, it will all be worth it!

    Saturday, June 18, 2011

    My List of Essential Spices, Plus a Tip For the Frugal Wannabe

    If you look over the list of meals in my three month supply plan, you'll notice that I tried to include a fair bit of variety. The menus may be heavy on the rice and beans, but the flavors range from Indian to Italian to Mexican-inspired.

    One thing that you need to have as part of your food storage if you value variety (and sanity when you're existing only on wheat, beans, and rice, for that matter) is spices. The more kinds you store, the more options you give yourself.

    The problem with stocking spices is that they have a relatively short shelf-life. Confession time: up until recently, I had a jar of Chinese five-spice powder that I bought over a decade ago. It was almost like a keepsake at this point, but I did finally pitch it. Whole spices last a lot longer than ground spices and storing them in a cool, dark place helps prolong their life. You can repackage spices in canning jars and vacuum seal them for additional shelf-life. One tip I read on the Granny Miller blog is to put a piece of paper towel over ground spices in a jar to avoid jamming up your FoodSaverwith particulates.

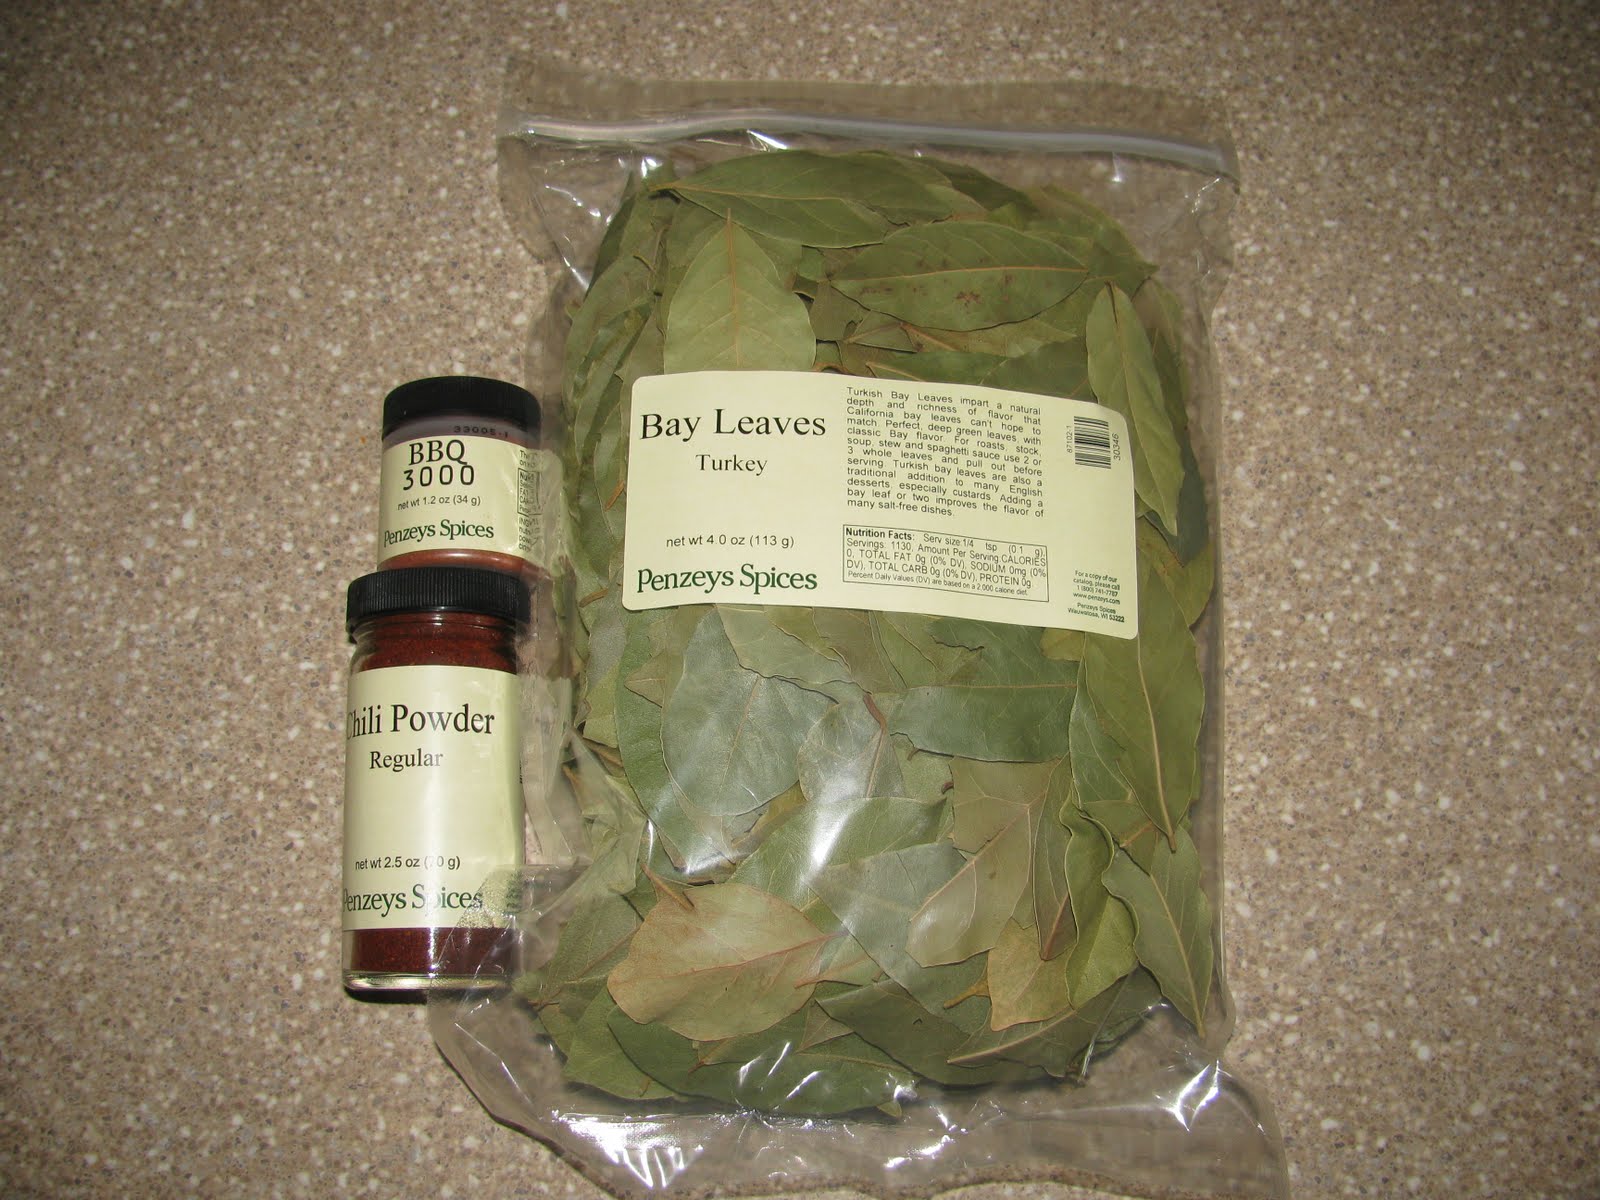
    I usually go the cheap route and buy spices in bulk at Sam's Club. Unfortunately, Sam's does not carry bay leaves, a key seasoning for many of the soups and stews in my food storage plan. I could have bought a bunch of those little jars they sell at the grocery store, but I instead got a decent deal on 4 oz. of bay leaves from Penzey's Spices.

    Ever wonder how much 4 oz. of bay leaves is? It is enough to pack 3 quart sized canning jars. I don't think I'll be needing to buy bay leaves anytime soon!


    Bay leaves and my two freebies

    You all probably know this tip, but I'm new to this whole frugality thing and I want to share this with my fellow clueless souls. I just now figured out that you can find all kinds of discounts if you simply google "coupon code" along with the name of whatever Internet retailer you are buying from. I found a coupon code at retailmenot.com that got me that jar of chili powder for absolutely free. Penzey's also included a sample of their BBQ 3000 seasoning.


    Penzey's carries over 250 different spices. I have somewhere around 40-45 that I keep on hand, but the following list contains the ones that I store in bulk. These are the seasonings that we would really miss after TEOTWAWKI.

    My Essential Spices and Seasoning Blends:

    Oregano (You'd never have guessed, right?)
    Parsley
    Sage
    Rosemary
    Thyme
    Basil
    Garlic Powder
    Cumin
    Coriander
    Bay leaves
    Chili Powder
    Black peppercorns
    Curry Powder
    Cayenne Pepper
    Crushed Red Pepper Flakes
    Cinnamon
    Taco Seasoning
    Cajun Seasoning
    Italian Seasoning
    Lawry's Seasoned Salt
    Hidden Valley Ranch Seasoning
    Worchestershire sauce


    I also stock chicken and beef bouillon. I do not use them on a regular basis since I prefer fresh or canned broths, but they are valuable because of their extensive shelf life and space saving vs. cans of broth.

    Lastly, here's a test to see if you share my twisted sense of humor. When Penzey's shipped my order, they included a bumper sticker with their slogan. This is how it appeared when I opened the box:


    Just what kind of survivalist do they think I am?

    Unfolded bumper sticker

    What are your "must have" seasonings? How much are you storing?