Sunday, August 12, 2012

How to dry garlic

The one crop we've grown this year that surpassed my expectations is garlic. Garlic will last for a long time when stored in cool, dry conditions, but we have so much of it that I am worried that it will start to go bad before we use it all.  Time to find a way to preserve it before I lose it!

When I don't have garlic I grew myself (i.e. any time prior to now), I generally buy the pre-minced garlic you can find in a jar at the grocery store. Ideally, I would can all my garlic up and use it that way. You can read about how Patrice Lewis of the Rural Revolution blog cans her garlic here.

Although I am an experienced canner, I tend to follow the established guidelines and not venture into the "grey areas" of canning such as canning bacon, butter, and, as it turns out, garlic. Here is a link to an article about the safe preservation of garlic. If you read through it, you will see that they do not recommend canning garlic. It seems that pressure canning destroys much of the flavor of garlic and so canning authorities have never bothered to establish the proper processing times for garlic. That's too iffy for me and so I decided to forgo canning garlic.

With canning out, I decided to dry much of my garlic. Here's how I did it.

Drying Garlic


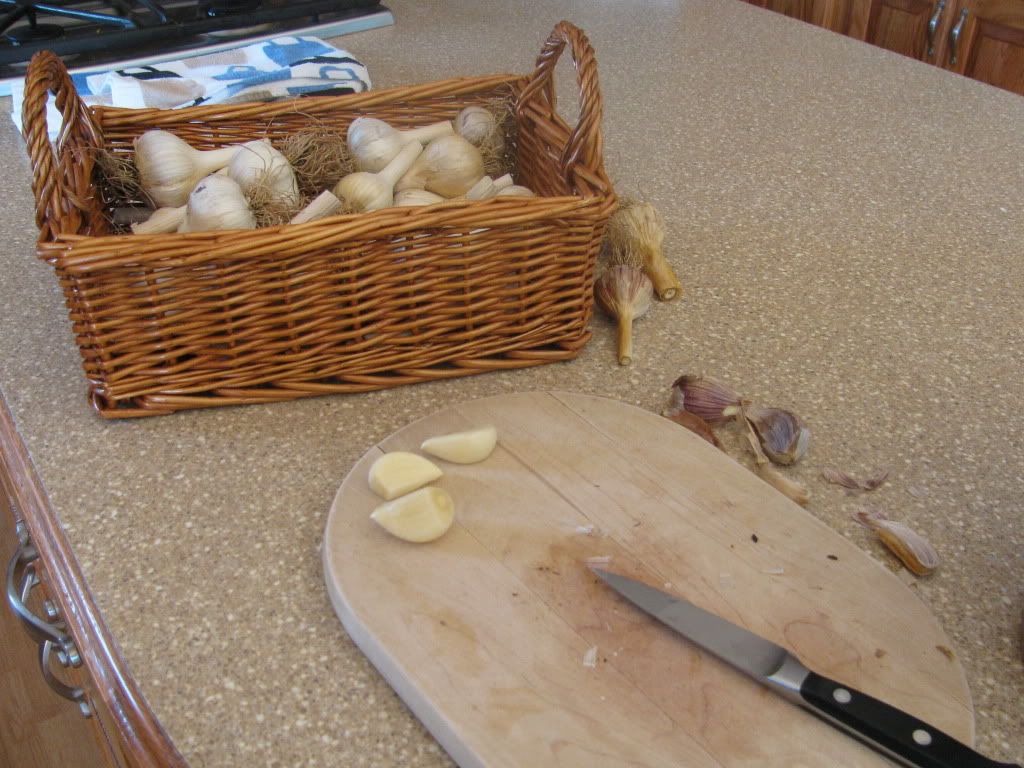
Peeling the garlic and trimming off the root end

I won't lie: the first step of the process is very tedious. Gather your heads of garlic and separate them into cloves. Then, peel the cloves and trim off the root ends. One reason I have mostly used pre-minced canned garlic for all these years is so I don't have to deal with the sticky, papery, garlic peels. I peeled so many heads of garlic this time that my fingers were covered with garlic juice. The peels then kept getting stuck to my fingers and transferred to the clean garlic cloves, cutting board, and pretty much everywhere else in the kitchen. It was a mess, but the good news is that the rest of the procedure is really, really easy.


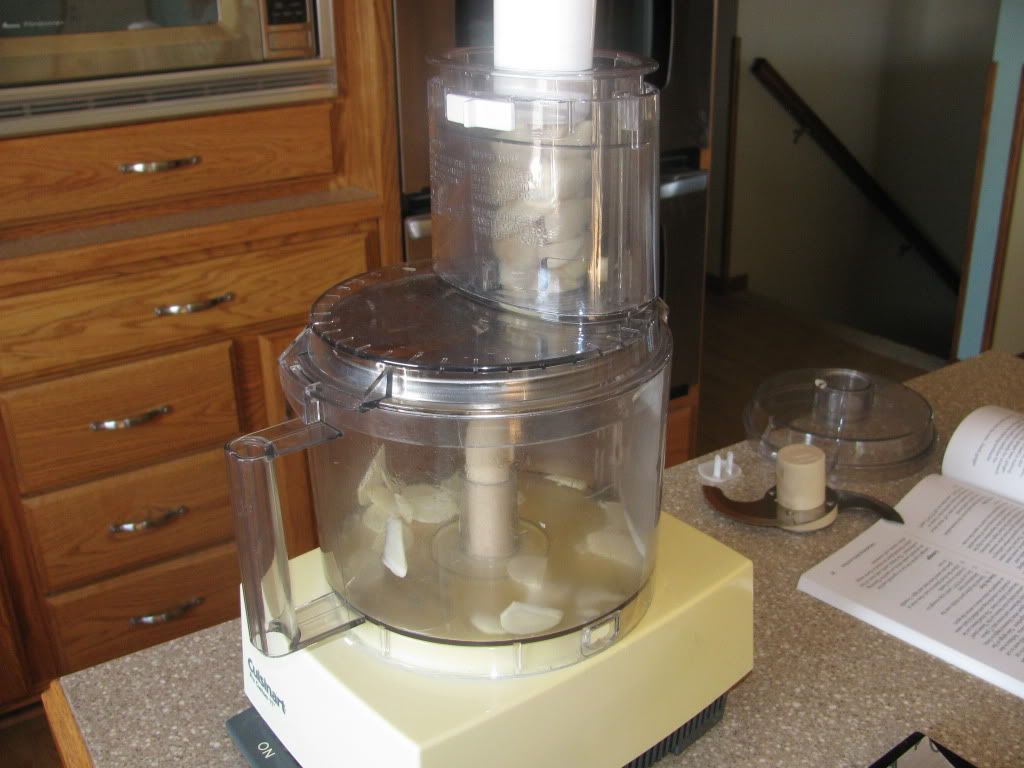
I used the slicing blade on my food processor to slice the garlic into uniform pieces

Now you need to slice your garlic by hand or with a food processor. You can mince the garlic into smaller bits if you desire, but be aware that they may fall through the mesh of your dehydrator screen.


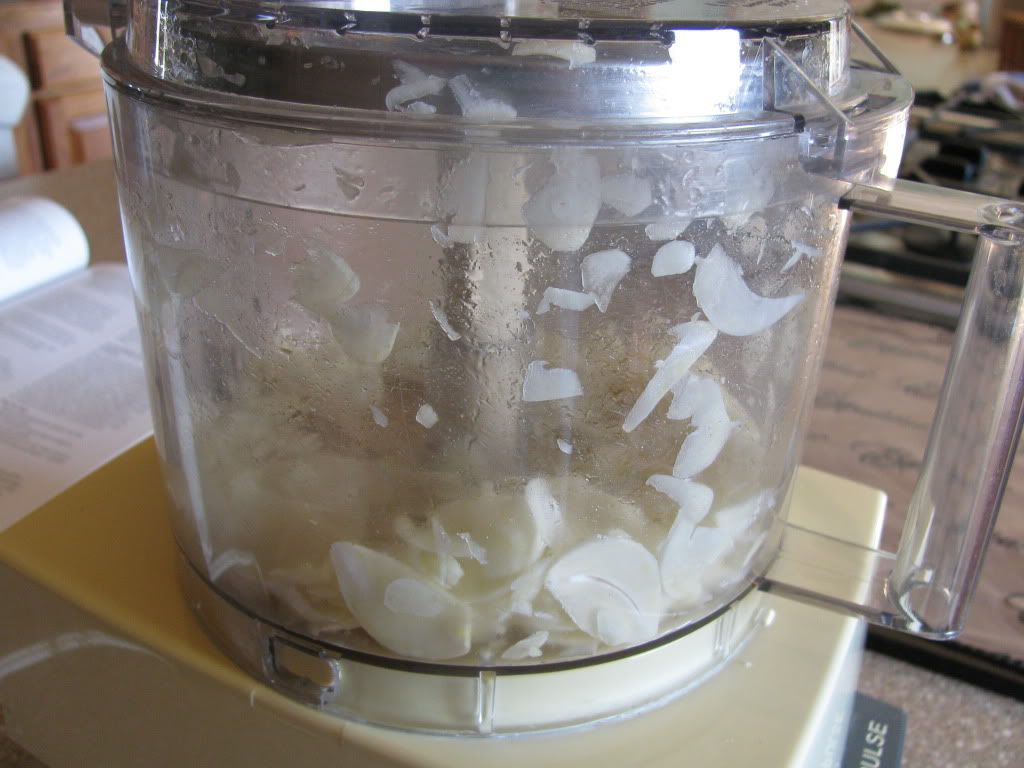
The food processor makes quick work of this task

Once your garlic is sliced, it's time to dry it. I have an Excalibur food dehydratorand I looked up the correct temperature to dry garlic in my owner's manual. I set the thermostat at 105 degrees and placed the garlic slices on the drying trays. I was worried that some of the garlic pieces were small enough to fall through the trays as they dried and shrank, so I lined the trays with plastic wrap before I put the garlic on.  I checked on the garlic every few hours and stirred it once. It took about 8 hours before it was completely crisp and dry.


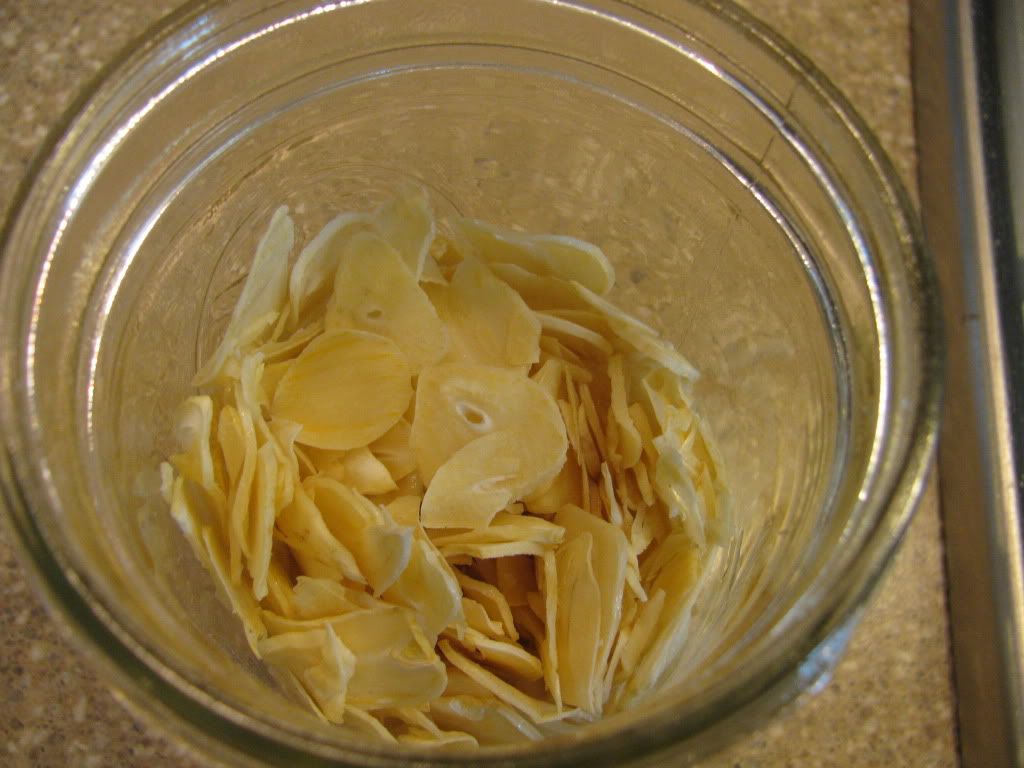
The finished product

If you don't have a dehydrator, I have also read about people drying garlic in the oven. The lowest temperature my oven goes to is 170 degrees, so drying garlic in there would take careful monitoring to prevent over-browning. Ever eaten a piece of scorched garlic before? Yuck! I would turn your oven to the lowest temperature it goes, stir often, and consider propping the oven door open a bit.

What do you do with dried garlic? 

  •  Throw a few pieces into a soup or stew. It will reconstitute while it cooks and lend its flavor to the meal. You might want to fish the larger pieces out after you're done cooking the dish, though, because these babies pack quite a wallop. 
  • Grind the dried garlic in a food processor or spice grinder to make your own garlic powder.
  • My favorite: Soak a clove's worth of dried garlic in some warm water until soft. Mince and use in recipes in place of canned minced garlic!  

Enjoy! 

Saturday, August 11, 2012

I Need Cheered Up! Plus, Egg Taste Test and Poultry Drama

I feel like I am not progressing very far in my preparedness efforts these days.

Our garden has been severely stunted by the unrelenting heat, drought, and insect pressure, so it hasn't produced nearly as much as it should. I'm thankful we are getting enough tomatoes to slice and eat on sandwiches, but my vision of massive amounts of canned tomato sauce is not to be this year. Most of the things that I was planning on freezing or canning have fried in our record-breaking heat. 

That's depressing. 

I also haven't bought a lot of preps because I spent my entire June-September prepping budget on items for the duck house build/chicken moat expansion. My Poultry Acquisition Disorder has definitely taken a toll on prepping. 

Sigh. Can somebody cheer me up and make me feel like I'm not a prepping loser? 

------

Alright, enough whining. 

The last time I blogged, I showed you all the first egg my dear little pullets laid. Not long after I completed that post, I cracked it open and compared our egg to a run-of-the-mill one from the grocery store. 

Our egg on the left, store egg on the right

Our egg was definitely smaller than the store-bought egg (1.3 oz vs. about 2 oz) but look at the difference in the color of the yolk and the firmness of the white! The store-bought egg is positively runny while our egg stands up nice and tall. 

I fried each egg separately and had the family do a taste test. Yes, all of us just had to sample that little bitty egg! The difference between the eggs was incredible. Our egg was so much more flavorful and almost buttery-tasting in and of itself. The store-bought egg was positively pallid in comparison, both in color and in flavor. 


The eggs just keep coming!

Since that first day, we have been nearly swimming in eggs. My girls are currently averaging 8 eggs a day, which is plenty for us and some to give away. Hubby Dear has people at work asking for eggs, so we might end up selling a few dozen here and there, too. I also plan to explore other methods of egg preservation so that we will never run out of eggs during the winter months when production will slow down. 


The ducks finally moved outside at four weeks of age

The same heat that destroyed my garden also prevented my five remaining ducklings (I gave away four to friends) from moving outdoors. I didn't spend 28 days nurturing these guys in an incubator only to have them fry in the 110 degree temperatures! The duck gurus I asked were very adamant that ducklings do not do well in such hot weather, so they stayed indoors for four weeks. Oh. my. word.  I can't even type out the horrors I had to clean out of that brooder in my bathroom. Finally I had enough and moved them outside one evening when it was "only" supposed to be in the upper nineties the next day. 

Ducks are creatures of habit and so the move scared them quite a bit. 


Goldilocks checking out her new neighbors

Plus, they now had nosy, loud neighbors who were very interested in everything the newcomers were up to. That would be intimidating to anyone. 


Puppy, Freckles, Morning Glory, Hyacinth, and Peek-a-Boo 

After a couple of days, the ducklings were having a ball making a mess in their new home. See how brown the grass is? We need rain desperately!

Will Doofenshmirtz be nice to the ducklings when the temporary pen gets removed next week?

Our rooster, Doofenshmirtz, is on probation. First, he was overly eager to mate with the pullets and would viciously attack them. He got that under control but then he started to attack my two oldest children when they came to collect eggs or visit the ducks. He does not mess with Hubby Dear or I, just the girls. 


Handsome brute

We are seriously torn as to whether we should keep Doof or eat him. The farmers around here say that's just how roosters are. Since we want a rooster so that we can hatch our own chicks, that's what we have to deal with. But I also don't want to ruin the pleasure my children have in interacting with the chickens and ducks. Tough decision. 

I went ahead and ordered processing equipment in case we decide to eat the brute. We need to get killing cones, knives, and other butchering paraphernalia anyway because we are definitely eating the turkeys. 


One of the Bourbon Red turkeys

Oh, the turkeys. We decided to try and house them with the chickens until butchering time. Since they are getting too big to get in the pop door (and are to ornery to do it themselves, anyway), every evening I get the joy of catching the beasts and throwing them into the chicken coop. They aren't too hard to catch, though they do shriek and kick their legs ineffectually when I pick them up. I won't miss that chore once they are gone. Picking them up every evening makes me keenly aware of just how much they need to grow before we butcher them. I feel like the witch in "Hansel and Gretel", feeling their keel bones every evening to see if they are fat enough yet to eat!  

Although it has definitely taken me a bit off course from my preparedness goals, I do so enjoy working with our livestock. I've even begun to dream about building a small barn with a brooder room, attached greenhouse, and room for a goat or two.