Showing posts with label grain mill. Show all posts

Friday, April 8, 2011

My Review of the NutriMill Electric Grain Mill

I've had the chance to put my new NutriMill Grain Mill through its paces over the last couple of days. Here's what it looked like when I took it out of the box.


The NutriMill is larger than I expected it to be. It's nearly as large as my Kitchenaid stand mixer.

You load the grain in the top of the mill. Experienced users of the NutriMill will note that I had the ring of the hopper installed upside down in the following photo. Oops! As you can tell, I have giant amounts of mechanical aptitude.


The hopper prominently warns against grinding oily seeds. There is an extensive list of banned items in the owner's manual, including oatmeal of any kind, nuts, and sprouted grains/seeds. Luckily, my Wonder Junior Deluxe's sets of steel burrs and stone heads will work just fine for those materials.

When you turn on the NutriMill, you might be surprised by the noise. Picture, if you will, a Shop Vac.
Imagine the noise that would ensue if you attempted to vaccum up a pack of yowling feral cats with said Shop Vac. That is pretty much what the NutriMill sounds like.

Should that discourage you from buying a NutriMill? Well, that's up to you and your tolerance for yowling feral cats. The good news is that the NutriMill works quickly, so you don't have to listen to it for very long. In 60 seconds, I had ground enough wheat to make a loaf of bread. That would have taken me about 7 minutes of constant grinding with the Wonder Mill Junior. I enjoy the sound of the Wonder Mill Junior, though. There's something therapeutic about hearing those stone heads grind against each other. The NutriMill's yowling? Not so therapeutic.

The freshly ground flour is collected in the bowl at the bottom.


I set it to grind on its finest setting. The end result was indeed finer than what my Wonder Junior can achieve. I made both a loaf of bread and a batch of pancakes with the flour and they turned out wonderfully.

The only issues I had during my experimentation occurred when my legendary mechanical aptitude got involved. The manual instructs you to first mill 2 cups of grain and discard it. I dumped out my test batch of flour and got ready to grind more wheat. The problem was that I forgot to put the flour bowl back in before I turned on the mill. Flour sprayed everywhere! That flustered me enough that when I finally did get the bowl installed, I didn't slide it in all the way. By the time I cleaned up the resulting flour-fest in my kitchen, I more resembled a powdered donut than a happy homemaker.

My personal issues aside, the NutriMill does a great job. It is noisy but quick, and it produces very nice flour. I recommend it!

Wednesday, April 6, 2011

My Honey Loves Me

How can I tell?

He got me this as a combined birthday/Mother's Day present.


A NutriMill !

Isn't he thoughtful? (Nevermind the fact that I told him exactly what I wanted and in fact I ordered it myself.) He's a total gem, isn't he, ladies?

After the great electric grain mill disappointment of 2010, I've been making do with my Wondermill Junior Deluxe. It's great and all, but I only pull it out of storage every so often. Between changing diapers and homeschooling, grinding grain by hand is low on the list of things I need to do every day. I'm sure I'll use it a ton. Thanks, Hubby Dear!

Coming soon: My Review of the NutriMill 

Thursday, December 30, 2010

2010 Preps in Review and 2011 Goals

I can't believe how quickly 2010 went by. I thought it would be interesting to evaluate my prepping progress over five areas.

INFORMATION:
  • I probably made the most progress in this area. I had zero knowledge of or interest in preparedness at the start of the year. Now I have read on the subject extensively and I feel comfortable with many of the most important preparedness areas. I feel confident in my knowledge of food storage, but not so much in areas like defense and alternative energy.
  • I made efforts to preserve my newly gained information. I have an enormous preparedness binder with lots of information printed off and organized. I collected numerous food storage and garden vegetable recipes and have another binder for that.  
  • Hubby Dear backed up our computer on SOS Online Backup. We also have several flashdrives with important items copied onto them.
  • I made an emergency binder with essential documents for our bug out bags (BOBs).
Speaking of bugging out...

SURVIVAL ESSENTIALS:
WATER AND FOOD:

FIRST AID/HEALTH AND HYGIENE:
  • We have first aid kits in several different places, from my purse to our BOBs.
  • We stocked up on items useful in a pandemic, such as N-95 masks and nitrile gloves. I've already been very glad to have the gloves on hand (no pun intended) during our family's bout with stomach flu over Christmas.
  • We've begun to stockpile toilet paper and OTC medications.
That's quite a bit accomplished in seven short months.

My Goals for 2011:
  1. Get a full year's worth of food storage.
  2. Buy an electric grain mill (finally).
  3. Continue to develop our gardening skills. We're converting our vegetable garden to a square foot garden. Hopefully we'll get enough cherries, raspberries, and blackberries to can and freeze this year.
  4. Can a wide variety of garden produce.
  5. Further develop our water storage and purification abilities. This could include: getting a Berkey filter, storing pool shock, mapping out nearby natural water sources, and installing rain barrels.
  6. Deepen our store of first aid/medical supplies.
  7. Lose weight and get in shape - both Hubby Dear and I.
And finally...

    8.    Start saving towards our home renovation that will include the installation of a woodstove.

Whew! That sounds like a lot. Hopefully we can accomplish all of these.

How have your preps come along in 2010? Do you have any big plans for 2011?  

Tuesday, December 28, 2010

Month Seven in Review and Month Eight Preps

Month Seven:

This month of my Prepping Plan featured a few bumps, namely on the grain mill front.

I bought a lot of food storage-related items this month. I have another 100 lbs of beans, 90 lb of wheat, and lots of odds and ends like drink mix. My food storage buckets seem to have multiplied all of a sudden. I wasn't aware that I had this many.


Buckets galore but we need so many more

I also bought a couple of packs of Can Organizers, which made neat work of one of my cabinets. I learned how to can meat and found out it wasn't so scary after all. I also made a first aid kit out of an Altoids tin for my purse.


Tall, dark, and handsome
Month Eight Preps:

I feel a lot of pressure to complete my food storage ASAP because the specter of high inflation looms ever larger, so next month will also be focused on that area. If I can get rid of some of the junk in my storage room, I plan on buying a nifty Shelf Reliance shelving system. It should really help maintain FIFO (first in, first out) when it comes to my canned goods. I also plan on buying a few more items to fill my shiny new shelves.

The weird thing about these Shelf Reliance organizers is that they don't come with a shelf across the top. That's too much space to waste so I'm going to figure out what kind of wood I need to buy and get Hubby Dear to cut a piece to serve as a shelf.

I also plan on getting a P-Touch labeler so that I can create neatly printed labels for all my storage containers. I've always wanted one of those, so I'm pretty excited about that purchase. That's it for Month Eight.

Do you have any preps planned for next month?


Coming Soon: 2010 in Review and Goals for 2011


Thursday, December 23, 2010

This Post Should've Been a Review of an Electric Grain Mill...

I don't have one of these. Grrr....
If you have been following my Prepping Plan, you might have noticed that I was planning on getting an electric grain mill this month. My Wonder Mill Junior Deluxe works very well and it only takes about 7 minutes of cranking to get enough flour for a loaf of bread, but let's be real. I have four kids, I homeschool, and I have other uses for my time. If I'm going to regularly grind grain, I really could use an electric mill.   

After I posted about my experience with my hand mill last month (read about it here and here), the president of a certain big name grain mill company emailed me and offered me a very nice discount and some freebies if I would try out and review their electric model here on my blog. I was surprised and delighted. The mill was actually the one I was planning on buying, and the discount would enable me to buy it this month.

Well, the grain mill company didn't follow through on their offer and, as a result, I still don't have an electric mill. Now I have to buy a different type of grain mill just so I can thumb my nose at this company. I'm looking at getting a Nutrimill, unless that company decides to play with my emotions, too.

What are your experiences with electric grain mills? Do you have any recommendations or know of ones I should avoid?

Sunday, November 28, 2010

Month Six in Review and Month Seven Preps

Did you think this past month seemed to fly by? I can't believe November is already drawing to a close. I also am astonished that I've been actively prepping for only seven months. I've learned so much and accomplished quite a bit.

RIP oil lamp chimney
Month Six of my prepping plan was a doozy. I had a humbling experience with primitive technology, bought a bunch of freeze-dried and dehydrated items for my food storage, stocked up on the necessities to have lighting during a power-down scenario, as well as accomplished the other items in my plan for this month.

In the negative column, I'm still not doing very well with adding in exercise, unless you count using my new grain mill. Hey, it does make me break a sweat! Also, the glass globe/chimney on my oil lamp met a premature demise when I was dusting it yesterday. This goes to show that A) I need to have some back-up chimneys on hand with my other supplies and B) My contention that housework is evil does have a basis in fact.   
 
Month Seven:
  1. Continue to build food storage basics. Perhaps take advantage of holiday sales and stock up on items like spices, chocolate chips, canned pumpkin, etc.
  2. Buy some ground beef and chicken breast and pressure can it. Conduct a taste test and see how my home-canned meat fares vs. store bought canned chicken. 
  3. Create a first aid kit for for my purse. I'm thinking of making one in a Altoid tin.
  4. Buy an electric grain mill and put it through its paces.
  5. Begin the process of organizing some of my canned food storage for easier rotation. I'm going to try out and review one of the can rotation devices on the market.
  6. In the category of "Hope Springs Eternal": Exercise 3x per week.
Do you have any prepping plans for December or are you consumed with Christmas purchases and preparations?

Monday, November 15, 2010

Adventures in Whole Wheat: My first home-ground loaf of bread

I've been waiting for this day for a long time. I've made bread since I was a teenager, but this is a definite first - 100% whole wheat bread made from flour ground by my own two hands. After I figured out my grain mill issues, I jumped right into a recipe for EZ Whole Wheat Bread from Crystal at Everyday Food Storage.

First, I milled just over two cups of wheat berries into 2 3/4 c. flour. It took me 7 minutes to grind it with my new Wonder Mill Junior Deluxe and it definitely gave me an upper body workout. Just another reason to get in shape!


Hand-ground flour made from hard white wheat

Next, I mixed together all of the ingredients for the bread in my Kitchenaid mixer, including this array of #10 cans:

Potato Flakes, Dry Milk, Vital Wheat Gluten and Hard White Wheat

This recipe includes vital wheat gluten, potato flakes, and vinegar as dough conditioners. They're supposed to help make the bread fluffy instead of a heavy brick.

My mixer took care of the kneading for 10 minutes or so while I cleaned up my kitchen. Two days of grain mill experiments had left it dusty and with a sprinkling of broken pieces of china. (Don't ask.)


Kneading the dough

The dough was heavy and gummy in texture when I set it aside to rise. After one hour, it was doubled in size

First Rising

and ready to be shaped into a loaf.


One more rising

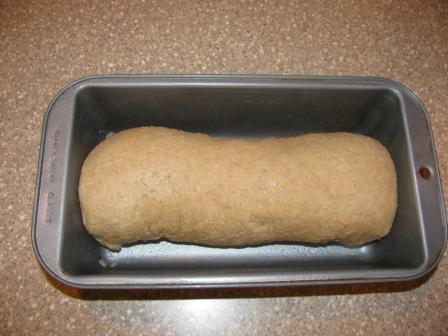
Risen twice and ready for the oven


and then 25 minutes in the oven produced this golden beauty.


Ready to eat!

We usually eat Sara Lee 100% Whole Wheat bread, so my family is already accustomed to whole wheat bread. This was similar in many ways but definitely better.

Where's the butter?

It had a nice, light texture. Those dough enhancers worked their magic. I was worried what the texture would be like when I felt the dough after it was kneaded, but it turned out great. It sliced well and would make wonderful sandwich bread. Compared to the store bought bread, it had a sweet, fresh, "clean" taste and was very filling.

The only problem was that there was a slight gritty bite every so often. I think we still need to work on wearing down our mill's stones and that problem will go away.

This recipe is so tasty and easy that I can see myself making it often... after I get an electric grain mill.

If you haven't found Crystal's site, check it out. You will find her recipe for EZ Whole Wheat Bread here and her YouTube video demonstration here and here.

Sunday, November 14, 2010

A Big Slice of Humble Pie: Wonder Mill Junior Deluxe Review Redux

After I posted my less than stellar review of the Wonder Junior Deluxe Hand Grain Mill, I had this nagging feeling I was doing something wrong. All those great reviews of this product from numerous sources just couldn't be wrong, could they? I went back and read through my research, looking for any clue as to why my grain mill wasn't producing much flour.

I got the clue I needed from this four part series of YouTube videos.

I watched David (one of those YouTube preppers who regularly cracks me up) assemble his Wonder Mill.

Check. Did that right.

I watched Dave start grinding wheat and getting copious amounts of flour.

Huh?

I paid close attention and then smacked myself in the head. Hubby Dear and I are officially idiots. Wanna know why?

We had been turning the handle in the wrong direction!! You're not going to get good results if you don't use it properly! I don't even want to admit how long we worked on that mill yesterday. We are s-t-u-p-i-d.

In our defense, the owner's manual doesn't say what direction you should turn the handle. (Clockwise, for fellow hapless grain millers). I guess I should be glad we're getting the kinks worked out now instead of during TEOTWAWKI.

Mostly I just feel dumb.

Hubby Dear getting the job done
Hubby Dear ground a cup of wheat into fine flour in.......three minutes. I cranked through the remainder of the 1 lb "break-in" wheat and I'm fixin' to grind some more for some bread.

In summary, my review of the Wonder Junior Deluxe Hand Grain Mill is now completely positive. It is sturdy and it does work - if you use it correctly!

Saturday, November 13, 2010

Review: Wonder Mill Junior Deluxe Grain Mill

It's been a while since my post on selecting a hand grain mill. I've had to wait on Amazon's Super-Slow Super Saver shipping. Then one of the vagaries of rural life occurred. It rained cats and dogs so the Post Office couldn't deliver my package. Why would that matter? Our mail is delivered in a 4x4 pickup and all packages have to go in the bed of the truck. Rain = Emily has to make a drive into town to pick up the package at the Post Office. Bet you city folk never had to deal with that! ;)

After these trials and tribulations, I finally was able to put my grain mill to use.

Which grain mill did I pick? 

After weighing the pros and cons of the various options, I decided to buy the Wonder Junior Deluxe Hand Grain Mill.


Why I chose the Wonder Mill:
I immediately ruled out El Cheapo grain mills like the Victorio. I want to be able to grind fine flour with relative ease, which is pretty much impossible with those sorts of mills.

I also decided against higher end mills like the Diamant and Country Living Grain Mill. They have glowing reviews, but they each had a few features that I didn't like. One of those features would be the price! I did seriously consider getting the Country Living mill since you can buy a motorization kit. Together, the mill and motorization kit would run $745! It's much cheaper just to buy two mills.

That left mid-priced mills like the Lehman's Best and Wonder Mill Junior Deluxe. They had a lot going for them. Both had great reviews but I ended up choosing the Wonder Mill. Now that I've tried it, here's my review.

What I liked:
  • Solid metal construction. There's nothing plastic except the hand grip on the handle. It is very sturdy.
  • It comes with both stone milling heads and stainless steel burrs. The stone heads are for dry things like wheat and oats and the burrs work for oily nuts and seeds.
  • It has a solid clamp to attach the mill to the counter. I was very impressed with how solid and still it remained no matter who was doing the grinding.

What I don't like:
  • It takes a lot of shoulder power. I have a bum shoulder and it was really irritated by the motion.
  • It takes FOREVER to grind fine flour. I put one cup of hard white wheat into the capacious hopper and was STILL grinding it 45 minutes later. Granted, I had a lot of "help" from children and took time to make adjustments to the grind. I had read reviews that said it took people 5 minutes to grind a cup of wheat, so I think I'm doing something wrong. Maybe I'll try grinding it coarsely first and then putting it back through the mill.

What I got after 30 minutes of grinding. I have some fine-tuning to do.


An important note:
  • The instruction manual states that first you need to process about 1 lb of grain with the stone milling heads and discard that flour. You have to wear down the stone a bit so that you won't get grit in your flour.  
  • If you get a Wonder Mill Junior or similar hand mill, you want to open it up and and do that process NOW while grain is plentiful and you have free time on your hands.
I have to admit I am disappointed. I was looking forward to making a loaf of bread from freshly ground whole wheat today. That is so NOT happening. I'm going to do some more research and I'll report back if my review changes. I've also contacted the Wonder Mill company in case they can help. At any rate, I think an electric mill is in my future very soon!

*PLEASE READ MY UPDATED REVIEW HERE!*

Monday, November 1, 2010

Selecting a Hand Grain Mill

I've had a couple hundred pounds of wheat since August but have been limited in what I can cook with it: blender pancakes, blender waffles, and disgusting hot cereal. Finally the day has come that I get to buy a grain mill. You can buy electric grain mills, hand grain mills, and ones that convert either way. I eventually want to have the capability to go electric for the time and labor savings, but it is most important to have a hand grain mill first. Otherwise TEOTWAWKI could happen and the only way my shiny electric grain mill would be useful is if it just so happened to grind some wheat as I threw it to the ground in frustration with my lack of foresight.

But what mill to pick? There a huge selection available and it's not like I can just walk into a dealership for a test drive. (Not in my neck of the woods, anyway.) So I did A LOT of reading. I read catalogs, reviews, and online listings. I read some more. I cross-referenced charts and watched videos. I gathered so much data that I practically overloaded. Here's some of what I looked at:

A comparison chart of hand and electric grain mills

The selection that Lehman's carries. Notes and reviews about several types

Purchasing the right grinder by Walton Feed Co.

Amazon.com listings and reviews

Grain Mill Comparison Chart (the "German made" one is the popular Family Grain Mill)


To my mind, there are three main considerations in selecting a grain mill:
  1. Coarseness/fineness of end product - Will it make a true fine flour?
  2. Ease of use - How hard is it to turn? How long does it take?
  3. Durability - Will it stand the test of time?
Not to mention

    4.   Price


I read about el cheapo grain mills. 


Victorio Grain Mill, approximately $69

I carefully considered the virtues of the Family Grain Mill and the Country Living Grain Mills, both of which can be motorized.

Country Living Grain Mill, base price $395


I compared the Lehman's Best Grain mill with the Wonder Mill Junior Deluxe.

Lehman's Best, $169.95

Wonder Mill Junior Deluxe, $199.95


I drooled over this Diamant grain mill that costs more than my first car did.

Diamant Grain Mill, $1299


Which one did I select? And will I be pleased with my choice? You'll have to wait and see. My order is in. :)

Friday, October 29, 2010

Month Five in Review and Month Six Preps

I achieved all of my Month Five Preps with the exception of #6 - the exercise component. I still need to work on being better with that. But I have more cash in my BOBs and vehicles, food storage containers, lots of new additions to my food storage, and more matches and toilet paper stocked.

Month six of my Prepping Plan is going to be fun. I'm feeling flush since Hubby Dear suggested we increase our prepping budget by about 40%. You could have knocked me over with a feather when he told me that. Not that he actually believes in this stuff. Nope, he doesn't think this is necessary even after reading One Second After. We're debt-free now and he is proud that I was able to stick to my prepping budget for five months so we could get there. Gotta love him! :)

So, this is what I'm thinking of for November:
  1. More cash for our BoBs.
  2. Stock up on oil and wicks for my oil lamps.
  3. Buy a box of exam gloves for potential medical emergencies
  4. Buy a quality hand grain mill. This one I'm really excited about.
  5. Buy a case of dry milk. I've been putting this one off for a while.  
  6. Pick up some freeze-dried and dehydrated odds and ends for food storage and bread making.
  7. Exercise at least three times per week.

Monday, August 23, 2010

Adventures in Whole Wheat: Cracked Wheat Cereal

Since my waffle experiment went swimmingly, I was eager to try out another application for whole wheat sans grain mill. I opened up Emergency Food Storage and Survival Handbook and found a recipe for Cracked Wheat Cereal and gave it a try.


First I measured out 1 cup of whole wheat kernels. Then I attempted to crack the kernels by pulsing them in my blender. They did not crack well at all. Some kernels remained whole, others cracked a bit while still more was turned completely into flour.


This is what it looked like when I gave up and decided to proceed with the recipe. After I was finished, I went back and read
the instructions for cracking wheat in a blender and you are supposed to only crack 1/4 to 1/3 c. at a time. Oops. Maybe that was the problem...


I added water, salt and a pat of butter to my improperly cracked wheat and cooked it for the 20 minutes it calls for in the recipe. When the time was up, it was still soupy and the wheat was extremely chewy.


I then increased the heat and stirred the mixture until the water had evaporated and the kernels were tender-ish.


The recipe made two large servings. Following the suggestions in the recipe, I added some milk to each bowl. Hubby Dear requested that I top his with cinnamon and brown sugar. I put honey and cinnamon on mine.

We dug in and chewed. And chewed some more. By cracky, that cracked wheat was chewy! The overall taste was okay, but the texture made it hard to enjoy. Neither of us finished our bowls.

The Verdict: This tastes like you expect "survival food" to taste. I'll pass on this one unless we're truly in a survival situation.

If you give this recipe a shot, let me know if you get it to come out better than I did.

Cracked Whole Wheat Cereal, from Emergency Food Storage and Survival Handbook by Peggy Layton

1 c. freshly cracked wheat
3 c. water
1/2 t. salt
1 T butter (or 1 T butter powder reconstituted with a few drops water)

Combine all ingredients in a pan. Bring to a full boil and reduce the heat. Simmer 20 minutes. Serve with honey, raisins, and milk. This cereal is also delicious with chopped apples, berries, nuts such as almonds or cashews, sunflower seeds, or cinnamon. Makes 2 servings.

Friday, August 20, 2010

Adventures in Whole Wheat: Blender Waffles

Today I opened one of the #10 cans of wheat that I recently bought and cooked with whole wheat kernels for the first time.

Since I don't have a grain mill, I am limited in what I can do with wheat. The first recipe I selected was Blender Waffles, which is a recipe I downloaded from Everydayfoodstorage.net.

Here are the ingredients. You'll notice that I'm using fresh milk and eggs. I don't have any powdered milk or eggs yet, but if you do, feel free to use them in this recipe.

This could be a completely shelf-stable recipe other than the bananas. Unless you live in Costa Rica on a banana plantation, you'd have to adapt the recipe in an emergency situation. Just leave out the bananas and subtract one tablespoon of wheat from the recipe below, and you're golden.


I opened the can of wheat and took a gander at the contents. Here's a small amount of it in Mini-Me's hand. I was surprised at how dry and unoily the kernels were. I guess that's what makes their shelf life so long.

Being the homeschooling mommy that I am, I proceeded to ruthlessly quiz the children about whether wheat is a monocot or dicot. We covered that in The Thinker's science lesson today. I told the children that I wouldn't give them any waffles unless they got the answer right.

The Thinker said, "Yeah right, Mom", rolled her eyes and left the kitchen. I've lost her to tweenage cynicism already. Mini-Me just looked up at me sweetly. She knows the power her brown eyes have to get her out of many a situation. Not to mention the fact that no one in my house is anything less than well-fed. So much for my threat.  

Anyway, the first step of the recipe is to blend the wheat with the milk for 4-5 minutes on high speed.

I was afraid my blender would either combust or do a lousy job, but it actually came out OK. The texture was kind of like a thick oatmeal when it was finished.

After the wheat and milk was blended, it was very easy to add the other ingredients, mix briefly, and then make the waffles.


As the waffles cooked, they smelled faintly like banana bread. I also made the caramel sauce to go along with the waffles.

When they were done, the family dug in with gusto. The Thinker, who is the pickiest eater I know, happily ate two of them. The caramel sauce tasted lovely with the waffles.

The whole wheat in the waffles made them extremely filling. The recipe made nine waffles, which ordinarily wouldn't go very far since my husband does a remarkable vacuum-cleaner imitation. We ended up having two waffles left over, which will make a fine breakfast for someone tomorrow.   

The Verdict: DELICIOUS! I'll definitely make these again.

Up next: Cracked Wheat Cereal


Blender Waffles, recipe from Everyday Food Storage

1 Cup Milk (3 T. Powdered Milk and 1 C. Water)
1 Cup + 2 Tbs Wheat Kernels, whole & uncooked
2 bananas
2 Eggs (2 T. Powdered Eggs and 1/4 C. Water)
2 tsp. Baking Powder
1/2 tsp. Salt
1/4 Cup Oil
2 Tbs. Sugar

Put milk and wheat kernels in blender. Blend on highest speed for 4 or 5 minutes or until batter is smooth.

Add bananas, eggs, oil, baking powder, salt and honey or sugar to above batter. Blend on low.

Pour batter into hot prepared waffle iron from the actual blender jar (only one thing to wash!). Cook and serve.


Hot Caramel Sauce - makes enough sauce for 2 recipes of waffles–good on many desserts too!

1/2 Cup buttermilk or 1/2 Cup milk with 1/2 tsp. vinegar or lemon juice
2 Cups Sugar
1/2 Cup Butter
2 Tbs. Corn Syrup (not essential but it will help your syrup keep longer with out going grainy)
2 t. baking soda
1 tsp. Vanilla

Mix ingredients in a pot and boil for 3 minutes, the sauce will turn to the carmel color towards the end of boiling. Stir in vanilla when syrup is finished cooking.

Monday, August 16, 2010

I've got my wheat so now what?

A grain mill is not in my budget for a couple of months. What can I do to play around with my 200+ pounds of wheat in the meantime?

First of all, I found that it is possible to crack your wheat in a blender. According to the gals at Food Storage Made Easy, you put a small amount of wheat (1/4-1/3 c.) in your blender and pulse it. When it looks cracked, it's done and you can use it in recipes that call for cracked wheat.

You can also use your blender to make pancakes or waffles with your whole, uncooked wheat kernels. The mixing time is somewhere around 5 minutes to grind all the wheat kernels. Ay Chihuahua! I have doubts about the ability of my blender to handle that.

What if my decrepit blender decides to die or the power goes off? In Emergency Preparedness the Right Way, the author describes another way to grind wheat. Basically, you take three pipes, bind them together, and use them to beat on wheat kernels you place inside a can. If you have ever seen how many tribes in Africa grind grain, you have the general idea.

I did a google search for "improvised grain mill" and lo and behold, I found the original source of this idea.  Improvised Grain Mill pdf   

That is one labor intensive way to grind grain!

Here are some recipes to use wheat without a grinder. I'm going to be experimenting with pancakes and one of the cereal recipes sometime during the next week and will report in on how it goes!


Blender Wheat Pancakes

1 Cup Milk (translation for powdered milk is 3 T. Milk and 1 C. Water)
1 Cup Wheat Kernels, whole & uncooked
2 Eggs (2 T. powdered eggs 1/4 C. Water)
2 tsp Baking Powder
1-1/2 tsp Salt
2 Tbs. Oil
2 Tbs. Honey or Sugar

Put milk and wheat kernels in blender. Blend on highest speed for 4 or 5 minutes or until batter is smooth. Add eggs, oil, baking powder, salt and honey or sugar to above batter. Blend on low. Pour out batter into pancakes from the actual blender jar (only one thing to wash!) onto a hot greased or Pam prepared griddle or large frying pan. Cook; flipping pancakes when bubbles pop and create holes.

ROASTED WHEAT KERNELS

1⁄4 cup wheat berries (whole kernels of wheat)
1⁄2 tablespoon oil
1⁄8 teaspoon salt

Heat a small amount of oil in a skillet. Add wheat berries and pop like popcorn. They don’t expand as much as popcorn, but they will pop. Swirl around in the pan to prevent burning. Sprinkle with salt while hot. Makes 1⁄3 cup.
 
CREAMY CRACKED WHEAT CEREAL

1 cup uncooked cracked wheat
3 cups water
1⁄2 teaspoon salt
1⁄4 cup powdered milk
4 tablespoons sugar

Prepare cracked wheat by using a wheat grinder or a blender. Add dry milk to water, whisk, and bring to a boil at medium high temperature. Add wheat, sugar, and salt; cover and reduce heat to simmer for 20 minutes, stirring occasionally, until water is absorbed. Makes 3 cups cereal.
 
 
THERMOS WHEAT

1 cup wheat
2 cups boiling water
1⁄2 teaspoon salt

Preheat a thermos by filling it with hot tap water. Bring 2 cups of water to a boil and add salt. Empty the tap water from the thermos. Place the wheat in the thermos and add the boiling water. Screw the lid tightly onto the thermos and allow the wheat to cook for about 8 hours or overnight. Drain off any water that has not been absorbed. Serve.
 
The previous three recipes are from a pamphlet entitled All is Safely Gathered In: Family Home Storage Basic Recipes by the LDS Church