Folks, if you have been holding back on canning meat for any of the reasons I listed above, stop! Canning meat is so easy. In fact, chicken breast is the easiest thing I've ever canned, period. It really couldn't be simpler. Here's how to do it.
- Pack your jars with chicken. I trimmed and sliced chicken breasts into large chunks and placed the pieces in clean canning jars. A pint jar will hold about 1 lb of chicken. Maintain 1" headspace. (For those new to canning, that means fill the jar with meat up to 1" from the top of the jar.)
- Pour hot water into the jars over the chicken. Some people skip this part. A couple of my canning books said to add water, and I followed their advice.
- Free any bubbles and adjust water to maintain the 1" of headspace. Run a plastic knife or bubble freer around the edge of the jar a couple of times. It was amazing just how many bubbles were trapped in the jar. I had to top each jar up with water to keep the headspace at 1".
- Clean off the jar rims with a damp paper towel. I had chicken gunk all over the rims of mine. If you don't take the time to clean the rims, your jars might not seal properly.
- Place boiled lids on the jars, tighten rings to "finger tight", and can it!
 |
| Chicken packed into jars |
 |
| Using the bubble freer to release any air from the jars |
 |
| Ready to can |
6. Check every so often to make sure your canner maintains 10 lb of pressure for the full 75 minutes.
You might have to adjust the temperature on your stove. It takes remarkably little heat to keep the
canner going.
7. After the 75 minutes, turn off the heat. When the pressure reads zero, open the petcock. I wait a
couple of minutes before I open my canner, just for insurance. Open the canner lid AWAY from
you and remove the jars. They are still very hot, so be careful.
8. I let the jars rest on my counter undisturbed for at least 12 hours. My jars and lids were a
bit greasy and schmutzy, so I put some white vinegar on a kitchen towel and wiped them clean.
9. Label jar with the contents/date canned and enjoy! For best quality, use within a year.
 |
| The finished product |
Canning ground beef is very similar, but there are a few differences.
- You need to brown your beef ahead of time.
- Put the browned beef in clean, hot, canning jars (a pint holds just under 1 lb of cooked ground beef), reserving 1" headspace, and pour some boiling water up to the 1" level.
- Free any bubbles, adjust headspace if necessary, wipe rims, etc. The remainder of the process is identical to the chicken. Process for 75 minutes at 10 lb of pressure.
 |
| 5 lb of ground beef, browned and ready to be canned |
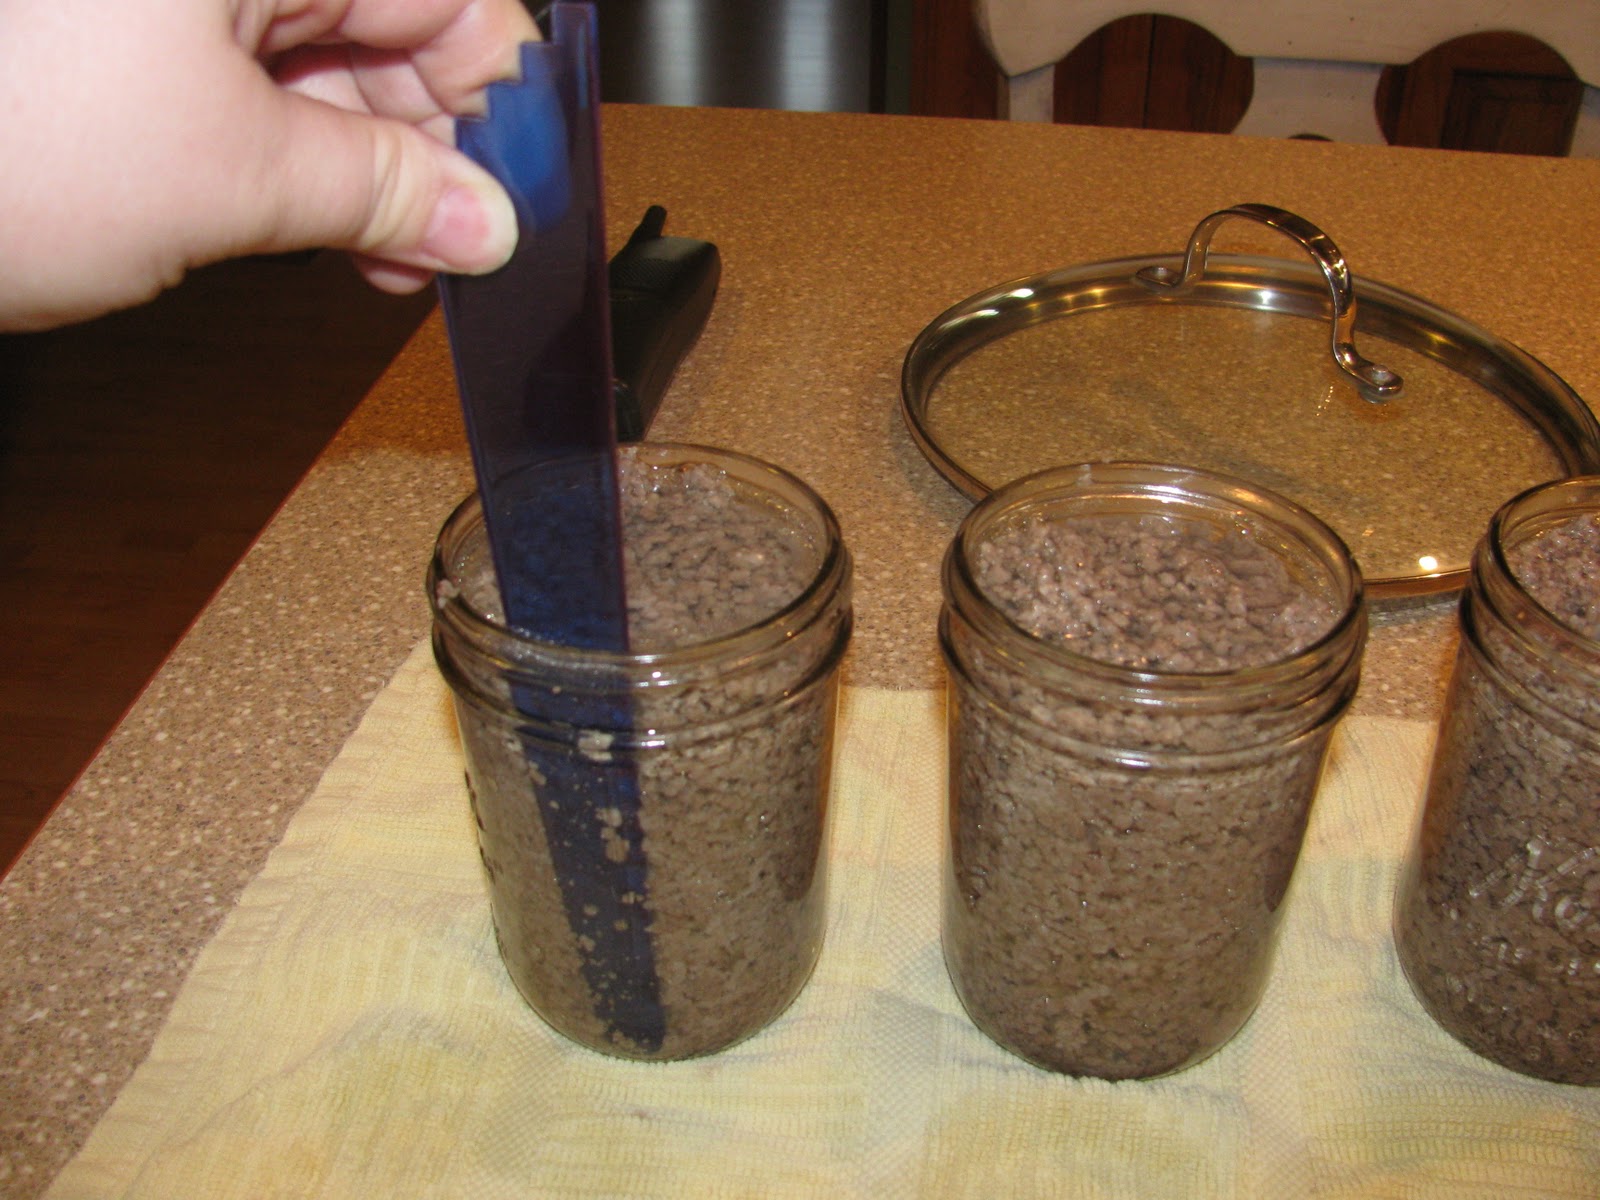 |
| Freeing bubbles from the beef and water |
 |
| Et voila! |
What's the point?
Why should you can your own meat? Well, if you like to eat meat, you'll definitely want to have some on hand if you're living off your food storage! I know Hubby Dear gets grumbly if I feed him too many vegetarian meals in a row.
Does home canning meat save you money? Here's what I found:
 |
| Sam's Club chicken |
5-13 oz cans of "Member's Mark" chicken at Sam's Club - $9.98, not including tax. When I add in our crazy-high local taxes, it came out to 15 cents per ounce.
Vs.
7 lb of boneless, skinless chicken breasts - 14.05 + tax
12 pack of pint jars with lids - 10.69 + tax
I added in tax and prorated the cost for the 7 jars I filled with chicken. It came to 18 cents per ounce. If I hadn't had to buy any canning jars or lids, it would have cost me only 13 cents an ounce.
If you get a crazy good deal on chicken and have a ready stock of canning jars, home canning meat will indeed save you a few pennies.
What about the taste?
I don't know! I haven't tried it out yet, but I've heard great things about home canned meats. I'm going to do a blind taste test of my home canned chicken vs. the Member's Mark chicken I have in storage and I'll post the results.


Thank you so much for posting this. I have not tried to can meat for the very same reasons! Now I feel brave - Ha! We have a glass top stove so my canning has to be done outside on a camp stove. I'll have to wait for some decent weather, but I'm going to try this for sure :)
ReplyDeleteI am going to try this too. I have been canning the grapes from our vineyard for a while but meat has always scared me!! Plunging in!
ReplyDeleteMight I suggest - take the rings off your jars? It will help keep them from rusting AND if there's a problem with any jar, the lid will just pop off instead of exploding your jar.
ReplyDeleteAlso, I've found that putting some vinegar in the canning water (you know, the 2" or so of water that goes in), it helps to keep the jars clean.
I don't add any water to raw meat when I can it. Usually it won't make enough broth to completely fill the jar, but that's ok. It's still safe.
In my pantry, I have home-canned chicken, turkey (I tried separating dark and light meat, but you know what, it tastes the same after canning!), ham in broth, ham in bbq sauce, pork, ground beef, beef chunks, beef slices (they shred when I take them out - nice hot beef/gravy sandwiches!), meatballs, spaghetti sauce with meat, taco-flavored ground beef ...
Sometime this month I'm getting a half pig. What can't be cured will be canned.
Canadian Doomer - You're right about taking off the canning rings. I neglected to mention that I do that. Thanks for the tip about adding vinegar to the canner. What isn't vinegar good for? :) What an awesome supply of canned meat you have! I definitely plan on exploring some of those things you mentioned.
ReplyDeleteI am unable to find any information about WHY you must add water/broth to cooked ground meat that is to be canned. Does anyone know the answer?
ReplyDeleteThanks!
Anonymous - My Ball Book of Home Preserving (the gold standard of canning books) doesn't say why. They just say you can use water, broth, or tomato juice. I have a few guesses of my own. If you didn't add water, the ground meat would be packed in very densely. Perhaps it wouldn't get to the proper temperature in the center of the jar, would have a loss in quality, or simply cook unevenly. The bonus about adding water is that you end up with free broth when you remove the meat from the jar! Maybe one of my readers will have a better answer for you.
ReplyDeleteYou usually add liquid if you precook the meat before canning. You usually do not add liquid if doing raw pack. On most meats, I raw pack. The meat will generate enough broth. I rarely have a jar that isn't fairly full of meat/broth. I normally pre-cook hamburger.
ReplyDeleteAdding water to raw-pack meats just makes for extra work. I've canned chicken breasts, turkey, pork and beef chunks and never added water. The only thing you'll notice is that after processing the jar only seems 3/4 full, but that doesn't make any difference to the meat.
ReplyDeleteYou should not try to raw-pack ground meats. The texture of raw ground meat makes it difficult for the temperature to rise as high as it needs to through the whole jar to safely can, and without draining the cooked ground beef, you'll end up with too much fat in your jars.
I usually wait 30 minutes to take the jars out of the canner to lessen the risk of cracking them.
Also, after cooling for 24 hours, you want to take the rings off to test your seal. I usually can about 15 pints at a time, and for whatever reason, I have one or two seal failures about 30% of the time. Test your seal two ways - tap with your fingernail on the top of the jar and any failed seal will sound different from the rest of your jars, and lift the jar by the edges of the lid and you will find the lid moves or just lifts off completely. Refrigerate and use that product within the next few days.
It will surprise you how convenient canned meats will be. No need to defrost and precook meat for a casserole. Just open the jar and it's ready to go.
Doesn't the meat you can yourself have a much longer shelf life than the canned chicken from Sam's? I've never canned before. The shelf life is my main reason for wanting to learn this skill
ReplyDeleteGettinreadymom - Not really. Most sources say you should use your meat within one to two years after canning. Would it be OK to eat past that point? Probably, but that's no different than commercial canned meat. I will say that it tastes better than commercially canned meat and has a better texture, too.
ReplyDeleteI was a tiny bit grossed put by the thought of canned meat but once I realized how convenient it is,I was sold!! I find that the ground beef has a different flavor (not bad, just different) but the chicken tastes just like fresh chicken. I also canned beef chunks which was crazy easy and fantastic to have on hand!
ReplyDeleteEmily B.
I have learned how to even can Bacon. I love canning our own meat!
ReplyDeleteAppreciate for this detailed information. With a vegetable chopper, you can get the perfect shape in less time and less mess. We can help you to find the Top vegetable choppers in the market.
ReplyDelete