Showing posts with label onions. Show all posts

Monday, August 12, 2013

How to Braid and Store Onions

This year's garden production has been absolutely outstanding and our crop of storage onions was no exception. Here's a quick tutorial on how to store your harvest to use for months to come.

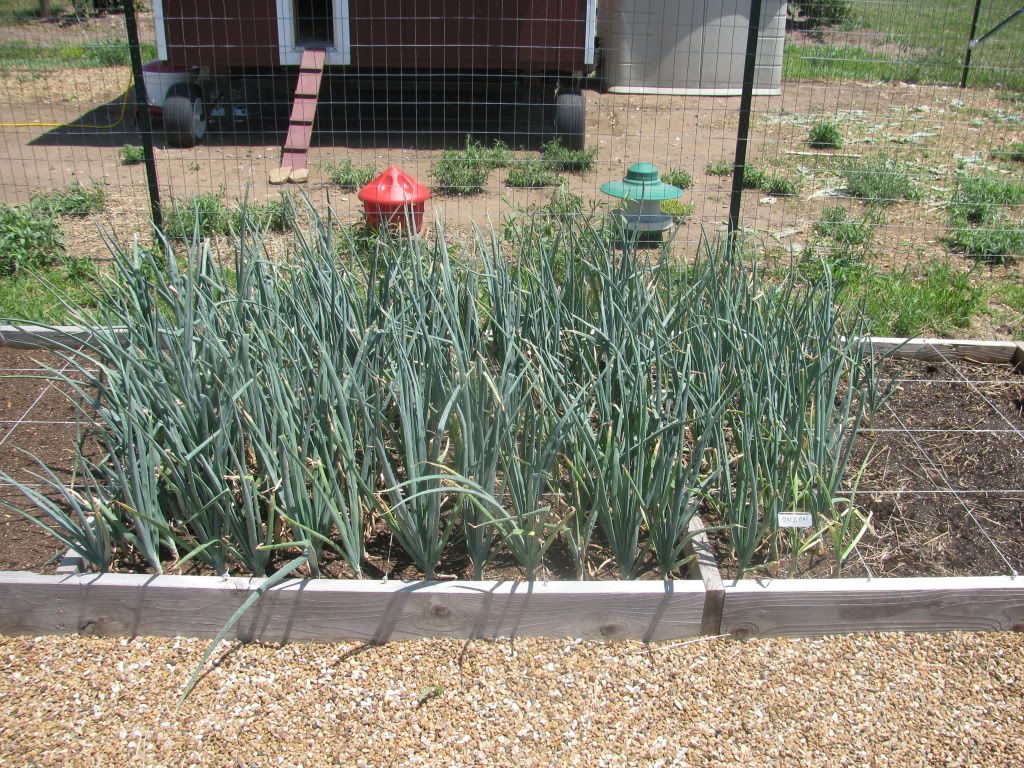
We had onions in both a double box and a shorter box. This was taken in mid June,
 about a month prior to harvest. 

Before you go to the trouble of braiding your onions for long(er) term storage, make sure your onions are a variety that will store well. Some onions keep for up to a year, but others (think Vidalia and many other sweet onions) only last a few weeks. We grew Patterson yellow storage onions this year and with care, they should keep into next spring. You can start onions from seed, from sets, or with plants. Onions started from sets do not store as well as those grown from seed or plants, so keep that in mind as well.

You will know your onions are ready to be harvested when the tops start to flop over and go brown. As long as the weather is dry, we let them stay in the the garden for a few days beyond that and then bring them into our garage to dry out some more. 

A batch of onions newly harvested from our garden.

If you are not going to braid your onions, you might want to allow them to dry for up to three weeks. That lets the foliage dry out completely, preventing mold and letting you cut the leaves from the bulb with ease. Since we were braiding ours, we let them set for about 3 days or so, just enough to begin the drying process but not so long that the leaves would be too brittle to braid. 

The Process

Here's how to do it. It might take you a few tries to create a neat braid, but it really isn't too hard. Even sloppy braids will store well.  

Crisscross three onions together just like you were braiding hair. 


Tie the onions tightly together with a piece of twine. This string will become
 part of the braid, so make sure you cut it nice and long. 


Put the long end of the twine in with the center onion's leaves. 


Begin to braid, making sure to braid the twine along with the onion leaves.


Put another onion in the center, adding its leaves to the existing strand. 


Braid the onion in to secure it. 


Add two more onions, one on the left and one on the right. Make sure you line
up their leaves with the existing strands. You will always have three strands of leaves and
you just keep adding more onions and their leaves into the braid. Note the twine is still part of the braid.  


Keep on braiding. 


Keep adding onions and braiding until you have run out of onions. If you have lots of
onions, stop while your braid is still a manageable size/weight. Once you have added
your last onion, keep braiding the remaining leaves.


Double the leaf "handle" over.


Tie it securely using the end of the twine. 


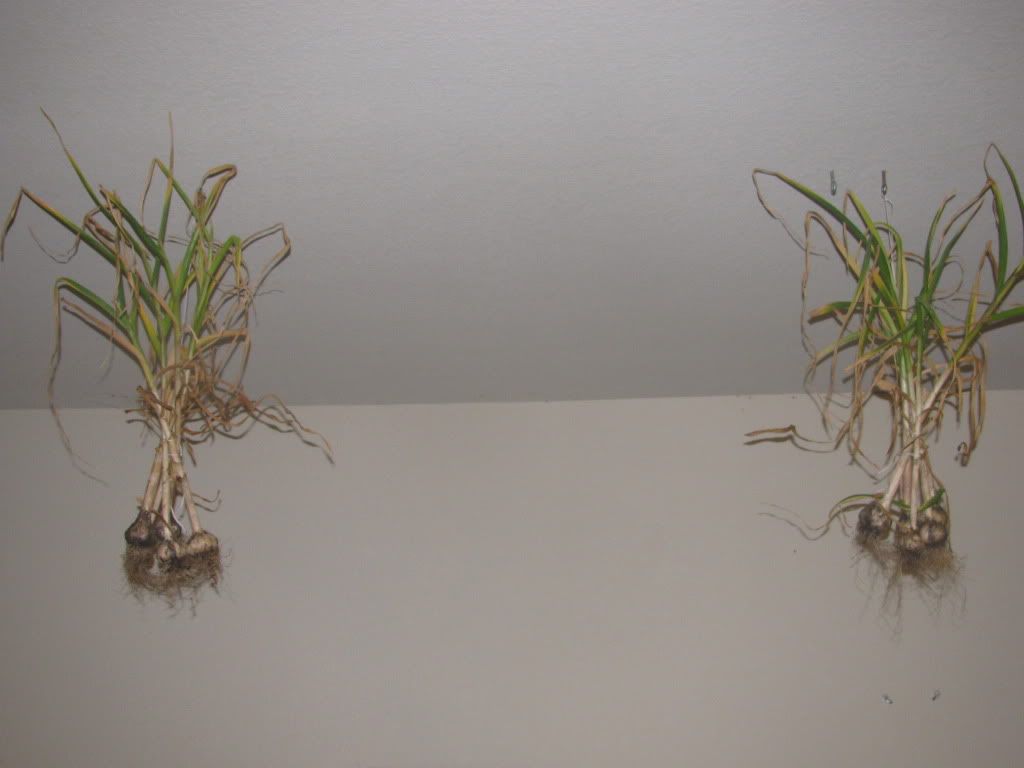
Viola! Your braid is now ready to be hung up. When you want an onion, simply cut one from
the braid. Our first braid is on the left. You can see that it took us a
 little practice to make a nice, tight braid.  

The ideal storage conditions for onions are 32-40 degrees F and 65-70% humidity. I don't have any place like that available to me at the moment, so we simply hung them up to a rafter in our basement storage room. A root cellar would be ideal. If you keep the onions in a cool dark place, they will last up to a year.


Reference: 

Harvesting and Storing Onions  


Do you grow your own onions? How do you store your onions? 

Wednesday, March 6, 2013

Perennial Vegetables to Establish Now for Your Survival Garden

I've been watching a series of old British TV shows called "The Victorian Kitchen Garden", "The Victorian Kitchen", and "The Victorian Flower Garden". I find it really relaxing to learn about gardening in days gone by. It's kind of like visual Valium for me.  I love it.

One of the things that these programs have done is to pique my interest in perennial vegetables. The Victorians grew a much wider array of vegetables than are commonly consumed today and many of them are perennials that will grow back year after year. If you establish several of these types of vegetables in your garden now, you will have them in place should an emergency situation occur. You could consider these plants to be living members of your food storage.

Perennials in the kitchen 

There are perennial vegetables mentioned in many of the episodes of the series listed above, but this episode of "The Victorian Kitchen" is the one that really got my wheels turning. If you start watching around 8:00, you will see the head gardener, Harry, come in with a basket of Jerusalem and Chinese artichokes for the cook, Ruth. The finished dish of Chinese artichokes is shown at about 10:30.


E8 Victorian Kitchen - The Dinner Party 


Don't those Chinese Artichokes look like some sort of insect larva? I'm not sure that I would have an easy time putting them in my mouth, but I'd enjoy giving it a go.  


Another reason to plant perennial vegetables - OPSEC

Besides the obvious advantage that perennial vegetables have in coming back every year with little help from the gardener, it is also worth noting that many don't look like vegetables to the uninformed. Jerusalem artichokes, for example, are a type of sunflower and could simply be a pleasing addition to your landscape. If the worst happens, the average Joe isn't going to recognize that your sunflowers have serious edibles growing underground.

This is what a Chinese Artichoke plant looks like. Does this look edible to you?
Image source: shizuokagourmet.com


What should you plant? 

There are whole books dedicated to perennial vegetables out there. (Try this one,especially if you live in warmer climates.) The following is a short list is composed of plants that will thrive in my Zone 5 climate. Many of these plants can be grown in climates both warmer and cooler than Zone 5. Follow the provided links to learn more about each plant and its needs. 


Asparagus - A classic, but, alas, no one in my family likes it. Maybe we can use it to barter. It must be grown for several seasons before you can harvest spears and even longer if you start with seeds rather than crowns.

Crosne (aka Chinese Artichoke) - Fool your friends and make them think you are eating insect larva! A plus for the time-crunched or fuel-conscious: these tubers can be cooked or eaten raw. 

Dandelions - Maybe you don't need to plant these in your garden, but you probably have them in your yard already. Just make sure you don't spray them with chemicals and you can eat them or feed them to your chickens.

Egyptian Walking Onions or other Multiplying Onions - The article I linked says that they "tend to be more reliable and productive, less day-length sensitive and less subject to the depravations of pests and diseases" than your standard onion. Yes, please! 

Good King Henry - I love the fanciful name of this plant. Apparently it is similar to spinach, though it also has edible flower buds and seeds. It can be grown in the shade, so if you have an area of your yard that is too shady for traditional vegetables, this would be a great option.

Lamb's Quarters - This is a plant that grows as a weed in many areas of the country. You can eat any of the above-ground parts of the plant and it can be used as a substitute for spinach. 

Lovage - Lovage can be grown as a substitute for celery and it was used for medicinal purposes in times past.

Patience Dock - This is a hard-to-find plant, but apparently worth the search. It is supposed to taste like spinach (Is that the perennial vegetable equivalent of "tastes like chicken"?) and is one of the earliest greens in the garden.

Russian Red Kale - I am a new convert to the wonders of kale. If you've never tried it before, it reminds me of broccoli, but in leaf form. My kids gobble it up and it is great livestock feed as well. Many varieties of kale self-seed readily, which makes kale a great addition to your perennial vegetable plan.

Rhubarb - Rhubarb is a popular spring dessert ingredient, but don't forget that the leaves are poisonous!

Skirret - This is a vegetable I had never heard of until I watched "Victorian Kitchen Garden". Apparently it was a favorite of Queen Victoria. The edible part of the plant is its roots. 

Sorrel (all kinds - Garden/Common, or French) - Tasty, lemony-flavored greens. 

Sunchoke (aka Jerusalem Artichoke) - This tuber is popular with chefs and can be eaten raw, roasted, or boiled and pureed.  This is one of the most attractive perennial vegetables to me simply because the plant is so pretty.

A sunny patch of sunchokes
Image source: http://myselfsufficienthome.com/jerusalem-artichokes/


I hope you find this list to be a useful starting place. I definitely plan to make perennial vegetables part of our garden in the future. 

Thursday, June 21, 2012

Mid-June Garden and Orchard Update

It's been a while since I did a garden update, so I thought I'd share what's going on. 

Unfortunately, May was extremely hot and dry here, which caused our cold weather crops like peas, lettuce, and spinach to die prematurely.  If it's not one thing, it's another. 

Our garden on June 18. It's looking bare since so much has been harvested or pulled out. 

The chickens have the right idea. 

The chickens spend the hot part of the day underneath their coop. 

When it's hot like this, it's best to just stay in the shade! I've been spritzing their run with the hose a couple of times a day and putting ice cubes in their water. They seem to be weathering the heat well. Hopefully by this time next month I'll be getting eggs from my lovely ladies! 


Drying garlic

We harvested around 40 heads of garlic. We gathered them into bunches of five or six heads and have suspended them in our garage to dry for a month or so. Once they are dry, I'll cut them off their stalk - we grew 'Music', a type of hard-neck garlic - and put them into storage. I plan to save our best heads back to use as seed garlic for next year's crop. I am also going to try dehydrating garlic in my Excaliburand grind my own garlic powder.

'Copra' onions

The onions are doing well and will probably do even better now that the garlic is gone. Our garlic plants were three feet tall and were shading them.


Our green beans had spotty germination

Our green beans had spotty germination, as did our carrots, cucumbers, watermelon, zucchini, and cantaloupe. We replanted the bare spots. We also planted extra vine plants in the space vacated by the peas. We will soon have a riotous mess in those bare areas!


Lots of varieties of heirloom tomatoes


Ripen already!! I can't wait for that first homegrown tomato of 2012.


We planted some black oil sunflowers in this open area

We are growing some Peredovik black oil sunflowers for a treat for our chickens.


Sunflower bud


The Berries

The heat has led the blackberries to begin ripening a full month earlier than last year.


I've only picked enough to eat out of hand, but in the next week or so, we should be harvesting buckets of berries. Time to dig out the canner and make some blackberry jam!


Barn swallow nest

One of the things we are doing to help control the wasps that plagued our blackberries last year is allow barn swallows to nest on our property. We had been knocking down the nests simply because the birds make such a mess on our porches and deck. Barn swallows eat an amazing amount of insects, however, so we are leaving them alone this year. Hopefully this will cut down on the wasps sucking the juice out of my berries!

We're getting a few strawberries from our everbearing plants and little bits of raspberries, too, though our big raspberry harvest will be in September. Or August, the way things are going this year!

Only about half of the new raspberries appear to have survived

The good news about the raspberry canes we planted this spring is that we have a few survivors. Hopefully they will make it through the heat of summer and we can fill in the row with extra canes from our established raspberries.


Blueberries going strong

Our blueberry bushes seem to be doing well and they've grown quite a bit. We planted two year old bushes, so hopefully we'll get a crop from them next year.

The Orchard

Our little orchard faced some struggles this month. Two of our newly-planted apple trees came down with a bad case of Cedar Apple Rust. 

Our Jonafree apple tree has managed to overcome the Cedar Apple Rust 

The GoldRush? Not so much. It's growth is being stunted by its struggle with rust.

I really didn't think we'd have to worry about disease pressures this early! And I didn't think Cedar Apple Rust would be a problem since we don't have any cedar trees on our property.


What's that right across the road from our orchard?


Earth to Emily! There are cedar trees right across the road! After I did more research, I found out that to eradicate the chance of Cedar Apple Rust, I'd have to get rid of all the cedar trees within a square MILE of our property. As that's not going to happen, I'm going to have to pay close attention to the weather conditions next spring so I can stay ahead of the rust. In the mean time, I have been using an organic disease control spray that seems to be helping somewhat.

Our pecan trees

Perhaps the most impressive growth has been from our three pecan trees. They might not look so impressive to you, but considering they were mere twigs when we planted them last November, I'm pleased.

Oh, but I'm forgetting the real star of the show, our cherry tree.

Our not-quite-as-dwarf Montmorency cherry

We got this tree for free four years ago and have pretty much neglected it. This year we have lavished it with care. It got a proper mulching, fertilization, and holistic sprays in the spring. It has responded with enthusiastic growth of nearly two feet!

I also pre-ordered the new additions to our orchard for the fall - two standard-sized pear trees (Starking Delicious and Seckel) and an All-in-One Almond tree. I was really tempted to order a lot more but I remember how hard Hubby Dear and I have to work to bust through our concrete soil. Three trees at a time is probably all we can handle.


Between the garden and my poultry projects, we've been busy. What's growing at your house? 


Monday, April 2, 2012

March 2012 in Review, Part III: A Whole Lot of Gardening

With the late Spring/early Summer-type weather we've been having, everything is about a month ahead of schedule. Our daffodils and forsythia have come and gone. The grass is lush and green and we've been working outside everyday. Here's what's going on in the garden. 

March Orchard Improvements

Our pitiful little cherry tree is finally getting some TLC

One of my goals this year is to make major strides towards establishing a survival orchard. I thought I should probably try and do something for this cherry tree I got for free four years ago before I start spending money on new trees! I pulled all the grass and weeds from around it in a 2' diameter. Then I bought some organic fruit tree fertilizer and gave it a generous serving. I'm pretty sure this is the first time I have ever fertilized this tree. Gee, I wonder why it is still 3 feet tall? ;) 

I learned from my orchard bible, The Holistic Orchard: Tree Fruits and Berries the Biological Way,that putting mulch right up against a fruit tree is a bad idea. It holds too much moisture against the trunk and is prime habitat for rodents that munch on bark. It is also a bad idea to lay down a circle of weed cloth underneath wood mulch or stone. Weed cloth creates an environment that favors bacteria at the expense of the fungi that are key to tree health. So, yes, I did that wrong when I planted my pecan trees last fall! It is better to put a thick layer of pea stone down and then mulch in a wider circle around that. Much more about mulch this month. (Hehe)

Spritzing and Spraying

I've spent a significant amount of my prepping budget over the last couple of  months on equipment and spray ingredients recommended in The Holistic Orchard for our fruit trees and berry bushes. The sprays aren't toxic pesticides or chemical fertilizers but are aimed at improving the overall health of the plants. It's all about helping the plant's own immune system fight off potential pathogens and insect pressure. Does this sound a bit New Age-y or otherwise weird? It's not, I promise! Read this for a bit more explanation.  


Solo 4 Gallon Backpack Sprayer
The weather has accelerated the spraying timetable so I've already sprayed two of four total spring sprays. I loaded up my nifty new backpack sprayer with a pungent concoction of water, neem oil, liquid fish, liquid kelp, effective microbes, and blackstrap molasses and slid on the 40+ lb contraption. It felt like a stubborn, smelly toddler was clinging to my back as I staggered across our homestead, spraying our cherry and pecan trees as well as the blackberry and raspberry bushes. Luckily, I'm used to stubborn, smelly toddlers so this was a breeze! 


Raspberries in the foreground, blackberries in the middle. Hopefully the holistic sprays will encourage bountiful harvests. 

Composting

We set up a compost bin primarily for chicken and rabbit waste. The majority of our food waste will be consumed by the chickens as they get older and we plan to use many of our spent garden plants as mulch in the chicken run.  


The bin is close to the coop and to the garden. 


When we were deciding where to set up the compost bin, we debated putting it somewhere that would be a bit out of the way but wouldn't be visible from the house. But then we remembered that our giant chicken run isn't exactly discreet! The compost bin is practically invisible in comparison.  

I'm looking forward to reducing the number of bags of compost we'll have to buy in the future for our garden endeavors. 

The Vegetable Garden

Hardly a day goes by when we're not planting something.


We planted onion transplants this year rather than trying to grow them from seed. 

Growing onions from transplants instead of seed seems like cheating, but maybe we'll actually get some good sized onions this year.


"Music" variety garlic

The garlic we planted last fall all sprouted and is doing great.


"Encore" lettuce mix and "Corvair" spinach

The first of many boxes of salad greens have sprouted. 


My usually June-bearing strawberries are in bloom

Last year's strawberries are blooming. In addition, we planted 75 new plants.


Peas! We outsmarted the mice this year

Hubby Dear's relentless trapping of mice in our garden has resulted in many more seeds surviving long enough to sprout. Yippee for peas!


I love our garden 

If you've been following my garden adventures, you might notice that we switched out the wooden lattice-style square foot grids for ones made of twine. We decided that the wooden grids simply take up too much room and make weeding and planting difficult. Hubby Dear installed metal screw eyes to the sides of the boxes and ran the twine through. We are much happier with the result.

Seed Starting Results

The seeds we planted in the little Jiffy Pot greenhouse took off rapidly. We're now in the process of hardening off the seedlings. 


Rosemary I overwintered indoors, the seedlings, and one of our new blueberry bushes


The sunflowers aren't enjoying the process very much and everything else is pretty leggy and windblown, but we may end up with a few successful transplants. We hedged our bets by directly sowing the same seeds in the garden and we'll keep whichever are the best looking plants in the whole lot. 

------

The beat goes on in April. More planting, hopefully we'll start harvesting! Coming soon: planting apple trees and blueberries.


Have you started your garden yet? What's growing at your house?