Showing posts with label ducks. Show all posts

Wednesday, January 2, 2013

2012 in Review and 2013 Goals

Happy New Year, y'all! I hope everyone had a blessed holiday season.

Unfortunately, I was either busy or sick for much of 2012 and so my posting here wasn't as regular as I would have liked. Nevertheless, I managed to make progress on my preparedness goals. Here's the list of goals I had last January. I didn't accomplish everything, but I'm not unhappy.

In 2012 I :

  • Added a bit to our first aid supplies. This is definitely an area where we fall short. I will admit to being a wee bit complacent about first aid since Hubby Dear is a medical professional. I need to improve. 
  • Expanded our garden and learned some hard lessons during a very poor growing season. Our area of the country experienced the hottest year on record as well as one of the driest, so our garden was far less than stellar. 
Delicious heirloom fruit and vegetables

  • I planted comfrey in our orchard area. It's part of the whole holistic orchard deal, but the bonus is that it is also a medicinal herb. I learned about permaculture and now have plans to have a bunch of medicinal perennials growing among the trees in the orchard. 
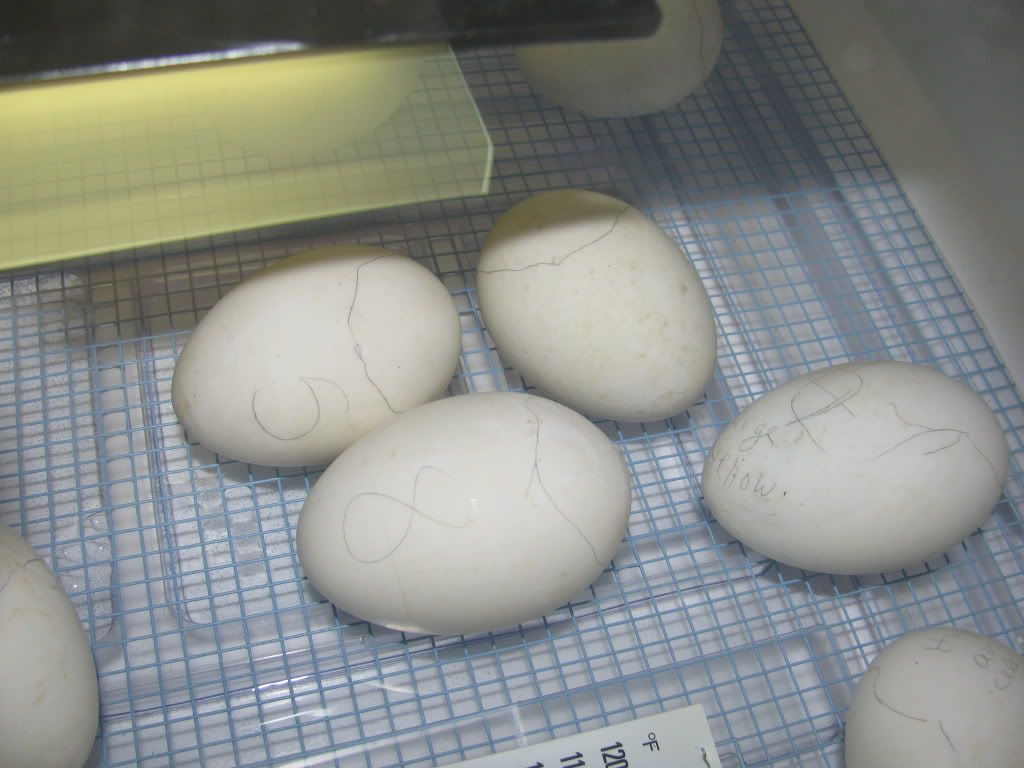
  • My favorite item on the list (and new obsession) is poultry. We started raising chickens, ducks, and turkeys. Having livestock was a big stretch for two former city kids like Hubby Dear and myself, but we have really enjoyed the journey. We started off with chicks and poults from hatcheries and ventured into hatching eggs with an incubator. Our chickens gave us 1,645 eggs in 2012; the ducks provided 124.  
Some of our ducklings

  • Related to that last one, we butchered our first animals. It was so rewarding to grow our own meat and butchering is definitely a worthy skill for any prepper. 
  • All the manure that started appearing on our property provided the impetus for us to begin composting
  • Managed to keep our strawberries alive! We won't have to re-plant this year. I am hopeful that we will have a generous crop next spring. 
  • Another success: I learned all about sprouting, an easy way to grow fresh, nutritious greens all year 'round.
  • My success with sprouting for people encouraged me to grow wheat grass for my birds. It took a couple of tries (and a horrible infestation of fruit flies), but I finally got the hang of it.  I'm also proud of the black oil sunflower seeds we grew for the chickens. 
A Peredovik black oil sunflower

  • I stocked up on reusable Tattler canning lids. I used them for all the canning I did and I finally got the hang of using them. They are a little different than standard metal canning lids, but once you get it, you won't go back. 


For 2013, I remain focused on building up our homestead. One reason is that I just like doing it. I love puttering around the garden and taking care of my birds. I have expanded into breeding poultry for pleasure and profit, so that also takes up a lot of my time and energy.

The other reason that my preps are centered on homesteading is that I feel it is quite necessary. The shenanigans in DC regarding the so-called Fiscal Cliff made me sick to my stomach, but I hope that it will serve as a wake-up call to many. I fear that our country is in an irreversible decline and our prosperous American lifestyle is in serious jeopardy. In short, I think we're screwed. I feel that being as self-sufficient as possible will be incredibly valuable in the days ahead. You might not live on 5 acres in the country like I do, but I hope you are thinking about things you can do to help your family weather whatever storm may come.

With that said, here are my goals for 2013:
The north half of our garden, May 2012

  1. Continue to add to our orchard. We have peach, nectarine, cherry, and plum trees ordered for the spring. We'll plant more peach, apple, and apricot trees in the fall. Here's the master plan for our orchard if you haven't seen it. 
  2. Expand our garden again and try some new varieties and methods of cultivation. 
  3. Try new types of pest control in the garden. We garden organically, but haven't ventured much into companion plantings to attract beneficial insects. That is a priority for me this year. We will also experiment with row covers to flummox the evil squash bug that has plagued us in the past.  
  4. We tried starting seeds indoor last year. We had mixed results, mainly due to lack of sunlight. We are building an easy DIY seed starting kit that should really help out. 
  5. Water storage is a huge issue for any prepper and the horrible drought we are in has really brought it to my attention. I hope to get rain barrels installed and may experiment with using greywater
  6. First aid - the perennial topic for me. I've got to get going here. 
  7. Food storage - I need to take inventory of what we have used up and refill as necessary. I will be canning and dehydrating the produce of our garden and herb garden. 

So that's me. What about you? What do you have planned for 2013? 

Monday, December 3, 2012

Wheat Grass Success and a Plague of Flies

After mixed results with my first attempt to grow wheat grass for my poultry, I decided to follow the experts' recommendations to the letter. The result has been amazing. If you have enough space for several trays at once, you can easily grow enough wheat grass to form the core of your poultry's diet. But I'm getting ahead of myself just a bit. Here's how I did it.

Supplies:
  • Something with good drainage to plant the wheat grass in. I bought a set of nursery flats like these to use, plus some additional flats without drain holes to nest them in (keeping the water from spilling all over my counter). You'll need two sets of the flats with holes because you'll use one as a cover when your grass is getting started. 
  • Potting soil or vermiculite. I keep vermiculite on hand, so that's what I used. 
  • Liquid kelp or other organic liquid fertilizer. This is optional, but useful, especially if you are going to get multiple cuttings of your wheat grass.
  • Sprouting seeds. I experimented using both hard white wheat from my food storage as well as a mix Sprout People sells called "Kat Grass"
  • A spray bottle 


Step One: Soak the wheat

Soaking the wheat

Measure out enough wheat to densely cover the bottom of your sprouting tray. Then place the wheat in a jar of cool water, stir, and allow to soak for 8-12 hours.

Step Two: Pre-sprout


See the tiny roots? This wheat is ready to plant. 

Drain and thoroughly rinse the soaked wheat. Then, put the wheat back in the jar you soaked it in or in a sprouter. I used my handy, dandy Victorio 4-Tray Kitchen Seed Sprouter. Keep the wheat in a cool location out of direct light. Rinse and drain the wheat every 8-12 hours until you see tiny roots on your wheat. It only took 12 hours before I was ready to proceed to the next step.

Step Three: Plant

Wheat seed planted

I poured in enough vermiculite to create an 1" layer in the bottom of the nursery flat. Then I added water, stirred, and added more water until the vermiculite was uniformly damp. I also added a little organic liquid kelp fertilizer to this initial watering. Next, I spread the sprouted wheat evenly across the top and spritzed the seeds with water from the spray bottle.

Important detail: After you spray the seeds, take the extra nursery flat and place it upside down to form a tent over the top of the tray. You want the wheat to grow tall quickly and the darkness is the way to do it. The drain holes in the bottom of the the nursery flat also provide ventilation to avoid mold problems.

Step Four: Water twice daily and watch in amazement

It won't take long before the seeds shoot up. And, unlike my previous attempt, there was absolutely no boozy smell associated with it. All I did was spray the tray evenly with water twice a day.

Day  One


Day Two


Day Three

I kept the tray inverted over the wheat grass until day four when the grass was about two inches tall. Now it is time to give the wheat grass a sunny place to grow. I also began watering from the bottom, pouring enough water into the bottom holding tray to last a full 24 hours.


Day Four


Day Five: Greening and growing!


Day Seven: First harvest

After seven days' worth of growth, I cut the wheat grass back to about 1". I could have just given the entire tray to my birds and let them have at it, but I wanted to see if I could coax additional growth out of the same planting. I was indeed able to get two more cuttings before I threw the remaining mass of roots and vermiculite (and fruit flies, but more about that in a bit) out into our garden.

And what was the verdict on wheat grass from the feathered community?  


Chickens love wheat grass


So do ducks
They adored it. Both the ducks and chickens chomped it down with gusto.

There's just one problem I encountered during this little experiment: a massive infestation of fruit flies! I'm talking giant, biblical plague-proportion of fruit flies. Every time I would open the lid to spritz the grass, a cloud of flies launched into my face. By the end of the first week, I had generations of flies living in the wheat grass. Even covering my kitchen counters with multiple tried and true apple cider vinegar traps only put a slight dent in the population. It's been a week since I removed the wheat grass trays (as well as all fruit and other food sources) from my kitchen and I'm just now noticing a sharp decline in the numbers of fruit flies.

I've promised my incredibly patient (albeit slightly frustrated) Hubby Dear that I'll wait a bit before I try sprouting wheat again, but you can bet that I'll do it. Growing wheat grass is only slightly more complicated than alfalfa sprouts, but you get so much bang for your buck. I'm really looking forward to having a continual supply of fresh greens for my birds.... if I can keep those darn fruit flies away, that is.

Thursday, July 5, 2012

Thursday Morning Miscellany

  • I broke my washer last Friday.

There is a 3" slit in the gasket 

I had an underwire bra go amok and slash a huge hole in the door gasket. It's a freak accident that is going to cost me $250 and  a week and a half without a functioning washer. In the meantime, what am I going to do about our laundry? 

I decided to wash it all by hand. 

I'm spending lots of time here

I've got detergent, plenty of hot running water, and even a dryer. I thought that there was no reason why I shouldn't be able to take care of it. Well, several days in, it's apparent that washing laundry for six people by hand is very tedious. I need to invest in a few simple tools that will make the job easier should I have to wash laundry by hand in the future. Something to agitate the laundry would be nice, and something else that would wring out water is essential. My laundry remains so wet after I wash it that it takes forever to dry. I just keep telling myself that this is an excellent learning opportunity and I'm counting down the days until my washer is fixed. 

  • We finished our chicken moat expansion. 
The fencing now encompasses the new duck house area and connects all the poultry
together in a circuit around the garden


I'm glad to be done with construction for a while. We're taking a brief breather and catching up on backed up garden chores. In a couple of weeks we'll have to address our turkey housing issues. 

  • My Ancona duck eggs are due to hatch today. When I woke up this morning, two of my eggs had pips (little holes in the shell). Thirteen of the 15 eggs made it to the end of the incubation period. I hope that I get a wide variety of colors and patterning and that most of them are girls. That's not too much to ask for, right? I found homes for any extra birds that should hatch. I should admit that things are moving slow enough at this point that I hope I get any ducks to hatch. 

Come on and hatch, little ducklings!

Sunday, June 10, 2012

How to Incubate Shipped Duck Eggs

I have wanted Ancona ducks since I read about their virtues in Carol Deppe's book, The Resilient Gardener. They are friendly, forage well, destroy garden pests and are good for both eggs and as a meat bird. They are also ridiculously gorgeous.

Ancona ducks come in a wide variety of patterns and colors
Image from http://boondockers.sharepoint.com 

Anconas are patterned like Holstein cows or pinto horses; no two ducks are alike and they can have spots that are black, brown, lavender, or blue in color.

There's just one problem - Ancona ducks are a critically endangered breed. There are very few hatcheries that sell them and those that do have a variety of issues (huge minimum orders, poor quality birds, and/or sold-out for 2012).

All of this persuaded me that there was no better way to get my own Anconas than to incubate eggs shipped  from an Ancona breeder across the country.

First, a little incubator terminology

An incubator is simply a device that holds fertilized eggs at the optimal temperature for embryo growth. You can make your own incubator on the cheap, or or buy one of the many models out there at a variety of price points.

There are two basic types of incubators, still and forced air. Forced air incubators have a fan so that air is circulated and the temperature is more or less equal throughout the incubator. Both types work well, you just need to adjust your incubation procedures based on your model's performance.

I was in a bit of a rush when I ordered my incubator. I had already ordered my eggs and I needed to get an incubator, pronto. I settled on a forced-air Hova-bator.


The bottom of the incubator


The Hova-bator's exterior is actually made of styrofoam. I guess that's why all those homemade incubators made from coolers work so well! The bottom is lined with a plastic tray that has channels to hold water. You control the humidity by adding water to the tray. Over the top is a wire rack. You can place your eggs directly on the wire and this is where the ducklings will be born. 


Automatic Egg Turner

Or if you are lazy and forgetful like me, you can buy an automatic egg turner. It plugs in and gently rotates the eggs once every 4 hours. If you don't have an automatic turner, you need to turn your eggs by hand three times a day.  This particular turner holds 42 eggs. 


I set the the incubator and got it to the correct humidity and temperature well before I put the eggs in.

The incubator was very easy to put together and came with easy to follow, full-color instructions. I set up the incubator in our basement storage room. The same characteristics that make it an ideal place for long-term food storage - steady temperature, lack of direct sunlight - are perfect for incubating eggs. 

Pre-heating the incubator

According to Dave Holderread, one of the foremost authorities on waterfowl and author of Storey's Guide to Raising Ducks, you should start your incubator at least 48 hours before you set your eggs. That way you can make sure you dial in on the correct temperature and humidity. For ducks, you want to start off at a temperature between 99.25 and 99.5 degrees F and about 55% humidity if you have a forced air incubator. If you have a still air incubator, your numbers will be different; check your manual. 


Some of my hatching eggs resting after their long trip

Challenges with Shipped Eggs

I located an Ancona breeder and bought 10 hatching eggs from her. I honestly don't need any more than five ducks, but shipped eggs can have a lower hatch rate due to the traumas of a cross-country journey. The lady I bought my eggs from was extremely generous and shipped 15 eggs. If I have an amazing hatch rate, I'm going to have to re-home some of the little cuties!

If you look in the right places, you can find hatching eggs of all sorts of rare breeds. Search for hatching eggs on Ebay or on the Buy-Sell-Trade section of the Backyard Chickens forum.

The seller individually wrapped each egg in bubble wrap and then packed them carefully in a Priority Mail box. As I took each egg out of the box, I candled each one to make sure there were no cracks and that the air cells were not detached in shipping. That sounds hard but it wasn't. I simply used a small penlight to shine a beam of light into each egg. I gently rotated the eggs to make sure the air cell was attached to its proper place at the large end of the egg.

Shipped eggs should be rested at least 6-12 hours before they are placed in the incubator. I received my eggs at 2:30 PM on Thursday and they were put into my warmed incubator at 1:30 AM Friday morning. I was up late working on our duck house project and couldn't wait any longer!


I have a thermometer and a thermometer/hygrometer to monitor conditions

Starting the Incubation

Place the eggs in the incubator with the small side down. If you are not using an automatic turner, simply put the eggs on the wire bottom and try to arrange them so the large end is slightly raised.

You should have a way to monitor the temperature and humidity from outside the incubator. My Hova-Bator came with a little thermometer to place on top of the eggs. I bought an additional thermometer/hygrometer. The thermometers don't read exactly same temperatures, so I just average the two.

If you do not have an automatic turner, you're going to need to rotate your eggs three times a day. Make a mark on each egg in pencil and that will help make sure you are rotating your eggs completely. The rotation is necessary to ensure the yolk doesn't stick to the shell.

The Waiting Game 

Ducks take about 28 days to hatch; chickens only take 21 days. For the first 25 days, the eggs need to be rotated and the temperature and humidity needs to be maintained. You should candle the eggs on day 7, 12, 19, and 24. This is a good link that shows what proper egg development looks like on each day of the incubation. Discard infertile or dead eggs as you discover them lest you find a nasty exploded egg inside your 'bator one day!

Holderread recommends spraying the eggs with lukewarm water on days 6-24. Supposedly this helps the eggs dry out the perfect amount for the ducklings to hatch properly.

On day 26, remove the automatic turner and stop rotating the eggs. Make sure you place the eggs with the large end up or the duckling may not be able to hatch out. Bump up the humidity as high as it can go without clouding the glass on your incubator. You are now on "lockdown" and you should not open the incubator until the hatch is over.

Once the ducklings have hatched, you can decrease the humidity, allow them to dry off, and whisk them away to the brooder.

------

It's only day four of our incubation process and I'm already watching over those eggs like a protective parent. Even though I'm not really supposed to be candling the eggs yet, I went ahead and looked at three of them. I think I saw the beginnings of veins in two of the three eggs. Good signs!

Resources:

1) Storey's Guide to Raising Ducks  by Dave Holderread


Have you ever incubated your own poultry? Have any advice for me? 

Photobucket

Friday, June 8, 2012

My June Lunacy, I mean, Preps

In case you haven't noticed, my thoughts, time, and prepping budget have been dominated by poultry-related purchases recently. Hubby Dear has come up with a term for the disease from which I suffer - Poultry Acquisition Disorder, or PAD for short. I don't think PAD is such a bad thing; Hubby Dear begs to differ!

There is a consequence of PAD, however; the cute little buggers grow up and then you have to figure out where you are going to house them. My June and July prepping budgets will be spent on turkey and duck housing and associated paraphernalia.

Oh, you didn't know I had ducks? Technically speaking, we will have ducks in 28 days since my ducks are still in ovo. I've got a batch of Ancona duck eggs in an incubator. Stay tuned for a tutorial on incubating duck eggs in an upcoming post.

We have three big projects underway.

1) Build a duck house


Hubby Dear and I shelled out big bucks for a pre-made chicken coop, but you can't just buy pre-fab duck houses. And using a chicken coop for ducks can be problematic as ducks have different requirements. For one thing, they don't roost. Their legs are also more delicate than chicken legs, so some of the taller designs with long ramps aren't ideal. They also need the nesting boxes to be at floor level.

We considered a lot of different options and nearly settled on converting a doghouse kit into a duck house identical to this, but we wanted something larger and with more versatility.

I ended up buying a chicken coop plan from the very cool Fresh Eggs Daily blog and Hubby Dear and I are building it ourselves. The coop is very duck-friendly and is large enough to house up to 9 Ancona ducks. We don't have a very good track record with home improvement projects, but so far it is going well. If you are handy, you probably don't need to buy the coop plan since she has a pretty detailed blog post about the coop, but Hubby Dear and I appreciate the cutting diagram and parts list.

The pile of supplies. We had to buy a circular saw and jigsaw plus all the lumber and miscellany, so the total came to
about $400 dollars. If you have the tools already, plus some scrap lumber on hand, this could be FAR cheaper. 

We're still cutting all the plywood, etc. and priming everything before we put it together.

Primed bits and pieces

Since ducks are so notoriously messy, I'm going through the extra step of painting the duck house both inside and out. I hope this will make cleanups easier in the long run. Right now it just seems to be slowing the process down!


2) Figure out the turkey housing situation

A brooder in my basement isn't going to cut it for my turkey poults much longer.

I think my turkeys are around 3 weeks old. They are already larger than my chickens were
when I allowed them out of the coop and into their run. Thank goodness I only bought four!

For one thing, I'm going to need my brooder for the ducklings in less than a month. And the turkeys are ready to get out of the brooder. They've already escaped several times despite the bird netting! They are little Houdinis, that's for sure.

Here's the problem: turkey poults are very delicate and disease-prone. Should they get too hot, too cold,or  too wet, they'll drop dead. People tend to baby their poults until they are 8+ weeks old, and even then many people will keep them indoors or in wire cages.

My tentative plan is to move them out into the duck house (with an attached run) when they are 5-6 weeks old. I'll give them plenty of shade and ventilation and hope for the best. They can get to know their new chicken roommates, and hopefully by the time I'm ready to move the ducks outside, I can integrate the turkeys in with the chickens. I'm taking a bit of risk by keeping our turkeys with the chickens (chickens can potentially give turkeys a disease called blackhead), but I'm willing to chance it.

Eventually the turkeys will be too big to go in and out of either the duck house or chicken coop, so they will get their own shelter. We plan to build a smaller version of the range shelter shown in Storey's Guide to Raising Turkeys. It will look similar to this:

Turkey range shelter - Ours will be quite a bit smaller because we only have four turkeys!
Image from http://www.freetimesw.com/blueoakranch/turkeys.htm 


3) Expand and fortify our chicken moat

Our chicken coop is attached to a moat that goes around our garden.

Current plan of the chicken moat


Since we're adding in a 4'x6' duck house plus a turkey range shelter and a whole bunch of new birds, we need to expand the run.

We seriously considered using electronet and making pens for the new birds out in the pasture. (You can see what that would look like in the photo of the turkey range shelter.) The birds would love that and we may do that in the future, but we have a special needs child and a toddler so I am concerned for their safety.  We decided instead to expand the chicken moat. We will bump out the right side of the moat to match the existing left side, giving a total of about 1,150 square feet for the birds to roam in safety.

We are also going to add a layer of chicken wire to the bottom of the fencing. We used welded wire mesh with 2"x4" openings to build our fence and little ducklings will easily be able to slip through for the first couple of months. And if any of my chickens go broody next spring and hatch some chicks, we'll be all ready for that!


A duckling could slip out or get stuck in the holes in the fence. We'll cover the lower
2 feet with chicken wire just to be safe. 


As you can see, I've got plenty to keep me busy over the next month and a half! I'm just trying to refrain from adding geese to the mix!