Monday, August 16, 2010

I've got my wheat so now what?

A grain mill is not in my budget for a couple of months. What can I do to play around with my 200+ pounds of wheat in the meantime?

First of all, I found that it is possible to crack your wheat in a blender. According to the gals at Food Storage Made Easy, you put a small amount of wheat (1/4-1/3 c.) in your blender and pulse it. When it looks cracked, it's done and you can use it in recipes that call for cracked wheat.

You can also use your blender to make pancakes or waffles with your whole, uncooked wheat kernels. The mixing time is somewhere around 5 minutes to grind all the wheat kernels. Ay Chihuahua! I have doubts about the ability of my blender to handle that.

What if my decrepit blender decides to die or the power goes off? In Emergency Preparedness the Right Way, the author describes another way to grind wheat. Basically, you take three pipes, bind them together, and use them to beat on wheat kernels you place inside a can. If you have ever seen how many tribes in Africa grind grain, you have the general idea.

I did a google search for "improvised grain mill" and lo and behold, I found the original source of this idea.  Improvised Grain Mill pdf   

That is one labor intensive way to grind grain!

Here are some recipes to use wheat without a grinder. I'm going to be experimenting with pancakes and one of the cereal recipes sometime during the next week and will report in on how it goes!


Blender Wheat Pancakes

1 Cup Milk (translation for powdered milk is 3 T. Milk and 1 C. Water)
1 Cup Wheat Kernels, whole & uncooked
2 Eggs (2 T. powdered eggs 1/4 C. Water)
2 tsp Baking Powder
1-1/2 tsp Salt
2 Tbs. Oil
2 Tbs. Honey or Sugar

Put milk and wheat kernels in blender. Blend on highest speed for 4 or 5 minutes or until batter is smooth. Add eggs, oil, baking powder, salt and honey or sugar to above batter. Blend on low. Pour out batter into pancakes from the actual blender jar (only one thing to wash!) onto a hot greased or Pam prepared griddle or large frying pan. Cook; flipping pancakes when bubbles pop and create holes.

ROASTED WHEAT KERNELS

1⁄4 cup wheat berries (whole kernels of wheat)
1⁄2 tablespoon oil
1⁄8 teaspoon salt

Heat a small amount of oil in a skillet. Add wheat berries and pop like popcorn. They don’t expand as much as popcorn, but they will pop. Swirl around in the pan to prevent burning. Sprinkle with salt while hot. Makes 1⁄3 cup.
 
CREAMY CRACKED WHEAT CEREAL

1 cup uncooked cracked wheat
3 cups water
1⁄2 teaspoon salt
1⁄4 cup powdered milk
4 tablespoons sugar

Prepare cracked wheat by using a wheat grinder or a blender. Add dry milk to water, whisk, and bring to a boil at medium high temperature. Add wheat, sugar, and salt; cover and reduce heat to simmer for 20 minutes, stirring occasionally, until water is absorbed. Makes 3 cups cereal.
 
 
THERMOS WHEAT

1 cup wheat
2 cups boiling water
1⁄2 teaspoon salt

Preheat a thermos by filling it with hot tap water. Bring 2 cups of water to a boil and add salt. Empty the tap water from the thermos. Place the wheat in the thermos and add the boiling water. Screw the lid tightly onto the thermos and allow the wheat to cook for about 8 hours or overnight. Drain off any water that has not been absorbed. Serve.
 
The previous three recipes are from a pamphlet entitled All is Safely Gathered In: Family Home Storage Basic Recipes by the LDS Church

Sunday, August 15, 2010

Financial Preparedness, Part I

The American people are feeling pretty light in the pocketbook at the moment. I don't have any solutions for our national economic problem, but I do know a way you can build a strong financial future for your family. Dave Ramsey has come up with a common-sense plan you can use to become financially prepared. Over the next few weeks I will be discussing Dave Ramsey's Seven Baby Steps and applying them to preparedness.

Baby Step One: Create an $1,000 emergency fund

The first step towards achieving financial freedom is saving money for an emergency. Dave says you should start with the amount of $1,000. You are not to touch this money unless it is a true emergency.


Your furnace dies in the dead of winter = EMERGENCY
Your car needs a serious repair = EMERGENCY
You lose your job = EMERGENCY
You run out of Diet Coke Zero and you have spent all the money you budgeted for soda = NOT AN EMERGENCY

That is something I have to repeat to myself regularly.

The reason you should start with this step instead of immediately tackling your debt is that the unexpected WILL happen. We have had a ton of medical expenses in my family this year. Some were expected (the birth of Baby Dear), some were not (two family members needing an MRI). If you don't have any money on hand to deal with life's little (and big) emergencies, chances are you will add to your debt. You'll never climb out of the pit of financial insecurity if you don't build an emergency fund. Keep in mind that this is only a starter emergency fund and you will need to save even more money after you become debt free.

Now for the prepping aspect of Baby Step #1. Having cash on hand is essential for preparedness. Consider this:
  • During the Great Depression, FDR declared a bank holiday. All banks throughout the country were closed for several days. If that was to happen today, you would definitely want to have cash at your fingertips.
  • If the grid goes down in a short or long-term emergency, cash or barter will be the only way you can buy goods. ATMs won't work and neither will your debit or credit cards.
I do keep the bulk of my emergency fund in the bank, but I am starting to keep a stash of cash at home. Some of it will be in our BOBs and in our vehicle kits. The rest of it will be kept in a fireproof safe hidden in my home. You should make sure that the bulk of your cash is in small denominations unless you relish the prospect of paying for a $7 pack of batteries with a $50 bill! There may not be change available when you need to use your cash in an emergency.

In his book, The Total Money Makeover, Dave relates the story of one of his listeners who put her $1,000 emergency fund in a cheap glass picture frame. She wrote "Break in case of emergency" on the paper she displayed in the frame. The frame was then hung on the wall behind the coats in her coat closet.

Many survivalists and preppers think that precious metals are an emergency fund essential. That is not a priority for me at all. I have way too many other things I need to spend my prepping money on at the moment and I'm not sure gold will end up being a quality investment outside of preparedness over the long haul. Read more about why you may or may not need to buy gold here. Dave Ramsey doesn't think gold is a great investment, but then again he thought I was a nut for storing food.

Saving money for an emergency is key, whether that emergency is TEOTWAWKI or simply everyday life.

Read much more about the Baby Steps in The Total Money Makeover. You may also be able to listen to Dave on his syndicated radio show. Dave's the man!

Friday, August 13, 2010

Why the Fed-Ex man hates my guts

My order of wheat from Emergency Essentials came yesterday.

My herd of children are usually the ones who let me know when someone pulls into the driveway. Who needs a dog when you have four kids?  This time they were busy wreaking havoc elsewhere so I was the one who saw the Fed-Ex man arrive.

Under normal circumstances, I engage in polite chit-chat with the delivery person and sign for my deliveries. This time, however, I was a bit nervous and remained out of sight while the delivery guy brought up the boxes.

Why did I skulk around in my own house? Because I knew the delivery man would soon be hurting. Indeed, by the time he had gotten all of my boxes off his truck and onto the porch, his face was beet red and he was limping. I think my delivery weighed over 225 pounds and the temperature of 105 degrees didn't help matters either.

I'm pretty sure the Fed Ex guy will remember me and he probably noticed the very prominent lettering on these boxes as he cursed their weight. It may also have reminded him of the many other similar deliveries he's brought over the past few months.

That adds up to a breach in OPSEC. OPSEC stands for operational security, which basically means prevention of leaks of information that could be used by others to harm you. The Fed-Ex man is aware that The Harried Homemaker Acres has had several large deliveries from preparedness companies. This is not ideal since I'm trying to keep our preps on the down-low.

I have many more prepping purchases I need to get over the next few months. What should I do to both maintain OPSEC and keep the Fed-Ex man from needing to apply for worker's comp? Ideally, I would purchase things in small amounts with cash from several local stores, transport them myself, and discreetly bring them into my home. That's not easy for a person who lives in a preparedness wasteland. I'm just going to have to continue to do what I've been doing and hope for the best.

I implore companies that specialize in preparedness supplies to remove the prominent lettering from their packaging. Help your customers gather their preparedness materials discreetly. 

Wednesday, August 11, 2010

The Whole Tooth and Nothing but the Tooth

Not The Harried Homemaker's Mouth. I wasn't that calm.
I spent an intense three hours in the chair at the dentist's office today. Apparently when you reach your thirties, cavity germs decide to cluster bomb your molars. That's what happened to me, anyway. I had my first cavity when I was fixin' to turn 31. And I didn't just have one cavity that first time, I had four! It might have something to do with a wicked Hot Tamale addiction during my last pregnancy. It might also be related to my crazy ridiculous consumption of carbonated beverages. That's just a theory.

As the drill was bearing down on me, I fought back the urge to run away by meditating on how important it is to maintain your dental health. The laughing gas helped, too.

Why you should get your dental work done now:
  1. Dentists don't work during TEOTWAWKI. That's the rumor, anyway.
  2. Cavities and gum disease are linked to all sorts of nasty things: heart disease, diabetes, strokes, and preterm births of low birth weight children, among others.
  3. A toothache is a big bummer. As if you need something else to make you miserable when TSHTF. Dental health could have an impact on your psychological health. 
  4. If you don't have teeth, you can't eat. Better hope your wheat grinder works well cause you could be gumming all that wheat you should be storing.
  5. In a worst case scenario, your little cavity could turn into something more. It could get infected and require antibiotics. The infection could spread to the rest of your body without treatment. I don't know about you, but I think a cavity is a pitiful way to die. If I'm going to go out post-SHTF, it better be for something I couldn't prevent.   

Schedule an appointment with your local dentist if you haven't been in a while and stock up on toothpaste, toothbrushes and floss while you're at it.

Sunday, August 8, 2010

Month Three Food Storage

Some of my plunder
Sam's Club is a very dangerous place for me. I walk in with a sensible list and one grocery cart and I manage to come out with two carts filled to the brim. I'm sure I could get things cheaper if I lived somewhere with more than one small town grocery store. I'm working on couponing, but I am still a rank novice. So a big monthly trip to the "big city" it is for many of my food storage needs.

My food storage area
Here's what my main food storage area looks like now. The top rack has my canning supplies. I've used up quite a bit of vinegar by canning pickles and I need to restock that. One day soon I'm going to do a post on the virtues of storing vinegar.

The next rack down is canned fruits and vegetables. I tried to pick ones I thought my family would eat.

The middle rack has my home-canned pickles and green beans as well as kidney beans, Spaghettios, soup and chili. I have never bought Spaghettios or canned chili before. You're supposed to "Store what you eat and eat what you store", but that is a challenge when you don't normally eat many canned foods. I'll figure out something to do with them.

We've been rotating through the next rack down pretty quickly. I have 20 lb of peanut butter now so I think we're done with that for the time being. At least that's one item I can check off my list!

I have pasta, boxed mixes and the large box of quick oats in plastic storage bins on the bottom. When you live in the middle of a cow pasture, you can't help but get mice running through your house from time to time. We manage to catch them quickly but I'm trying to make things as difficult for them as possible by storing them in the bins.  The goal is to rotate through these items before they have a chance to deteriorate in nutrition or taste.  

Chicken-n-fats. I'm woefully low on fats besides peanut butter
I have a few cans of chicken now. I've never used canned chicken before so this will be another new adventure for us. One of these days I'll try canning my own meats and see how that compares.


Here's what I bought for food storage this month:
  • 6 lb macaroni
  • 6 lb spaghetti
  • 12 cans of chili with beans
  • 5 cans of chicken
  • 4 lb of yeast (I've frozen this and it will last indefinitely in the freezer)
  • 16 cans of Spaghettios
  • 12 boxes of macaroni and cheese
  • 3.75 lb of baking powder
  • 9 lb of quick oats
  • 2-2.5 lb jars of peanut butter
  • 8 cans of corn
  • 8 cans of peaches
  • 12 cans of green beans (Next year I hope we will be able to can enough green beans to be self-sufficient.)
  • 5 cans of kidney beans
  • 36 applesauce cups

Not to mention the 4-6 gallon buckets and 4-#10 cans of wheat that are on their way.

Our homeschooling year began this week and during The Thinker's history lesson, we read the following quote from Lao Tzu:

"A journey of a thousand miles begins with a single step."

It feels like I've spent a lot of money and have very little to show for it, but I am at least three steps closer to my goal of 1 year's worth of food storage.

What steps have you taken this month to insure that your family will have food in a crisis?

Friday, August 6, 2010

To wheat or not to wheat?

I was all prepared to make my final Month Three Prep purchases this morning when I was made aware of the craziness in the world wheat market. I was watching HLN, which I refer to as the junkfood of the TV news biz. You know, full of fluff, light on substance. They reported that the Russian government is halting wheat exports, which set off a giant price increase in wheat prices. They are predicting wheat to continue it's upward trend. Famine could be a possibility in third-world countries like Egypt that depend on cheap wheat to survive.

Then I got on The Survival Blog and JWR said: "I predict this will start a chain reaction, around the globe. Other nations are sure to follow suit with export restrictions, and futures prices will soar. We can expect food riots in the future. There is also some likely inflation in other grain prices, as cattle feed is shifted slightly, to compensate. Get your wheat orders in with a trustworthy vendor pronto, before the inevitable prices increases hit the retail level! Wheat prices could double again, before December."

I about choked on my Cheerios when I read that.

My prepping plan went out the window and I decided to spend the remainder of my budget this month on wheat. Unfortunately I had already spent half of my money on sheltering-in-place supplies and a trip to Sam's Club.  I envy the people who live close to LDS canneries. You can get wheat very cheaply there if you are Mormon, have a Mormon friend who will go with you, or they let you in. 

The best buy that I have found for me is to order through Emergency Essentials. I had enough money remaining to buy 4-6 gallon "SuperPails" and 4-#10 cans of hard white wheat. If I had food grade plastic buckets and mylar bags on hand, it would have been cheaper to just order bags of wheat from Honeyville Grains. When I need to refill these buckets, that is what I'll probably do. Yes, I do plan on using my wheat regularly. Once I get it and get a grain mill, that is!

I hate deviating from my plan. Knee-jerk reactions are often not my best decisions. In this case, however, I was planning on buy some wheat in the next few months. This may save me some money and insure that the product I want is available.

Now I have to decide whether to get back on my prepping plan next month or to go ahead and buy more wheat. I need to buy 473 more pounds in order to have a year's supply for my family. I refuse to be at the mercy of inflation, food shortages and a world gone crazy.

Here are some links I got from the Survival Blog for further reading on the subject of the wheat market:

http://www.reuters.com/article/idUSTRE6742QQ20100805

http://www.dailyfinance.com/story/higher-food-prices-russian-heatwave-wallet/19581230/

Thursday, August 5, 2010

A Review: Emergency Preparedness the Right Way, by Howard Godfrey

The first prepping book I bought was Emergency Preparedness the Right Way by Howard Godfrey. I’m not exactly sure why I decided to purchase this one over the many other books on this topic available. I was just browsing on amazon.com and somehow this book ended up in my cart. I think it was the cute little girl on the cover that did it.

This is a small book – only 143 pages including the index and references. Small though it may be, it does cover the major survival topics. Chapters include:

-Planning and other random thoughts

-Water

                                       -Food

                                       -Storage Tips

                                     -Cooking, lights and fuel

                                     -Medical and sanitation

                                     -72-hour kits

                                     -Miscellaneous recipes (HH says: These are truly
                                      miscellaneous. Don’t buy this book for food storage recipes)

                                     -Improvised equipment

                                     -Some Last Thoughts

One thing I appreciated about this book is that it makes survival topics very accessible for the novice prepper. It’s not full of jargon or highly technical discussions. I got a good basis and it inspired me to do further research.

One weakness of this book is that it has a bit of filler. The author includes long (the one on pinto beans is 1+ pages) quotations from scholarly studies done at BYU. While the information may be relevant, the author could have simply summarized the findings of the studies. It felt like the author was trying to beef up the page count of his book, much like my students would do when I was a teacher back in the day. Add a bit of filler, make the margins 2 inches, jack up the font size and PRESTO you have a 5-7 page research paper, teacher! This book is self-published. This kind of stuff, plus the random nature of the first and last chapters, wouldn’t have made it past the editing process of most publishing houses.

Since some people are put off by heavily Mormon content, I will make note of it when I do reviews. Personally it doesn’t bother me. Some of the nicest people I have met are Mormons. I also have read enough Mormon preparedness documents to be able to quote their scriptures by now! The Mormons are on their game when it comes to prepping. The author does say "Remember, if you are prepared you shall not fear", which is a Mormon scriptural reference. That is about it.

This wasn’t a bad start to my prepping library. It covers the most important topics, albeit not in great depth. There is some filler included, but it is an adequate primer for the beginning prepper. I’ll keep this for reference and it has whetted my appetite for more.

Emergency Preparedness the Right Way is available at Amazon.com

Sheltering In Place

The government has been telling us to stock plastic sheeting and duct tape and be prepared seal a safe room since 9/11. Maybe they recommended it before and I was oblivious, but it really entered the public's consciousness after the terrorist attacks of 2001.

Yes, I've known I should do this.

No, I didn't take any steps to do it until this month.

Technically, there are two kinds of sheltering-in-place. The first is the one those of us in Tornado Alley are familiar with. If severe weather approaches, you grab your kids and hunker down in the basement or other safe area to avoid being blown into Oz. I've never looked good in blue gingham, so I've got this maneuver mastered.

The sheltering-in-place I am going to address today is the second variety and it is different from the first in some very important ways. If there is a chemical, biological, or terrorist attack, you may need to stay indoors and seal a room to keep your family safe.

In contrast to a severe weather situation, you do NOT want to shelter-in-place in the basement for a chemical or biological attack. Some chemical agents are actually heavier than air and can sink below ground level. You should select a room on the highest level of your house. Ideally that room would be interior and windowless and yet spacious (approx. 10 square feet per person) and with a source of water. I don't know about you, but that doesn't describe any room in my house!

I selected our master bathroom. It does have a window and door, but I should be able to seal them up quickly. Obviously it also has a water supply. If I had a lot of notice I could also seal up the adjoining master bedroom. We would be considerably more comfortable and have access to a TV to keep abreast of the news. I'm not counting on having a lot of warning, so we're probably going to be stuck in the bathroom. Thankfully, I store our BOBs in the bathroom closet so we'll have an emergency radio and other supplies.

The following diagram from ready.gov illustrates how you're supposed to seal up your room.


You should pre-cut all of your pieces of sheeting ahead of time. The last thing you want to do is be fooling around with that stuff when time is of the essence. Store the pre-cut sheeting with a roll of duct tape and a pair of scissors in the room you'll be sheltering in.

Don't forget to make sure the sheeting you buy is at least 2 mils thick. I bought a 250 meter roll of 3.5 mil plastic for $7.27. The duct tape was a little under $4. Pretty cheap preps that have a multitude of other uses. The leftover plastic sheeting could be used to make an evaporation still, a tarp, or sleeves to wear when you butcher rotting pig carcasses to create biodiesel. You know, vital survival activities in a SHTF scenario.

This kind of shelter-in-place is designed to last for a few hours, not days. You can't seal yourself in for very long or you'll suffocate! I've read that if the room you're sheltering in has at least 10 square feet per person, you will have enough oxygen for at least 5 hours. My bathroom is only 50 sq ft and I have six people in my family, so I guess we'll have to all breathe shallowly. I have read that most chemical agents should dissipate by 2 hours, though, so we should be fine. I hope.

Just to muddy the waters further, if there is a nuclear attack, you should shelter in place in the lowest level of your house or an interior room. Having earth and concrete surrounding you will help protect your family from radiation. You should prepare your basement shelter in much the same way as your upper level shelter. Read this for more information http://www.bt.cdc.gov/radiation/shelter.asp

Don't forget that before you seal yourself in for a chemical, biological or nuclear attack, you need to turn off your heat or A/C!

I live in a rural area and I'm pretty sure the farmer next door isn't a secret agent for Al Qaeda, but even our family could potentially need to shelter in place. No matter who you are or where you live, take the time to buy some plastic sheeting and duct tape and get ready. Don't be a slacker like me!

There are two websites I recommend for further reading:


http://www.bt.cdc.gov/planning/shelteringfacts.pdf


and

http://www.ready.gov/business/plan/shelterplan.html

Friday, July 30, 2010

Water, water everywhere


One of the books I have read to my children so many times I have it memorized is "Water, Water Everywhere". Although I have already have two weeks worth of water stored (plus another two weeks if I utilize our water heaters), I can't seem to stop storing water. Soon I'll have water, water everywhere in my house.

I've taken to cleaning out empty apple juice bottles and filling them with water. After labeling the bottle as potable water, I write the date I filled it and store them in the freezer compartment of the refrigerator we have in our garage. We don't have a lot of items in this extra refrigerator and these water bottles will serve dual purpose. Not only are they additional water storage but they also will help our refrigerator maintain its temperature. A full refrigerator requires much less energy to keep cold.

That will save us money in the short term and possibly save our lives in the long term.

Tuesday, July 27, 2010

YouTube Preppers

There's a ton of information on the Internet on survival-related topics. Type in "food storage" or "survival" on YouTube and you will find a wide variety of videos. Some are useful, some useless and some are filled with unreliable information.

I'd like to share a couple of YouTube channels that have information you can trust. In some ways they are polar opposites. Both, however, have good information and inspiration for the budding prepper.

The first is AnalyticalSurvival, which you can find here:

http://www.youtube.com/user/AnalyticalSurvival

GM is ex-Special Forces and his videos cover very hardcore, masculine survival topics. Want to find out the best foods for a bug-out situation, learn how to maintain your shooting gear or create a medical trauma bag? This is your channel. GM has a talent for making complicated topics seem easy. His presentations are well-organized and chock full of info. GM approaches survival from a very military perspective, which for me is a bit intimidating. He also borders on OCD with his organization of his survival gear! You will learn a lot if you watch the videos on this channel.

The second YouTuber I would like to recommend is Michigansnowpony.

http://www.youtube.com/user/Michigansnowpony

Renee describes herself as a homesteading prepper and her videos capture that life well. Her garden videos make me jealous! One day I hope my crops will be as abundant. She also covers small livestock and various prepping related topics. I learned how to can chicken from one of her videos and can't wait to try it out. Her demeanor is that of a knowledgable, friendly neighbor. She makes me feel like I can do what she does, too.

If you have any other favorite YouTube channels or prepping-related blogs and websites, please let me know!

Sunday, July 25, 2010

In a pickle

My cucumber patch is going gangbusters and I'm putting up pickles. Pickles are tasty but do they have any nutritional value?

Yes and No. They are fairly low-cal but high in sodium. That's a big problem if you are low on water. During the Age of Exploration, though, sailors often carried barrels of pickled vegetables with them. Why? They helped to prevent scurvy, a disease caused by Vitamin C deficiency. Scurvy is not something we worry about today but it could potentially be a problem if TSHTF. Better store some vitamins and maybe some pickles!

You're not going to survive TEOTWAWKI on pickles alone, but they can be useful as well as delicious. They might even count as comfort food in a stressful situation. I know they will certainly perk up any taste buds worn down by a diet of survival food.

Here's my favorite pickle recipe. It's from Blue Ribbon Preserves by Linda J. Amendt. This is the book I learned to can from and the source of my favorite canning recipes.

Bread and Butter Pickles

Makes about 6 Pint Jars or 3 Quart Jars

15 to 18 1-to 1-1/2 inch diameter firm fresh pickling cucumbers
2 to 3 medium onions
1/2 c. pickling salt or kosher salt
2 to 3 qt. distilled water, chilled
3 c. sugar
2 c. distilled white vinegar
2 c. cider vinegar
2 t. mustard seeds
1 t. celery seeds
1 t. ground turmeric

Using a soft vegetable brush, gently scrub the cucumbers, being careful not to scratch the peel. Rinse the cucumbers 2 to 3 times in cool water, changing the water after each rinsing. Drain well. Cut the cucumbers into 1/4-inch slices, discarding the blossom and stem ends. Measure 2 qt. sliced cucumbers.

Peel the onions and cut into 1/4-inch slices. Cut the slices into quarters. Measure 1 qt. onion slices.

In a large bowl, layer the cucumber and onion slices, sprinkling salt between each layer. Add enough of the cold distilled water to completely cover the vegetables. Let stand for 2 hours.

Drain the salt water from the vegetables. Rinse the vegetables thoroughly with cold water to remove all of the salt. Drain well.

In a 8 qt. stainless steel pan, combine the sugar, vinegars and spices. Over medium-low heat, gradually heat the mixture, stirring constantly, until the sugar is completely dissolved. Increase the heat to medium-high and bring the syrup to a boil. Add the drained vegetables to the syrup and heat for 3 minutes. Remove the pan from the heat.

Ladle the hot vegetables into hot jars, leaving 1/2-inch headspace. Ladle the syrup into the jars, covering the vegetables and maintaining the 1/2-inch headspace. Cover with hot lids and apply rings. Process both pint and quart jars ina 180 to 185F water bath for 30 minutes.


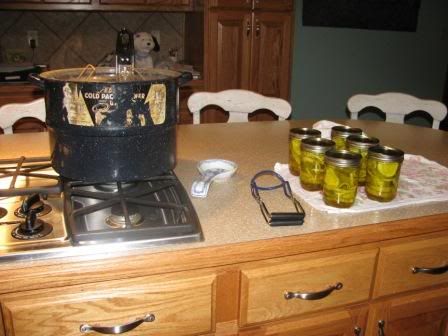
One batch of B&B pickles done, another one bubbling away in one of my vintage canners.

Thursday, July 22, 2010

Free Home Preservation Course!

I heard about this free online course on preserving on the Survival Blog. The National Center for Home Food Preservation, which is associated with the University of Georgia, is the source for information on safe canning and preservation methods. They have put together a course that according to their website covers: introduction to food preservation, general canning, canning acid foods and canning low-acid foods.

If you go here

https://spock.fcs.uga.edu/ext/food/nchfp_elc/

you can register for the free class. It took them about three days to send me the login information and I'm all set to get started.

I'll post a review of the course once I've completed it.

PS I'm in love with the graphic I added to this post. My pressure canner is about 60 years old and this picture is in the instruction manual. I feel very June Cleaver when I use my canner. :)

Wednesday, July 21, 2010

Month Three Preps

I've spent my money for Month Two so it's time to think about spending next month's money!

1) Get more cash and add it to our Bug Out Bags (BOBs).
2) Buy a box of trash bags.
3) Get a roll of heavy mil plastic sheeting and a roll of duct tape. Use it to prep for possible sheltering-in-place.
4) Buy butane refills for my Zippo lighter.
5) Buy maps for both vehicles + BOB.
6) Buy the remainder of items for my van’s emergency kit.
7) Continue to buy items for food storage.

My original plan for Month Three had me buying a bunch of food storage containers for my pantry and a Brother P-Touch label maker. That's the OCD organizer in me.

I decided that it was probably more important that I store up food. With my luck, TEOTWAWKI would happen and all I'd have to show for it would be a bunch of plastic with nothing in it! And with the threat of hyperinflation looming, food prices are only going to rise. It's best to stock up NOW on the essentials of life. However much Snapware makes my soul sing, it will not sustain me in an emergency. :)

Monday, July 19, 2010

Giveaway on "New Life On a Homestead"

I came across a great blog by the way of a fortuitous Google search.


Kendra is the kind of woman I'm aiming to be. Her family is trying to be self-sufficient and her blog chronicles their adventures as they start their homestead. I relate a lot to her posts - other than the fact that her hubby is on-board with the plan!

She's giving away a survival seed pack from Hometown Seeds. It looks great and all you have to do to enter is leave a comment on her blog.

http://newlifeonahomestead.com/2010/07/survival-seed-pack-giveaway/

Friday, July 16, 2010

Where I stand in my food storage

I have been accumulating food storage for a few months now. I haven't made any huge purchases but I have been consistently buying a few extras when I go to the grocery store or warehouse club. Here are a few pictures of my major food storage areas.

I am fortunate to have a large kitchen with ample storage room. I cleaned out parts of two cabinets and am currently storing:


A 3/4 gallon of olive oil, 24 lb of salt, 2 jugs of maple syrup and 6 lb of baking soda are among my stored items here. I need to move some of these items to the basement because I intend on this area being a dry storage area. Items like the salt, baking powder and baking soda that absolutely must stay dry will be in this cabinet. Our basement never floods and never should, but it can be a bit humid in our storage room. To protect these items sensitive to moisture, I'm going to store them in the kitchen.

Here's my other storage cabinet in the kitchen:


I have items like different kinds of soup and tomato products here. The Diet Pepsi doesn't count as food storage! I am a total soda addict and have the cavities to prove it.

These pictures don't even show the items I have in my regular pantry. I am storing bottles of apple juice (about 7 weeks worth) along with the every day items that everyone has in their pantry.

Here's my basement storage area:


It's filled in a little bit since I last posted a picture of it. On the top rack I have my canning supplies and two gallons of vinegar. The next rack down has canned fruits, vegetables, and soup. I've only just started storing these types of goods and I don't have very many yet. The next rack has my home-canned items - pickles, tomatoes, dried oregano (not really canned but stored in a Mason jar) and green beans. Hubby Dear and I are slowly increasing our harvest from our garden and I hope to can even more next year. The next rack down has a mish-mash of items like Crisco, applesauce, jelly, 15 lb of peanut butter, salad dressing, and a variety of condiments. The bottom part of the storage rack has a couple of large plastic containers. In one I am storing boxes of baking mixes. Right now all it has are two lonely boxes of brownie mix. The other container has 36 lb of pasta.

When I have filled up this storage unit, I have a couple of shelves on other units cleaned off. I will, however, need to buy some sort of additional storage. I'm thinking about getting one of these from Shelf Reliance:


That would make rotation so easy, but I'm not sure it is the most efficient use of space.

When I look at what we've accumulated so far, I feel like we are getting somewhere.
That is until I watch some of the many YouTube videos where fellow preppers show off their food storage.

Sigh. We have so far to go.

We are making headway, though, and now that Hubby Dear has given me a budget, I'll be able to make consistent purchases. I am considering changing my Month Three Preps in order to make a large leap in our food storage next month.

Monday, July 12, 2010

Water storage and protection from nukes

I finally completed my prepping purchases for this month. They fall into two major headings, water and nuclear preparedness. I'll discuss each in turn.

WATER


Why store water?

Water is one of the most important items in preparedness. You can't survive very long without water and yet it is something that we all take for granted. We just expect that clean, safe water will always flow out of our faucets. That is something that you absolutely cannot count on in an emergency. Municipal water supplies could be contaminated or they could be out of order. If you are on well water, a loss of electricity would cut power to your pump. A major local, regional or national power grid outage would then leave you up a creek without a paddle. Bottled water is one of the first items to get sold out in anticipation of a hurricane, snow or ice storm. Be ready ahead of time!

How much water to store?

You should count on at least 1 gallon of water per person per day. That gives you enough water to drink as well as some for basic hygiene and cooking. Most sources that I have read recommend that you store a minimum of two weeks worth of water. For our family that would be:

6 people x 1 gallon per day x 14 days = 84 gallons

How do you store water?

I have decided to accomplish this in a couple of ways. First, I purchased a 55 gallon barrel.


It is important that your water storage containers be made of food-grade materials. You should never store water in something that once held anything you would not put in your body (gas, cleaners, etc.). I chose to buy our water storage containers but you can use clean and empty pop or juice bottles. Some people are able to get barrels that held syrup, etc. for free from restaurants. Be sure to clean your containers thoroughly if you go that route and again, make sure the containers are of food-grade plastic.

You also need a way to open and close your barrel plus drain out the water. The barrel has a valve on top that you need a bung wrench to open.


Water weighs over 8 lb per gallon, so it will be very heavy when the barrel is filled. You do not want to be fooling around should you have to use your water in an emergency. You can buy siphon pumps or siphon hoses. I chose to get a simple hose. You can buy the barrel in a combo with the siphon and wrench from Emergency Essentials. I was pretty pleased at the price point and it was quickly delivered via Fed Ex to my residence.

It is space efficient to store a lot of water in a large container but at approximately 455 pounds when full, it is definitely not portable. What if we need to bug out? I found the basic water storage kit sold by Emergency Essentials to be an easy and economical way to get five 5-gallon storage containers.
The kit consists of heavy duty mylar bags that have a spout. You fill the bags with water and place each one in a cardboard box. The boxes have handles and stack easily. The kit is reuseable and seems like it would be pretty sturdy as long as your basement or other storage area stays dry.

This is what my storage area looked like with my storage containers filled up and ready to go.


I went ahead and placed some cardboard underneath the water barrel. Many people recommend that you have some sort of separation between your plastic water containers and the concrete floor. The thought is that chemicals from the concrete can leach through the plastic into your water. Other folks think that as long as your concrete is not getting heated up (ie. from the sun, outdoors, etc.) you are fine. I chose to put a layer of cardboard underneath my water barrel even though our concrete stays cool all year long. Another solution to this problem is to rest your barrel on top of some 2 x4s.


If you're adding it up, this totals 80 gallons of water and my family needs 84. We do have an additional three days' worth of water stored in our BOBs in the form of Aqua Blox. Should we need even more water, we have two 40 gallon water heaters. You can also use the water in the tank of your toilet (not the bowl!). In all, we have enough water for nearly four weeks.

In the future I plan on buying a large Berkey water filter for more long term solutions. While we do not have a natural source of water on our property, we do live in an area where there are many farm ponds nearby. If TSHTF, we could haul in water from those ponds or a nearby public lake and then filter it. We also have some water treatment tablets and bleach that could be used to disinfect suspect water if necessary. Boiling water once you filter out the big particles is always an option as well.

Do you need to treat your water?

Generally speaking, if you are filling your water containers with water from municipal supplies, you do not need to add any sort of water treatment. You do, however, have to rotate your water, dumping it out and refilling your containers every 6 months to 1 year.

If you add this water preserver sold by The Ready Store, however, you can extend the time water stays fresh in your containers to 5 years. I don't know about you but I don't have the time or inclination to dump out 84 gallons of water every year, so this was a good investment for me.

Another thing you should think about is how you are going to fill your water containers. Most garden hoses are not considered safe for drinking water. They can have lead and other chemicals leach out of them or even harbor mold and mildew. I went ahead and bought a couple of water-safe, mold resistant hoses. You can find these online at emergency preparedness stores or even at your local Wal-Mart in the RV or garden section. In the end, filling our water containers from our regular garden hose probably wouldn't be a big deal, but better safe than sorry in my book. After all, that's why I'm a prepper.

NUCLEAR PREPAREDNESS

This next purchase may seem kind of random or paranoid.


These are Iosat tablets which consist of potassium iodide. If there is a nuclear incident, it will flood your thyroid with iodine so that it does not absorb radiation. There are dosages on the package for people of all ages and the medicine can be stored for up to seven years before you need to replace them.

People tend to be much less afraid of nuclear radiation than they were decades ago. The Cold War may be over, but the recent arrest and deportation of those Russian spies living in the US should remind you that Russia isn't exactly our best friend. Rogue states like Iran and North Korea certainly have the motivation to launch a nuclear attack on the US. Terrorists of all stripes would definitely like to do so.

I'd like to think that, living as I do in the middle of nowhere, we'd be safe. There is no guarantee, though, particularly when you consider the effect of weather systems. The BP disaster in the Gulf of Mexico illustrates how weather, wind, and ocean currents can spread a localized disaster over a huge area. There are also nuclear power plants dotted throughout the country. They, too, could be a source of a nuclear emergency.

Of course there is much more to consider when it comes to nuclear preparedness. Many of the other preps I'm doing would be essential: water storage, food, hygiene, etc. A great resource and one that is available for free is
Cresson H. Kearny's Nuclear War Survival Skills.

That's a long post but one I hope will be helpful to those of you starting out your preparedness journey. My Month Two Preps are complete.

Tuesday, July 6, 2010

Progress Report on our Month Two Preps


  1. Get $20 in small bills to add to BOBs. IN PROGRESS Whenever I get some cash, I add a little bit to the stash in our BOBs.
  2. Continue to build our three month supply of food and other essentials. IN PROGRESS Every time I went to the grocery store during the month of June, I picked up a few additional items for food storage. That would be why our grocery bill was out of control! Since Hubby Dear and I have agreed upon an amount in the budget for food storage, I have promised I will do much better in July! As a result of my over-spending, however, we have a few additional items in our storage like canned fruits and vegetables, paper products, toiletries like toothpaste and bodywash, salad dressing and pasta, to name a few.

  3. Reorganize our storage room. Clear out junk, donate unnecessary items and consolidate to make room for food and water storage. COMPLETE We have a storage room in our basement that was very organized but filled to the brim. Hubby Dear and I went through the contents of every storage bin and were able to throw out, recycle, or donate enough items to empty 7 large bins. I will use these for food and supply storage. We also have cleared out enough space for the water containers we're buying. If I can convince Hubby Dear to get a vasectomy, we'll be able to donate all of the bins of outgrown baby clothes we have stored and I'll have even more room. Somehow I don't think that will be a very persuasive argument for him. ;) We cleaned out about half of the items that were underneath these stairs. Our water storage is going here. I've started moving some of the items I had stored in my kitchen to these shelves. I haven't quite figured out what I'll store upstairs and what's going to come downstairs. Right now I have some condiments and peanut butter on these shelves along with about 24 pounds of pasta in that clear plastic bin. 24 pounds down, 87 to go! The top part of the shelf has my canning supplies and last year's canned tomatoes and pickles.

  4. I still have a lot of organizing I could do here, but I'm kind of waiting until this summer's canning is complete.

  5. Buy Iosat tablets for the whole family. See #5

  6. Buy items necessary to store 2 weeks worth of water for our family - barrels, siphon, water conditioner, etc. INCOMPLETE After Hubby Dear gets paid this week, I will be able to make these purchases.
  7. Fill water containers. Store appropriately in our cleared out storage room. INCOMPLETE but coming soon!

Friday, July 2, 2010

Breaking News... Hubby Dear gets roped into prepping! Sorta.

Well, after our big talk with Dave Ramsey, Hubby Dear has agreed to allocate $300 a month in the budget towards prepping plus an additional $50 in the grocery budget for food storage. I can get quite a lot accomplished with that kind of budget. I'm happy, he's placated, all is good.

Hubby Dear is making a trip into town today to get preparations for a little July 4th gathering that we're having and I threw a bit of a monkey wrench into the mix.

Here's how the conversation went at the Harried Homemaker's Acres:

"Hubby Dear, you need to get some Product X", I told him, batting my eyes and wearing my most charming smile.

Product X, of course, is a pseudonym for an item that can be decidedly embarrassing for a male to purchase.

"Aw, sweetheart, I don't think I can buy that!", he cringed. It just wasn't a manly sort of purchase. Going to the store to buy strawberries, marshmallows, and Product X??

I replied, "Well, you know, I saw they have some drinking water safe hoses in the RV department at Wal-Mart. That ought to butch-up your shopping cart quite a bit. Why don't you pick up a couple of those as well?"

And so he did. :)

Monday, June 28, 2010

Woohoo! Dave Ramsey says I'm right!

Hubby Dear and I have been going back and forth a lot on the subject of prepping. Honestly, it has descended into flat-out fights several times. Hubby Dear and I are the kind of couple that usually make people sick because we're so lovey-dovey even after over a decade of marriage, so that is very unusual. It was after one of those fights that I got all steamed up and emailed Dave Ramsey. Little did I know that I would quickly get a reply from Dave's producer, Lara Johnson, and actually talk with the man himself live on national radio.

In case you do not know who Dave Ramsey is, he is THE financial guru. His slogan says it all: "Debt is dumb, cash is king, and the paid-off home mortgage has taken the place of the BMW as the status symbol of choice". We have been following the Baby Steps as set out in his best-selling book, The Total Money Makeover, for over a year. I knew if anyone could solve this problem Hubby Dear and I have, it would be Dave.

When we put our problem before Dave, he was impressed to hear how much debt we had paid off in the last year. Lee told Dave that he didn't want to spend money on prepping until we paid off the remainder of our debt. Dave Ramsey told Lee that it would be fine to set a budget for prepping as long as we stick to it. Dave noted that preparedness obviously must be something important to me since I was willing to call in to a national radio show!

After he stated his opinion on our question, Dave asked me why I felt the need to, in his words, "store up a bunch of food in the basement". I briefly explained my reasons for prepping. Dave said he wasn't worried about ever having trouble feeding his kids, but said what did he know - he stocked up on certain kinds of ammo when Obama came into office.

Overall, I was very satisfied with the call, even though Dave isn't a prepper. Hubby Dear and I are finally on the same page with our budget and I get to spend money on prepping.


* By the way, they said our location as Kansas City. I'm proud that I was quick witted enough to give a phony location. I didn't break OPSEC! ;)

Friday, June 25, 2010

My Preparedness Binder, Parts Two and Three

In case you missed it, the first section of my Preparedness Binder is devoted to Food Storage and Preparedness Stocking Plans. I've collected bits and pieces of the collective wisdom of preppers on the Internet to come up with my own plan to buy food and supplies.

The second section in the binder is entitled "Food Storage Information". In this section I have general information about long term food storage.

-The Seven Major Mistakes in Food Storage

-Recommended Food Storage Shelf Lifes

-Growing and Using Sprouts

-Water Treatment

  • Print offs of information from Food Storage Made Easy - water storage, grains, baking supplies, etc. This includes types of items to store, ideas on how to use them and shelf lifes.
  • A handout from Everyday Food Storage about wheat

I intend to collect more information on how to use the items in our future long term food storage and put them in this section.

The last section of my binder is devoted to emergency and disaster information. The LDS Preparedness Manual was very helpful for this section as well. I included:

  • A Preparedness Test (We failed!)
  • Supply Table/Master Preparedness List
  • Generator Info
  • What to do in the case of biological or chemical agent dispersion
  • Nuclear/Chemical decontamination kit and how-to
  • A Shelter-in-Place diagram (I got this from Ready.gov)
  • Nuclear Disaster and Warfare Info

I have also collected quite a few recipes that use food storage items. I plan to put together a binder for food storage recipes soon.

Speaking of food storage recipes, I have finally completed our three month food supply. Well, not the food itself, but the shopping list of what we need to have three months worth of shelf-stable food. I'll have to post our menu sometime. The Excel file from Food Storage Made Easy was essential and really made things so much easier.

It is a bit intimidating to realize just how much food and other items we need to store. 45 cans of Chicken Noodle Soup, 75 large cans of fruit and eight cases of toilet paper are among the highlights of the list. (Yes, we use a lot of toilet paper. It's pretty ridiculous.) I'll just keep chipping away at it and get there eventually.

Thursday, June 24, 2010

The Marriage Ref - Dave Ramsey!

Well, Hubby Dear and I still aren't seeing eye to eye on spending money on prepping. So I called in the big gun - Dave Ramsey! I'll be speaking to Dave on his radio show around 1 pm central time on Monday. We'll see whose side of the argument Dave falls on!

Wednesday, June 16, 2010

My Preparedness Binder

I thought I would share more details and links from my preparedness binder. I have spent a couple of months compiling resources from all over the Web and you might find them to be helpful, too.

Today I'll go through the Food Storage/Preparedness Stocking Plans section. It contains lists and information about what to have on hand and various purchasing plans:

  • A list of our frequently eaten meals and their ingredients. I also listed all of the non-food items we use - hygiene items, cleaning and paper products, etc. I used the Excel file from Food Storage Made Easy to develop an inventory and shopping list for our three month food supply.
  • I also downloaded the Excel file from Food Storage Made Easy for long-term storage. I haven't gotten very far at all on long-term storage (I have fulfilled only our baking soda and salad dressing quotas!), but at least I know what I'm shooting for.
  • If you don't have Excel, you can go to About.com and find the same long-term storage calculator. These suggestions are based upon the LDS (Mormon) church's recommendations for food storage.
  • The three month supply list from http://www.everydayfoodstorage.net/
  • My Prepping Plan, month by month. These are the items I am going to purchase and the actions we'll take.
  • Another LDS resource, The LDS Preparedness Manual, has a TON of information. I printed off the pages having to do with food storage lists and a monthly food storage purchasing calendar for this section of my binder. We're not Mormon, but since the LDS church preaches preparedness, they have lots of resources that are useful for anyone wanting to develop their food storage.
  • Print-outs of the Babysteps Checklists from Food Storage Made Easy. You can sign up for free bi-weekly emails that will guide you through developing your food storage over the course of a year.
  • A copy of a handout by Wendy DeWitt. She has developed an easy system of food storage with recipes that use a solar oven. An excellent resource! You really get a good idea of how you could use your long-term food storage if the SHTF. There are also videos of her presentations on YouTube that fully explains her system.
I will go through the other two sections of my binder sometime soon.

Month Two Preps

Now that my Month One Preps are mostly complete (our van emergency kit is a glaring omission, I will admit), it's time to think about Month Two.

Month Two Preps:
  1. Get $20 in small bills to add to BOBs.
  2. Continue to build our three month supply of food and other essentials.
  3. Reorganize our storage room. Clear out junk, donate unnecessary items and consolidate to make room for food and water storage.
  4. Buy Iosat tablets for the whole family.
  5. Buy items necessary to store 2 weeks worth of water for our family - barrels, siphon, water conditioner, etc.
  6. Fill water containers. Store appropriately in our cleared out storage room.

Month One Preps, Part Four: Three Month Supply of Food

In my last few posts I have tried to illustrate what I've accomplished during my first month of prepping. It doesn't feel like I've done very much because I see all of the shortcomings of my plans and I know how far I have yet to go. Plus there's the whole issue of my desire to spend money on preparedness vs. Hubby Dear's gazelle-intensity to pay off his vehicle. I'll wear him down yet, LOL!

The last item I have to discuss from my month one preps list is a three month supply of food. Basically, this is normal, everyday food, not designed for long-term storage. What do you eat regularly? You should store three months' worth of that food.

Some people include frozen foods in their three month supply. I'm kind of ambivalent about that. If I'm storing food for a minor emergency - job loss, quarantine, etc. - that is fine. But if the power goes out, a three months' supply of fresh or frozen food will quickly spoil.

In addition to food, it is recommended that you store up at least three months of non-food supplies. These are items like toilet paper, diapers and cleaning supplies. I have decided to go above and beyond these recommendations and build a year's supply of non-food items. The only exception to this is diapers. With two children in diapers, a year's supply would be HUGE. I could definitely get better about storing diapers and formula, though.

The best explanation of how to store three months of food is from the ladies at Food Storage Made Easy. You can read about it here. They have a wonderful Excel spreadsheet that helps you calculate just how much you need of any one item. It is also available as a print-out if you do not have Excel.

Another helpful resource is this Three Month Supply List from http://www.everydayfoodstorage.net/

Obviously I'm not going to be able to build up an entire three month's supply in one fell swoop. I am buying a few extra items each time I go to the store, however, and they will build up. I'm having a kind of hard time with this. We do not eat a lot of canned food besides beans and tomato products. My children are so used to eating only fresh or frozen vegetables that they refuse to eat canned veggies of any kind - even home canned green beans. It's taking some extra thought on my part to plan three months of shelf-stable meals we'll all enjoy.

And then there is the problem of where to store it all. But I'll tackle that in a future month.

Month One Summary:

1. Get Hubby Dear to back-up the computer
Status - Still need to do this.
2. Create emergency kits for both vehicles
Status - Hubby Dear's vehicle is complete. I need to figure out how to fit it
all in my van.
3. Make Bug Out Bags for our family
Status - Complete
4. Buy a large box of N-95 Masks
Status - Complete
5. Buy a crank flashlight/cell phone charger
Status - Complete
6. Create Emergency Binder and Preparedness Binder
Status - Complete, though I continue to find and print off useful articles for
my preparedness binder
7. Stock up on 3 Month Food Supply items
Status - In progress
8. Start saving cash and add to Bug Out Bags
Status - In progress. I've got a measely total of $34 at the moment and will
continue to add to it each month.

Tuesday, June 8, 2010

Month One Preps, Part Three: Bug Out Bags

I thought for a long time about the best way to assemble Bug Out Bags. Some lists you'll find out on the Internet are very much military inspired and list every component down to the type of heat you should be packing. I definitely will be investigating firearms at some point, but my inherent clumsiness and complete lack of experience precludes me from including them at this point.

I decided the easiest thing to do would be to order a prepackaged emergency kit and personalize it. My large order from Emergency Essentials (which also included the items for our Vehicle Emergency Kits) weighed over 70 pounds!


The emergency kit I ordered was their "Trekker IV", a mid-priced emergency kit for four people. Since we have six people in our family, I then ordered additional items such as rations, water, ponchos, etc. for another two people. I don't think that Baby Dear will be eating emergency rations for a while, but I wanted to have them on hand now rather than forget about it for the future.

The kit includes two backpacks and you arrange the items in them as you desire. It really does include many items and covers the vast majority of the ones you will find on Bug Out Bag checklists.

The only weakness I really found was the multipurpose tool in the kit. I found it to be pretty flimsy in comparison to one we already have kicking around the house. I wouldn't want to have to depend on that tool for my survival. I'm planning on upgrading that at some point in the future.

One of the items I added to the kit was this flashlight/cell phone charger. If you crank it for 1 minute, the flashlight will work for 30 minutes. The cell phone charger could be really handy since our cell phones tend to run out of juice right when we need them.


These are the emergency food rations the Trekker IV kit contains. Some of the more pricey kits Emergency Essential sells include MREs. That is something I may buy down the road, but for now these rations will do. They will keep us alive anyway. My oldest two children are begging to try them out.


I bought a box of 20 N-95 masks. These are good for preventing dust inhalation or infectious disease transmission. Hubby Dear is in the health care field and told me that if you have facial hair, it is nearly impossible to get a N-95 mask to fit correctly, which is something to remember. During the Swine Flu epidemic, he was unable to wear one over his beard at work. Nonetheless, these are important to have on hand.


The final addition to our BOB was my emergency binder, which I explained in this post. It contains all the information we would want to have on hand if we hand to evacuate in a hurry - family phone numbers, insurance information, etc.

The two backpacks that make up our primarily emergency kits are very heavy. None of our children could possibly carry them and they would wear me out in a hurry. I guess I had better start lifting weights!

I made another backpack that contains diapers for Sweetie Pie and Baby Dear as well as formula. That backpack could be carried by either of our two oldest children. There are two other backpacks that contain changes of clothing and shoes for our entire family.

Finally, I am building up a store of cash to carry in the BOBs. I've started our stash with the $30 we were paid for being a Nielsen family. Each month I intend to add to the cash using small denominations only. Right now I'm planning on putting about $200 in the BOBs and storing additional cash our safe. Eventually I'd like to have around $1,000 in cash stored at home. We already have a substantial emergency fund in the bank, but if SHTF that may not be accessible.

So that's our Bug Out Bags.

Month One Preps, Part Two: Vehicle Emergency Kits

Having survival supplies in your vehicle is important. Hubby Dear works long hours at work and would likely be away from home should an emergency occur. I am home with our four offspring most of the time, but with my luck I'd be at a ballgame or at the local megamart when SHTF.

I bought a few items from Emergency Essentials to throw in the back of Hubby Dear's vehicle. They should enable him to make it home on foot or survive in his car for a while. 99% of the time he is alone in his car, so I only included enough supplies for one person.


Contained an a plastic tub:

  1. Aqua Literz - Enough water for one person for one day. I have read reports that bottled water isn't safe to store in hot vehicles, but this boxed water should be OK.
  2. Premier Bottled Emergency Kit - Packed in a water bottle, it contains many different survival items including a poncho, water purification tablets, first aid kit, etc.

  3. Emergency Road Side Kit - Jumper cables, tools, etc. My one complaint about this product is that the plastic container it is housed in is pretty flimsy.
  4. Tri-fold shovel - A shovel could be handy in an emergency. There were times this past winter that Hubby Dear really could have used one.
  5. Some Millennium bars - 400 kcal each, these food bars last up to 5 years and can stand the heat of a vehicle during summer.

I also want to make a more extensive emergency kit for our family mini-van. I went ahead and bought a shovel and Emergency Roadside Kit. The problem I'm encountering is that our family fills up our vehicle already. Add in a typical load of groceries and I simply don't have room for an emergency kit. I'd like to store items under the seats, but nothing will fit underneath there. I'm still thinking of the solution to this problem and welcome ideas.